Open Appointments and start a new booking
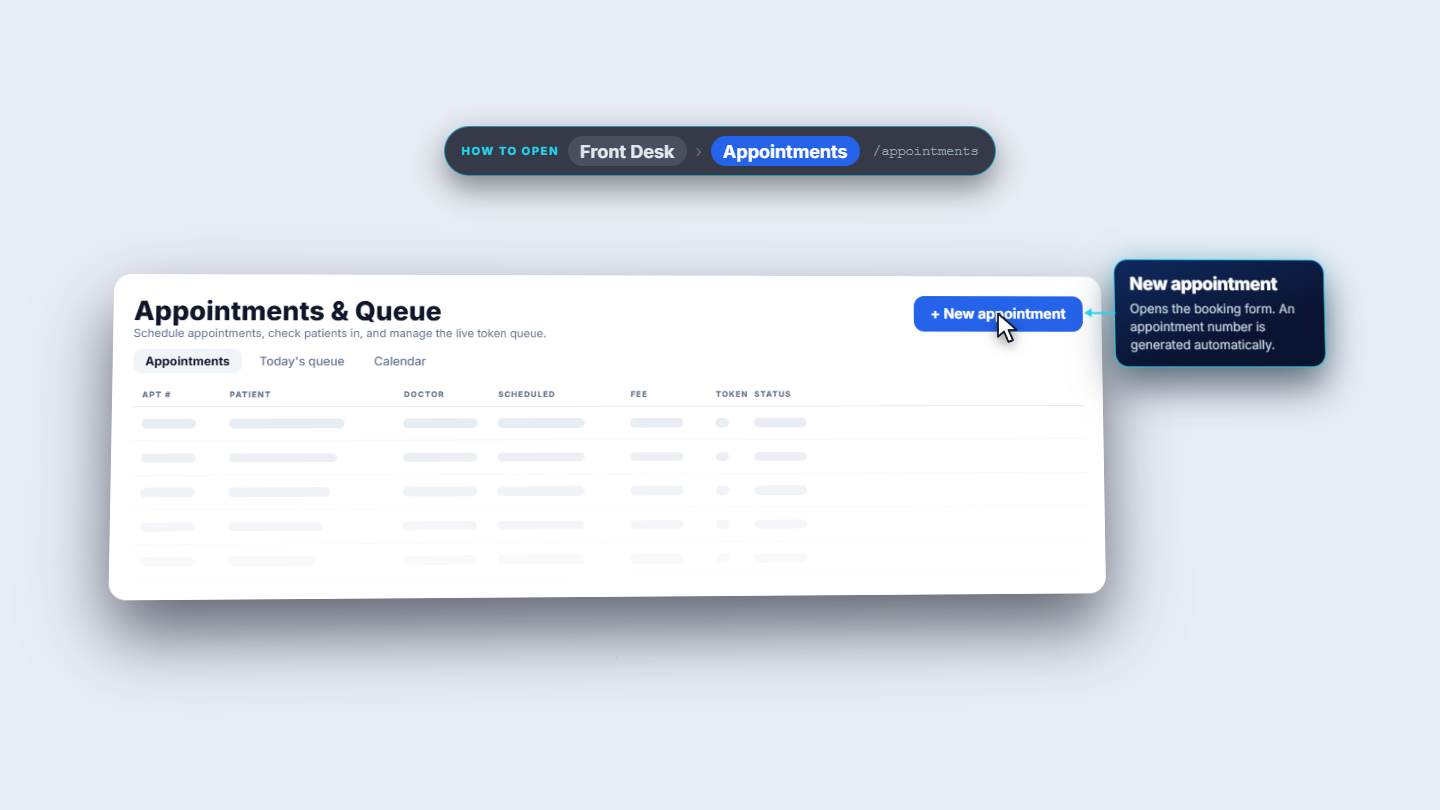
Click Front Desk › Appointments (/appointments) and then + New appointment. The form says an appointment number is generated automatically.
Most patients come to the clinic. This guide shows how to find the patient with their MR card, book the visit with the right doctor and time, and take the fee when the patient pays.
Click Front Desk › Appointments (/appointments) and then + New appointment. The form says an appointment number is generated automatically.
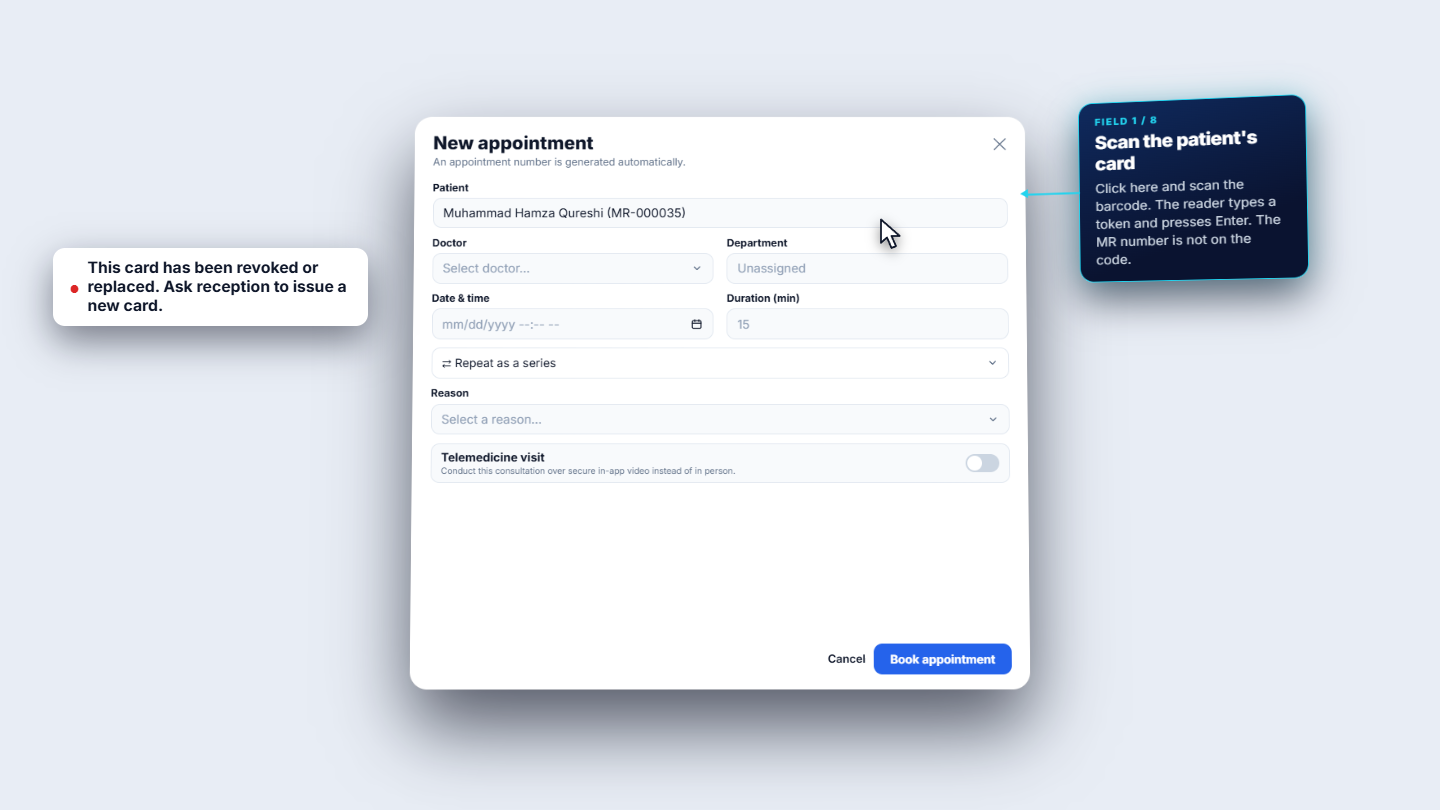
Click in the Patient box and scan the MR card. The reader types a token and presses Enter, and the patient fills in (Muhammad Hamza Qureshi, MR-000035). The token is not the MR number.
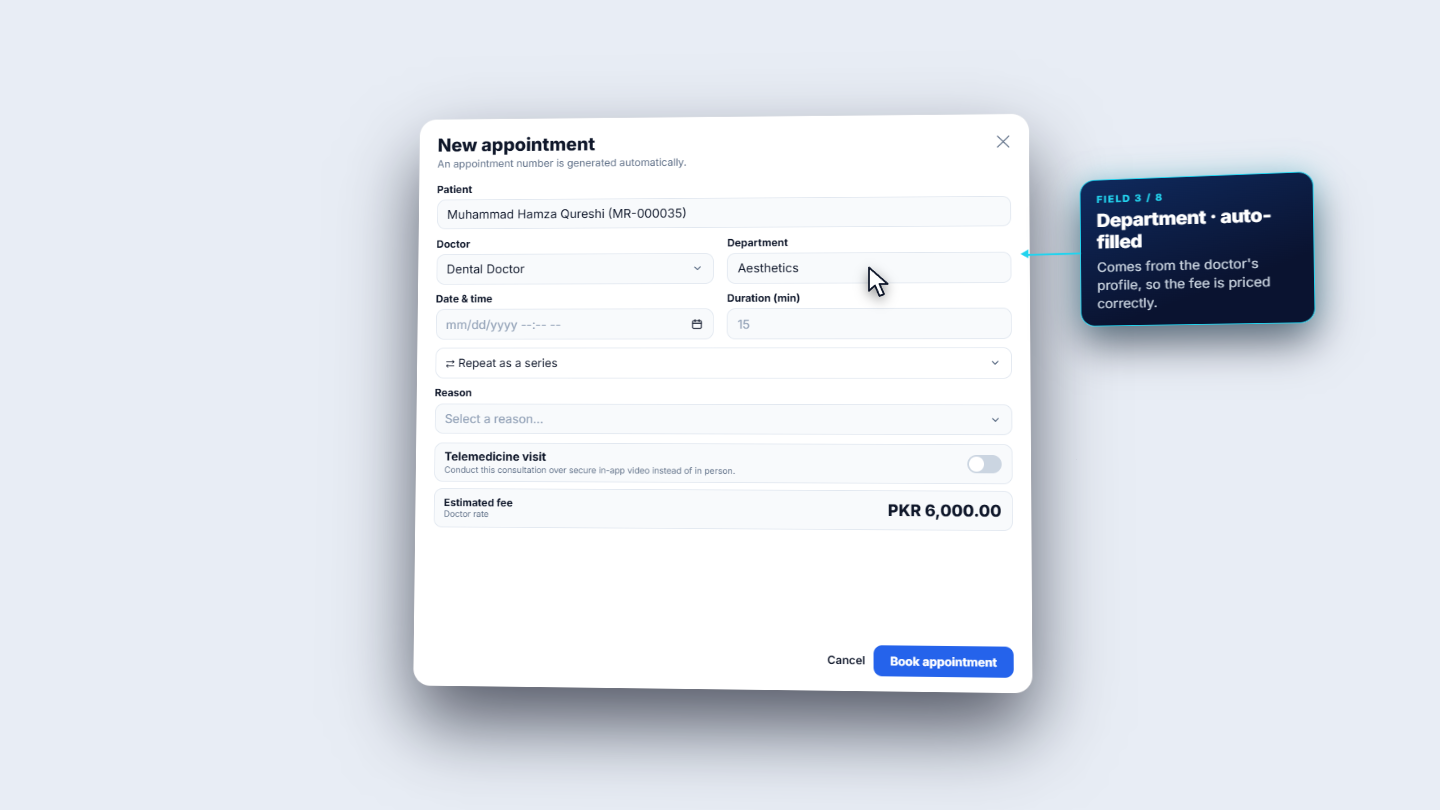
Choose the Doctor (Dental Doctor). The Department fills in automatically (Aesthetics) and the Estimated fee shows PKR 6,000.00.
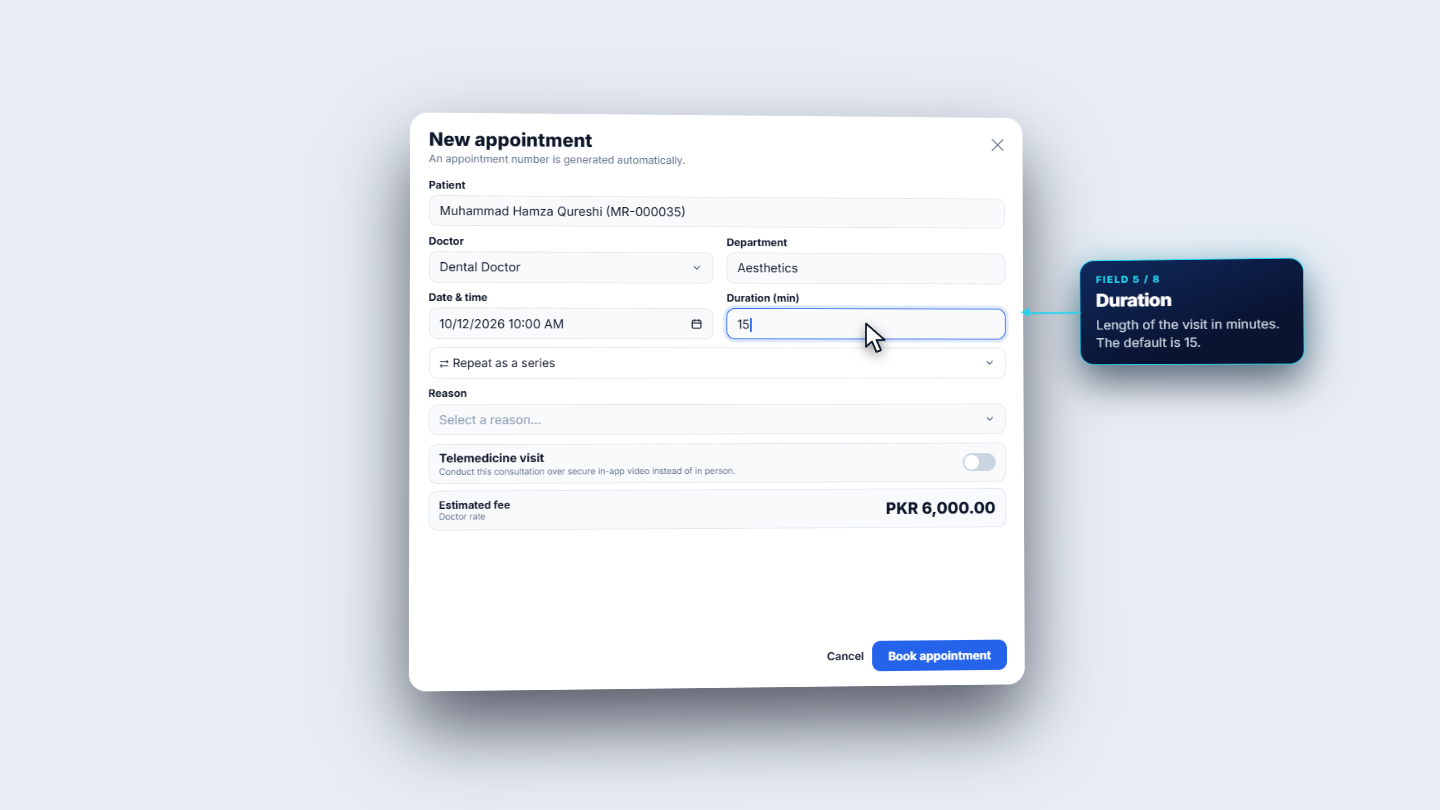
Choose Date & time (10/12/2026 10:00 AM). Duration (min) is 15 by default. Repeat as a series is optional and stays closed for one visit.
In Reason choose Consultation. The Scheduling check says No conflicts: this slot is free and within working hours.
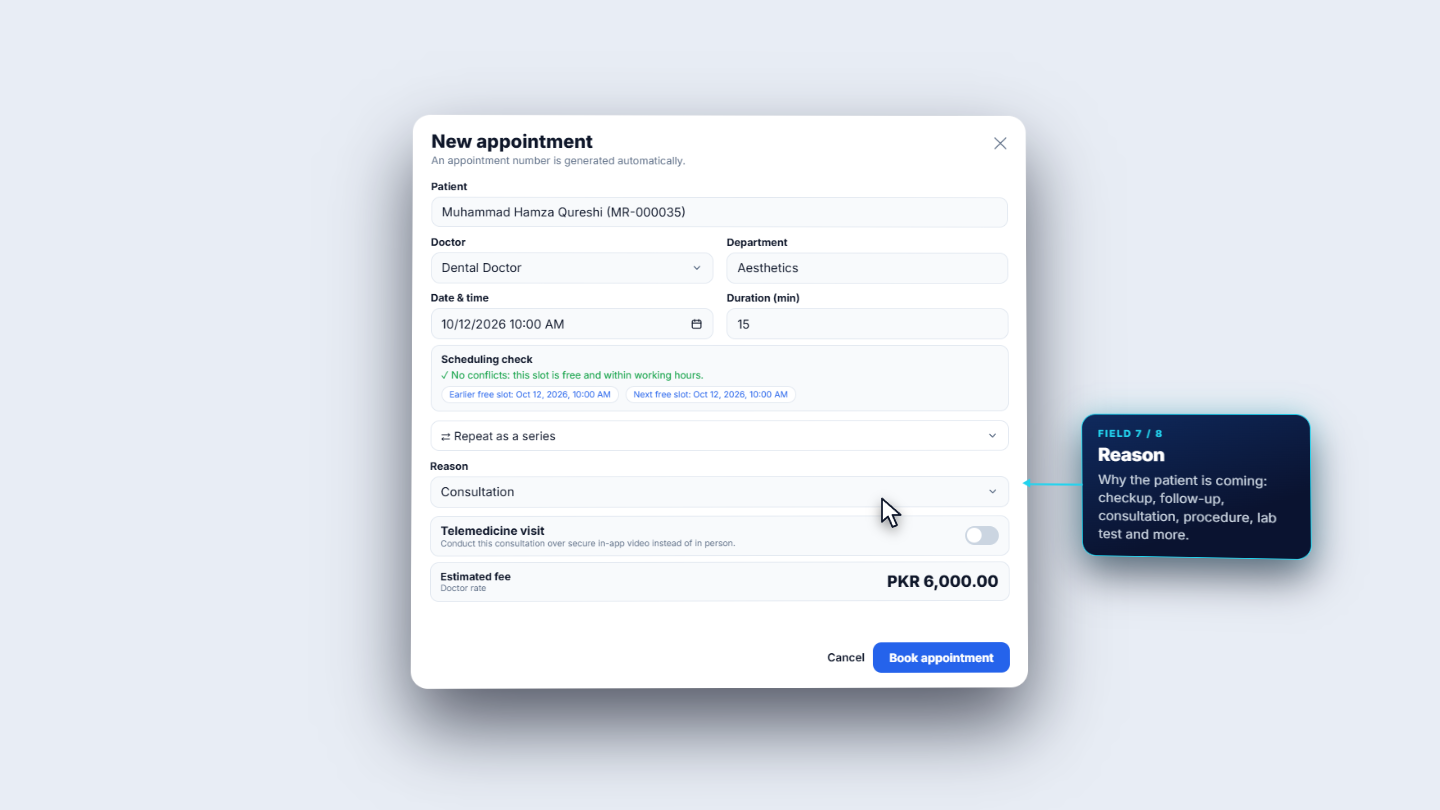
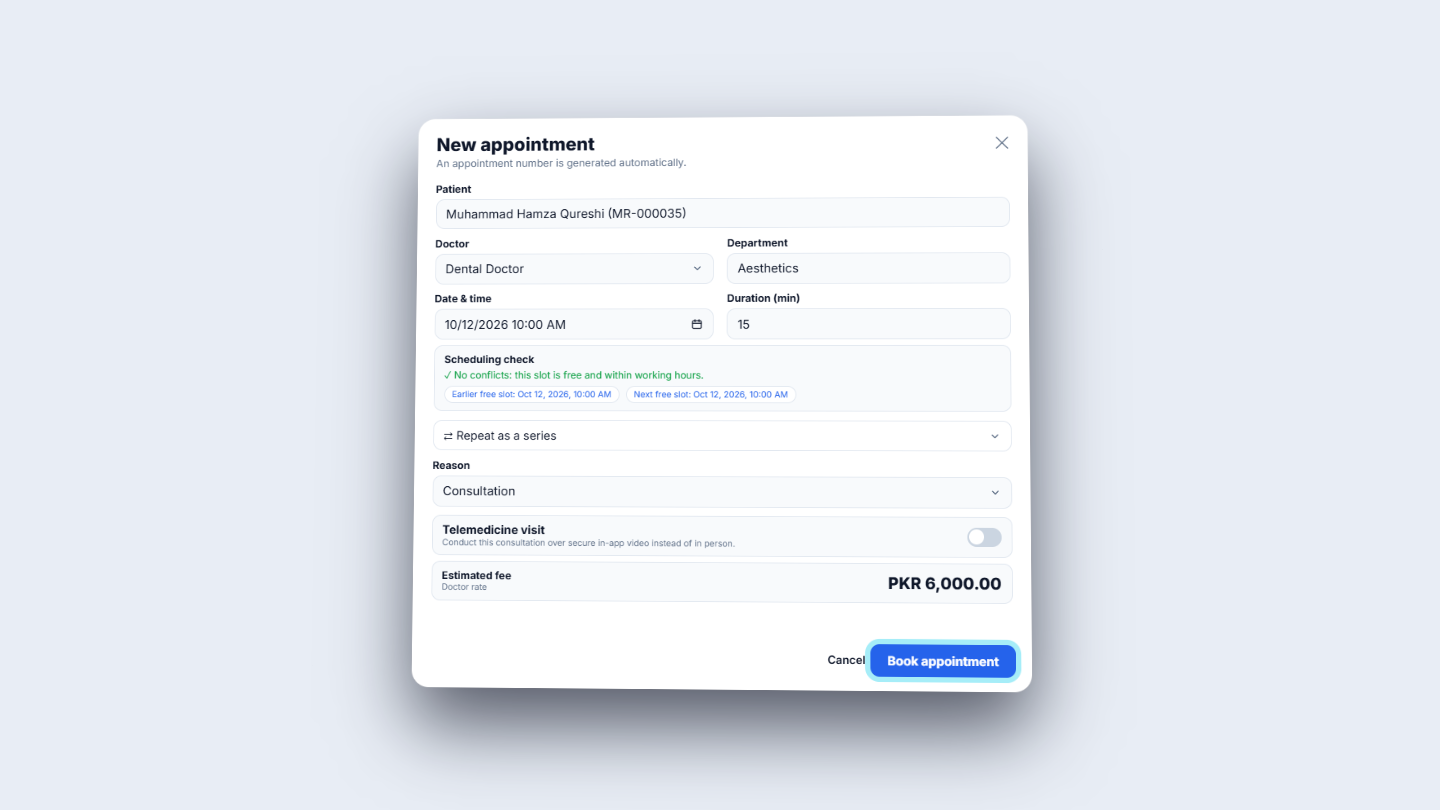
Leave Telemedicine visit off for an in-person visit. Press Book appointment.
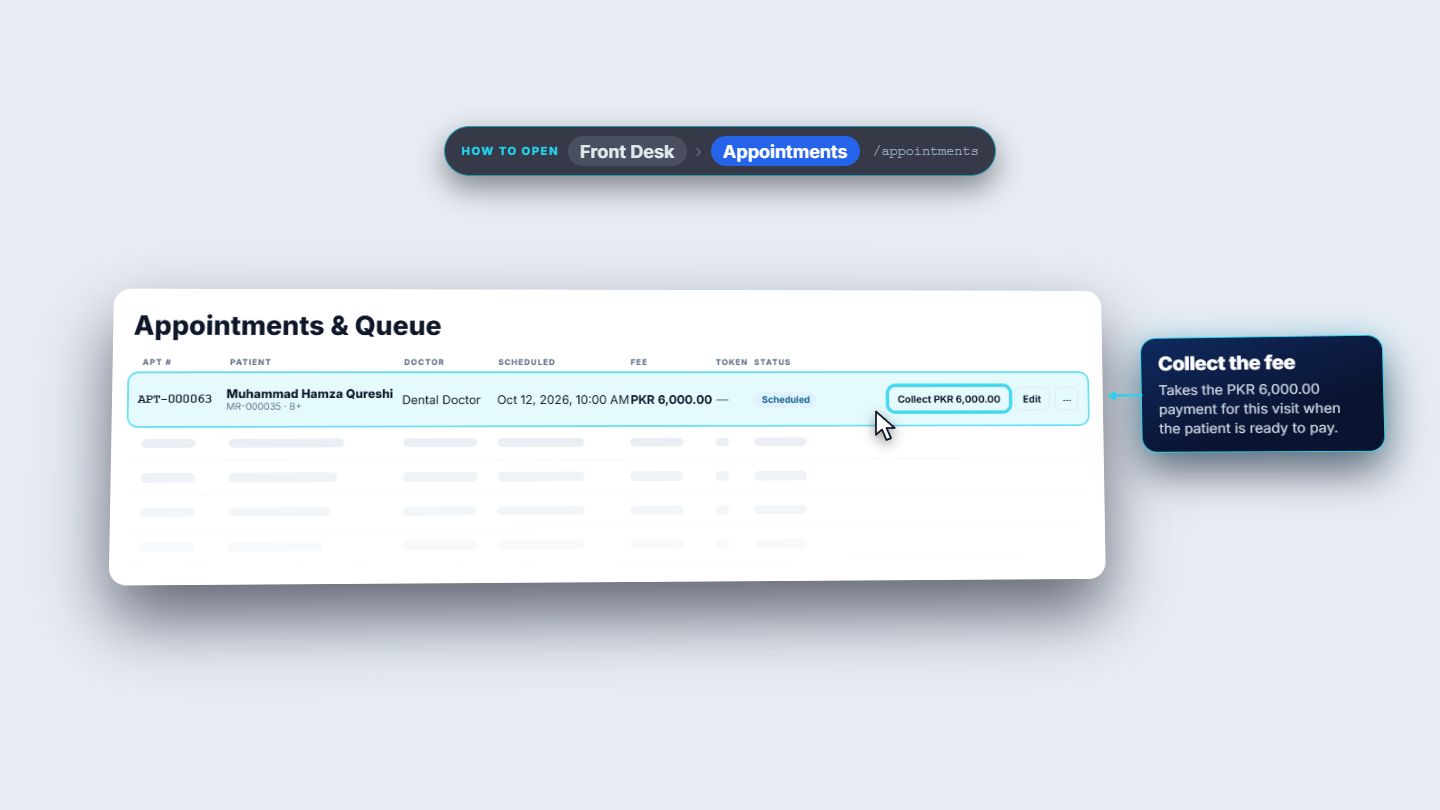
The appointment is booked, and the number is generated: APT-000063, Muhammad Hamza Qureshi, Oct 12, 2026, 10:00 AM, status Scheduled. When the patient pays, press Collect PKR 6,000.00 (see HMS-S09). The row also has Edit and a More menu with No show and Cancel.
| Mistake | What you see | Fix |
|---|---|---|
| Scanning a revoked card | This card has been revoked or replaced. Ask reception to issue a new card. | Re-issue the card and scan the new one |
| Leaving Telemedicine on for a walk-in visit | A video visit is booked | Edit the appointment and turn it off |
| Booking a clashing time | The Scheduling check warns | Choose a free slot |
| Item | Meaning |
|---|---|
| Scan | A token from the MR card finds the patient; it is not the MR number |
| Estimated fee | Priced from the doctor's rate |
| Collect | Takes the visit fee from the appointment row |
| More | Holds No show and Cancel |
How do I find the patient when booking an appointment? Click in the Patient box and scan the patient's MR card. The reader types a token and presses Enter, and the patient fills in. The token is not the MR number.
Where does the department and the estimated fee come from? Choose the Doctor and the Department fills in automatically. The Estimated fee is priced from the doctor's rate.
What happens if the time I choose clashes with another booking? The Scheduling check warns you. Choose a free slot instead; a clear slot shows No conflicts: this slot is free and within working hours.
How do I mark a no-show or cancel an appointment? Use the More menu on the appointment row, which holds No show and Cancel. The row also has Collect to take the fee and Edit.
GridX HMS runs this whole workflow. See what GridX HMS does and what it costs, or browse all step-by-step guides.