How to let patients book from your website, and confirm the requests
The Online Booking Widget lets patients request an appointment from your own website. This guide shows how to set it up, what the patient sees, and how front-desk staff confirm the request so it becomes a normal appointment.
Who it is forHospital administrator and front-desk receptionistTime12 minutesProductHMSLevelIntermediate
Before you start
Steps
1
Turn it on, name the link and list your website
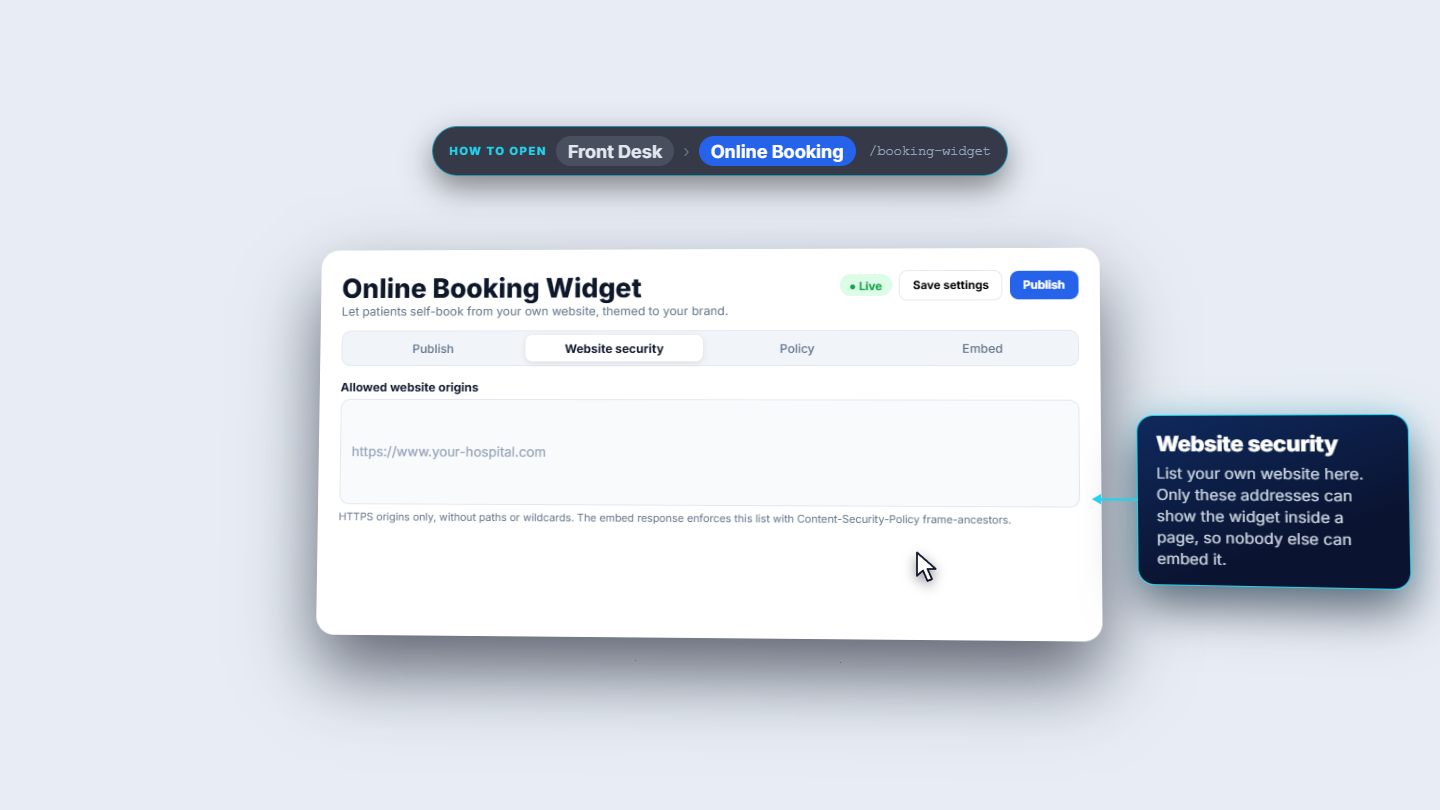
Open Front Desk › Online Booking. The page shows a Live badge and the buttons Save settings and Publish, above four tabs: Publish, Website security, Policy and Embed. Turn on Accept online bookings and choose your public link (here /book/demo-hospital). On Website security list your own website under Allowed website origins.
Online Booking Widget, Website security tab with Allowed website origins
2
Choose departments, doctors and time rules
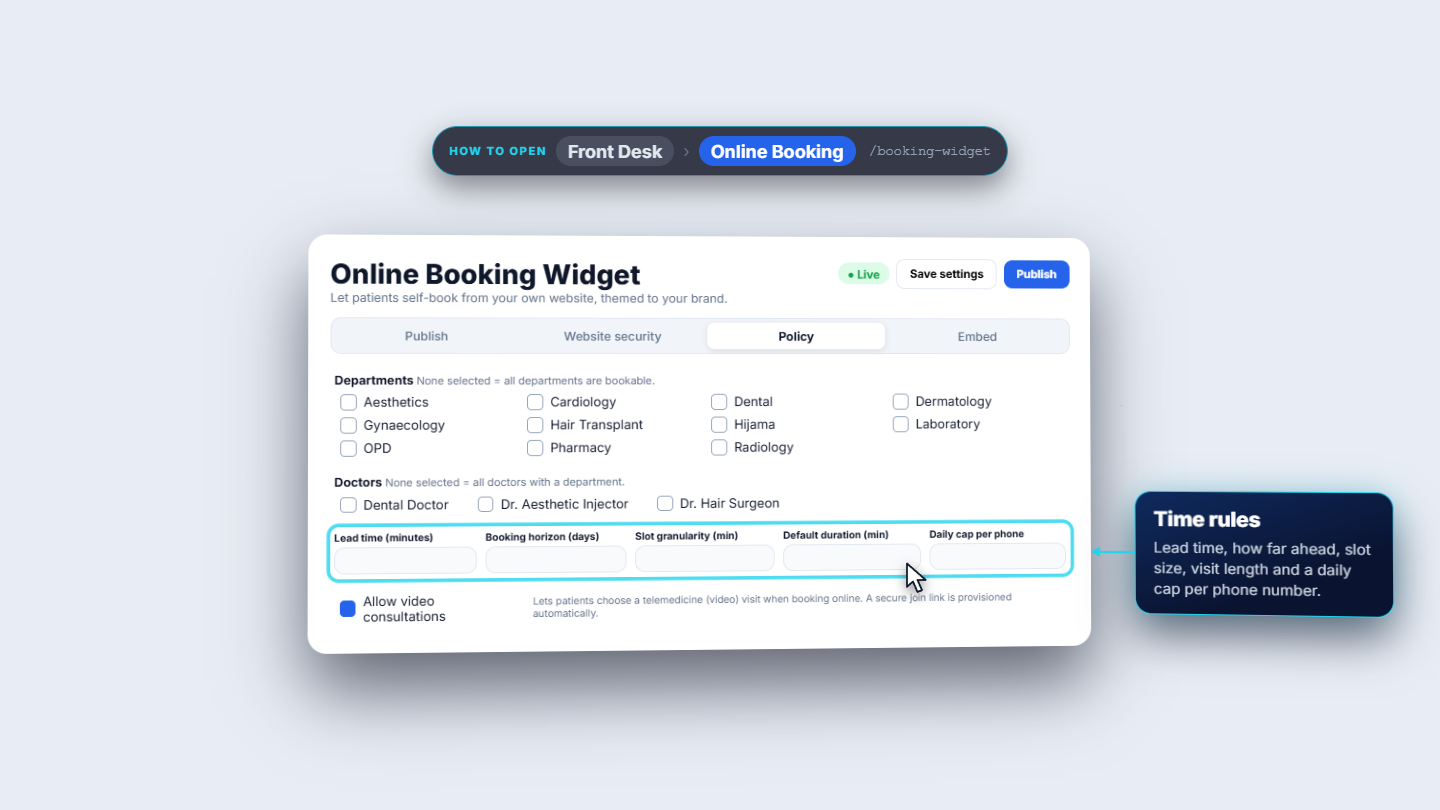
Open Policy. Tick the Departments and Doctors patients may book; none selected means all departments (and all doctors with a department) are bookable. Fill the time rules: Lead time (minutes), Booking horizon (days), Slot granularity (min), Default duration (min) and Daily cap per phone. Tick Allow video consultations if patients may choose a video visit; a secure join link is provisioned automatically.
Policy tab with departments, doctors, time rules and Allow video consultations
3
Add the widget to your website
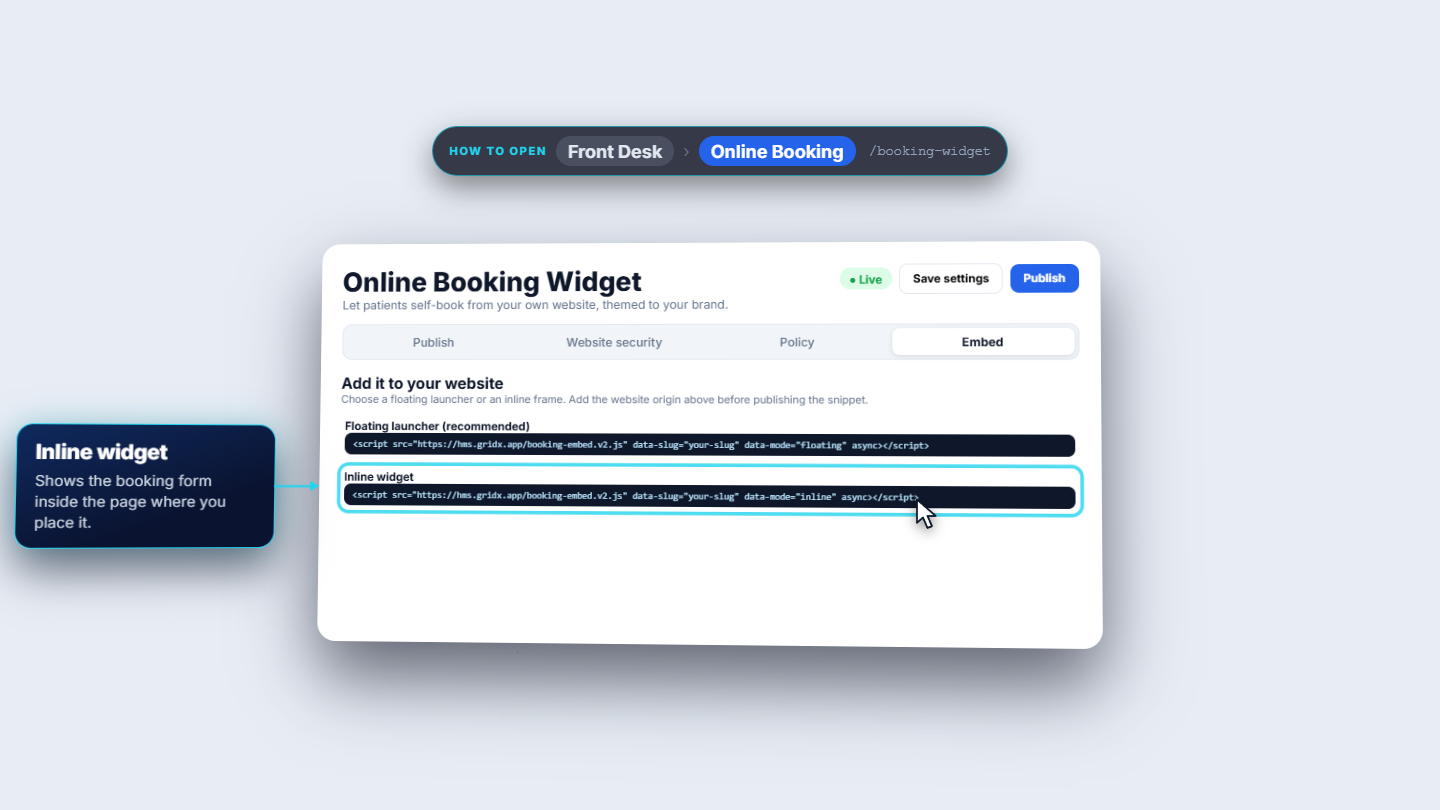
Open Embed and choose how patients reach the form: a Floating launcher (recommended), an Inline widget inside a page, an iframe, or a plain link. Copy the snippet and paste it into your website. Add the website origin (Step 1) before publishing the snippet. Press Publish.
Embed tab with the Floating launcher and Inline widget snippets
4
What the patient does first: pick a department
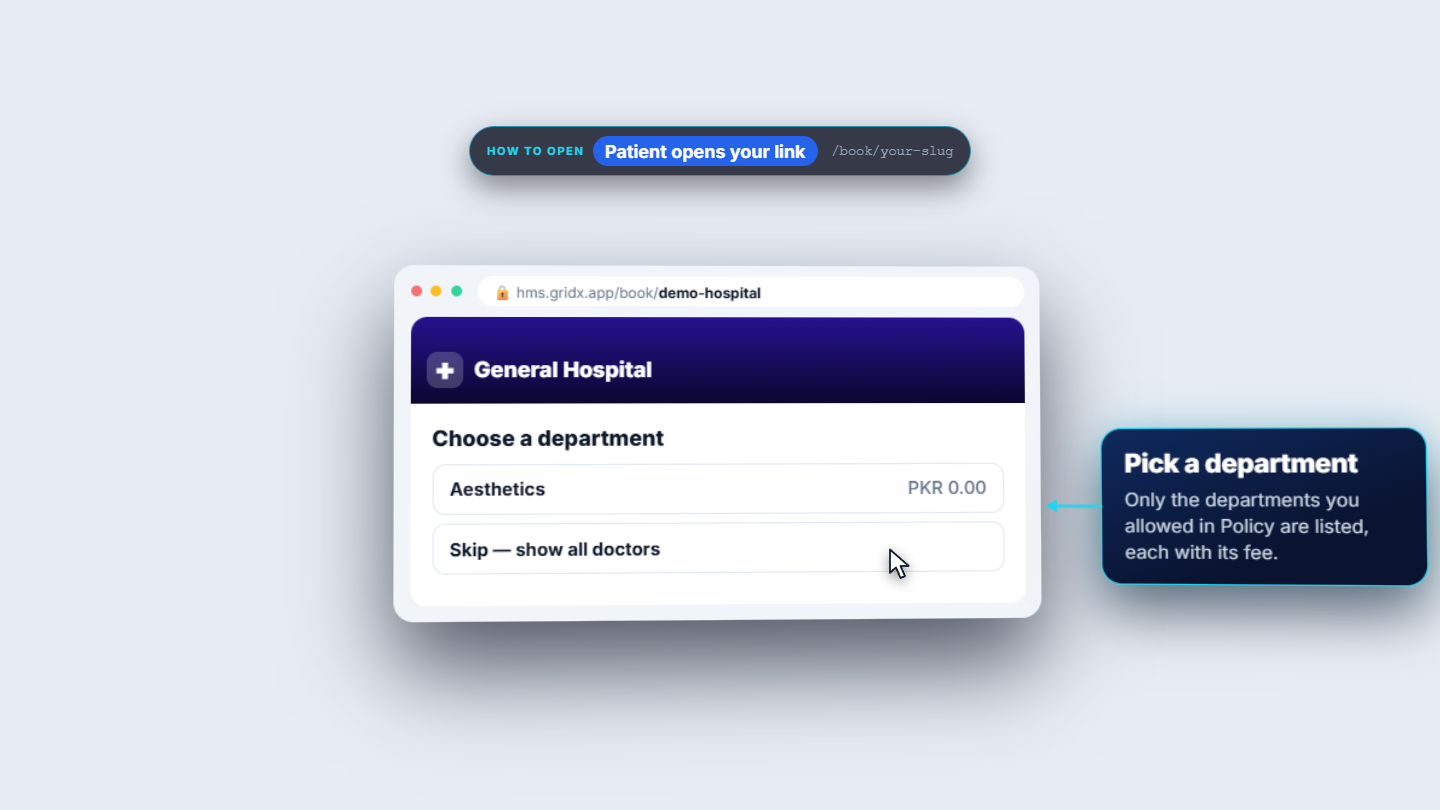
The patient opens your link and sees the hospital name and Choose a department. Only the departments you allowed in Policy are listed, each with its fee. Skip — show all doctors goes straight to the doctors. They then choose a doctor; one tap moves on.
Public booking page asking the patient to Choose a department
5
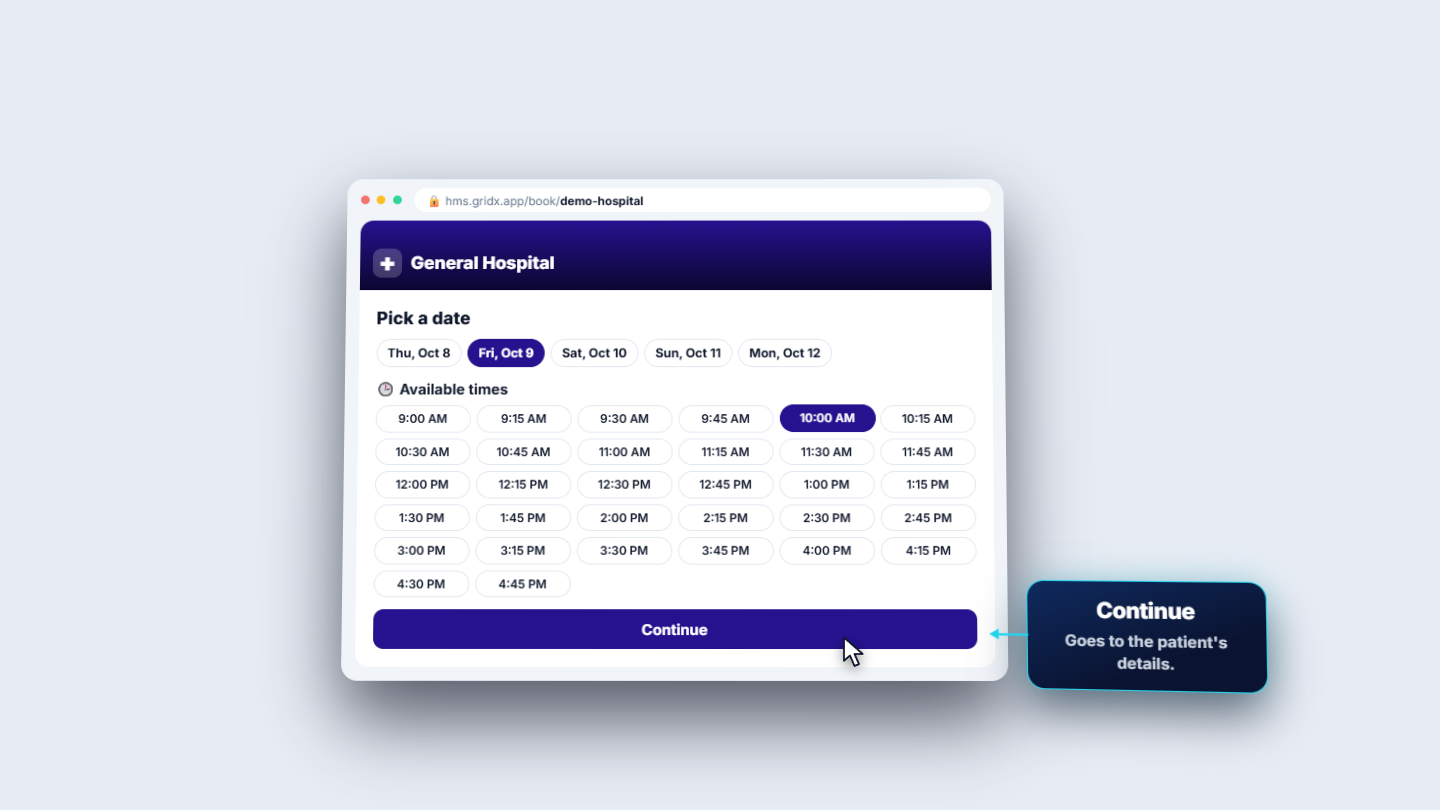
The patient picks a date and a free time
The patient chooses a date (here Fri, Oct 9) and a free time under Available times (10:00 AM), then presses Continue.
Pick a date with Available times and the Continue button
6
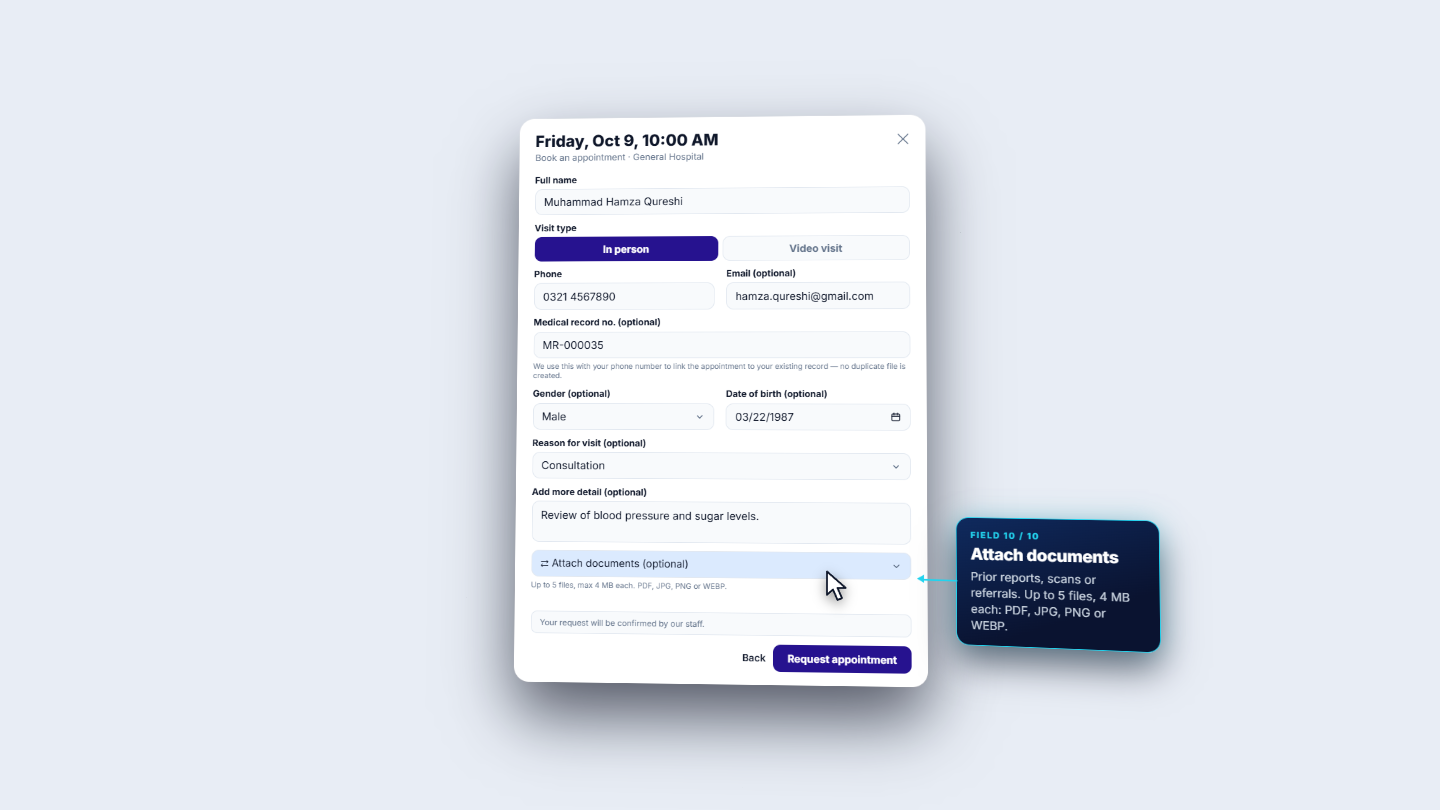
The patient fills in their details
The form asks for Full name, Visit type (In person or Video visit) and Phone. Email, Medical record no., Gender, Date of birth, Reason for visit, Add more detail and Attach documents are optional. A returning patient types the MR number (MR-000035): it is used with the phone number to link the booking to the existing record, so no duplicate file is created. Documents: up to 5 files, 4 MB each, PDF, JPG, PNG or WEBP. The patient presses Request appointment.
Details form for Muhammad Hamza Qureshi with MR-000035
7
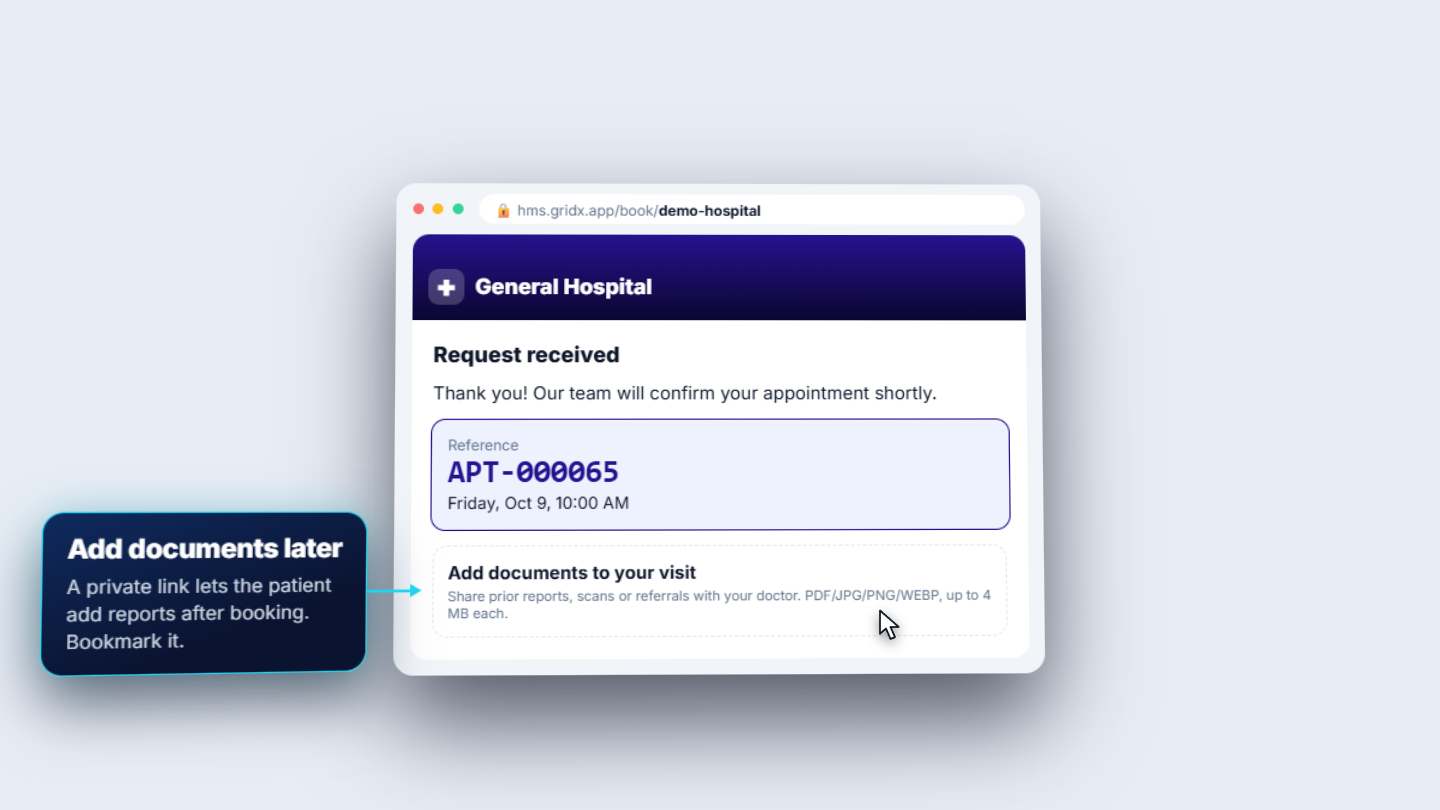
The patient gets a reference number
The page says Request received and shows a Reference (APT-000065, Friday, Oct 9, 10:00 AM). A private Add documents to your visit link lets the patient add reports after booking.
Request received with Reference APT-000065 and Add documents to your visit
8
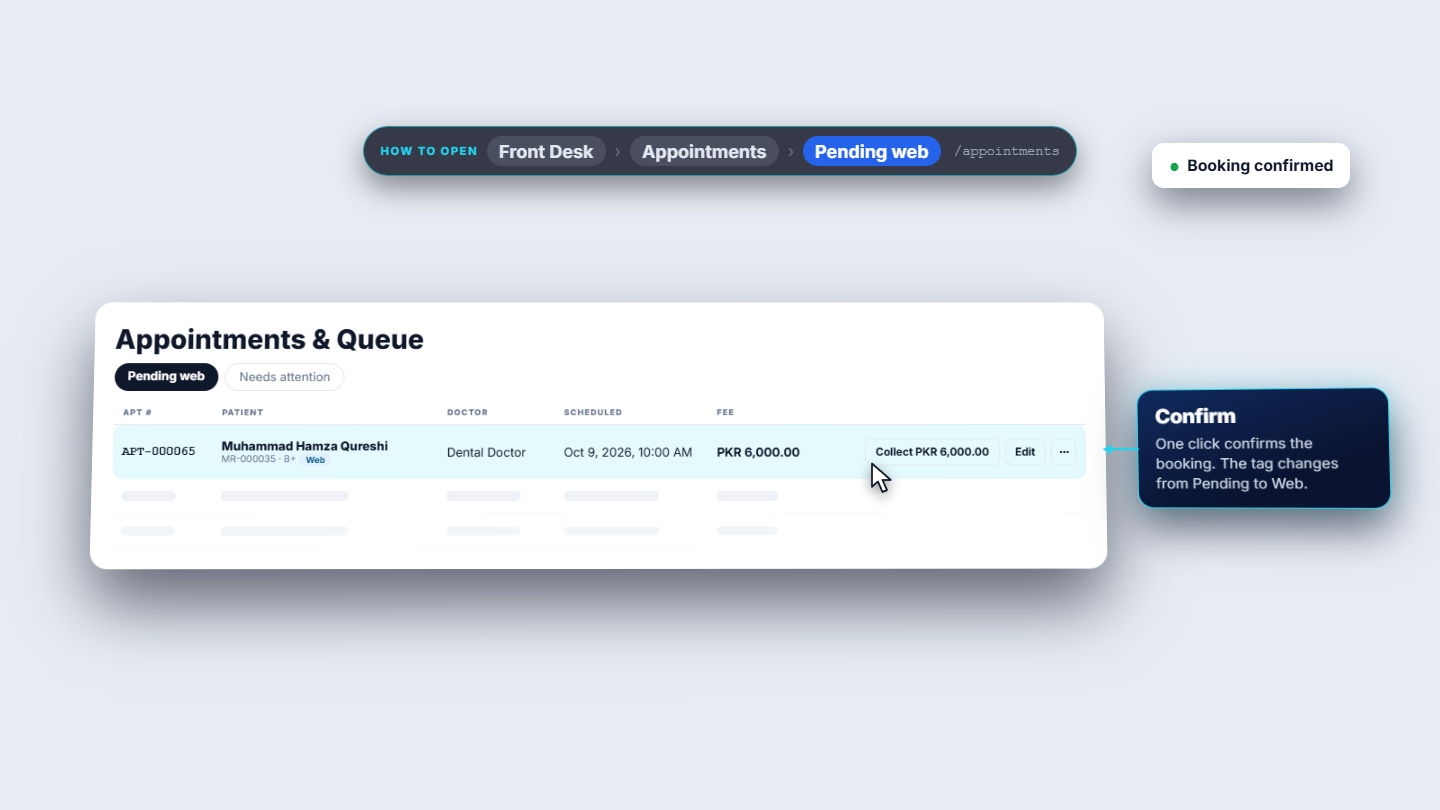
Staff confirm the request
On Front Desk › Appointments open Pending web. The request appears linked to the same record: APT-000065, Muhammad Hamza Qureshi, Dental Doctor, Oct 9, 2026, 10:00 AM. Click Confirm: Booking confirmed. It is now a normal appointment.
Pending web list with APT-000065 and the Booking confirmed toast
Check it worked
The patient saw Request received with a reference number.
The same number appears in Pending web, and after Confirm the tag changes from Pending to Web.
The confirmed appointment is a normal appointment on the doctor's list.
Common mistakes
Mistake
What you see
Fix
Website not listed under Allowed website origins
The widget cannot be embedded on that site
Add the https address in Website security
No departments or doctors ticked
All departments are bookable
Tick only the ones patients may book
Forgetting to confirm
The request stays in Pending web
Press Confirm
Returning patient leaves MR number out
The booking may not link to the existing record
Ask for the MR number and phone together
Quick reference
Item
Meaning
Accept online bookings
Master switch for the public booking page
Allowed website origins
The websites that may embed the widget
Lead time / Booking horizon
How soon and how far ahead patients can book
Daily cap per phone
Limit on bookings per phone number per day
Pending web
Staff queue of online requests
Frequently asked questions
Why must I list my website under Allowed website origins? Only the addresses on that list may show the widget inside a page, so nobody else can embed your booking form. Use https addresses only, without paths or wildcards.
Is an online request already an appointment? No. Until staff press Confirm in Pending web, it is only a request. After Confirm it becomes a normal appointment on the doctor's list.
How can patients reach the booking form? Open Embed and choose a Floating launcher (recommended), an Inline widget inside a page, an iframe, or a plain link. Copy the snippet into your website and press Publish.
How does a returning patient avoid a duplicate record? The patient types the MR number with the phone number. Together they link the booking to the existing record, so no duplicate file is created.