How to manage classrooms and labs and read a room's schedule
Lectures need a place. This guide shows how to keep the register of classrooms, labs and other spaces, and how to see when a room is in use before you promise it to someone else.
Who it is forSchool administrator or timetable coordinatorTime10 minutesProductSCMLevelBeginner
Before you start
Steps
1
Open Room Management
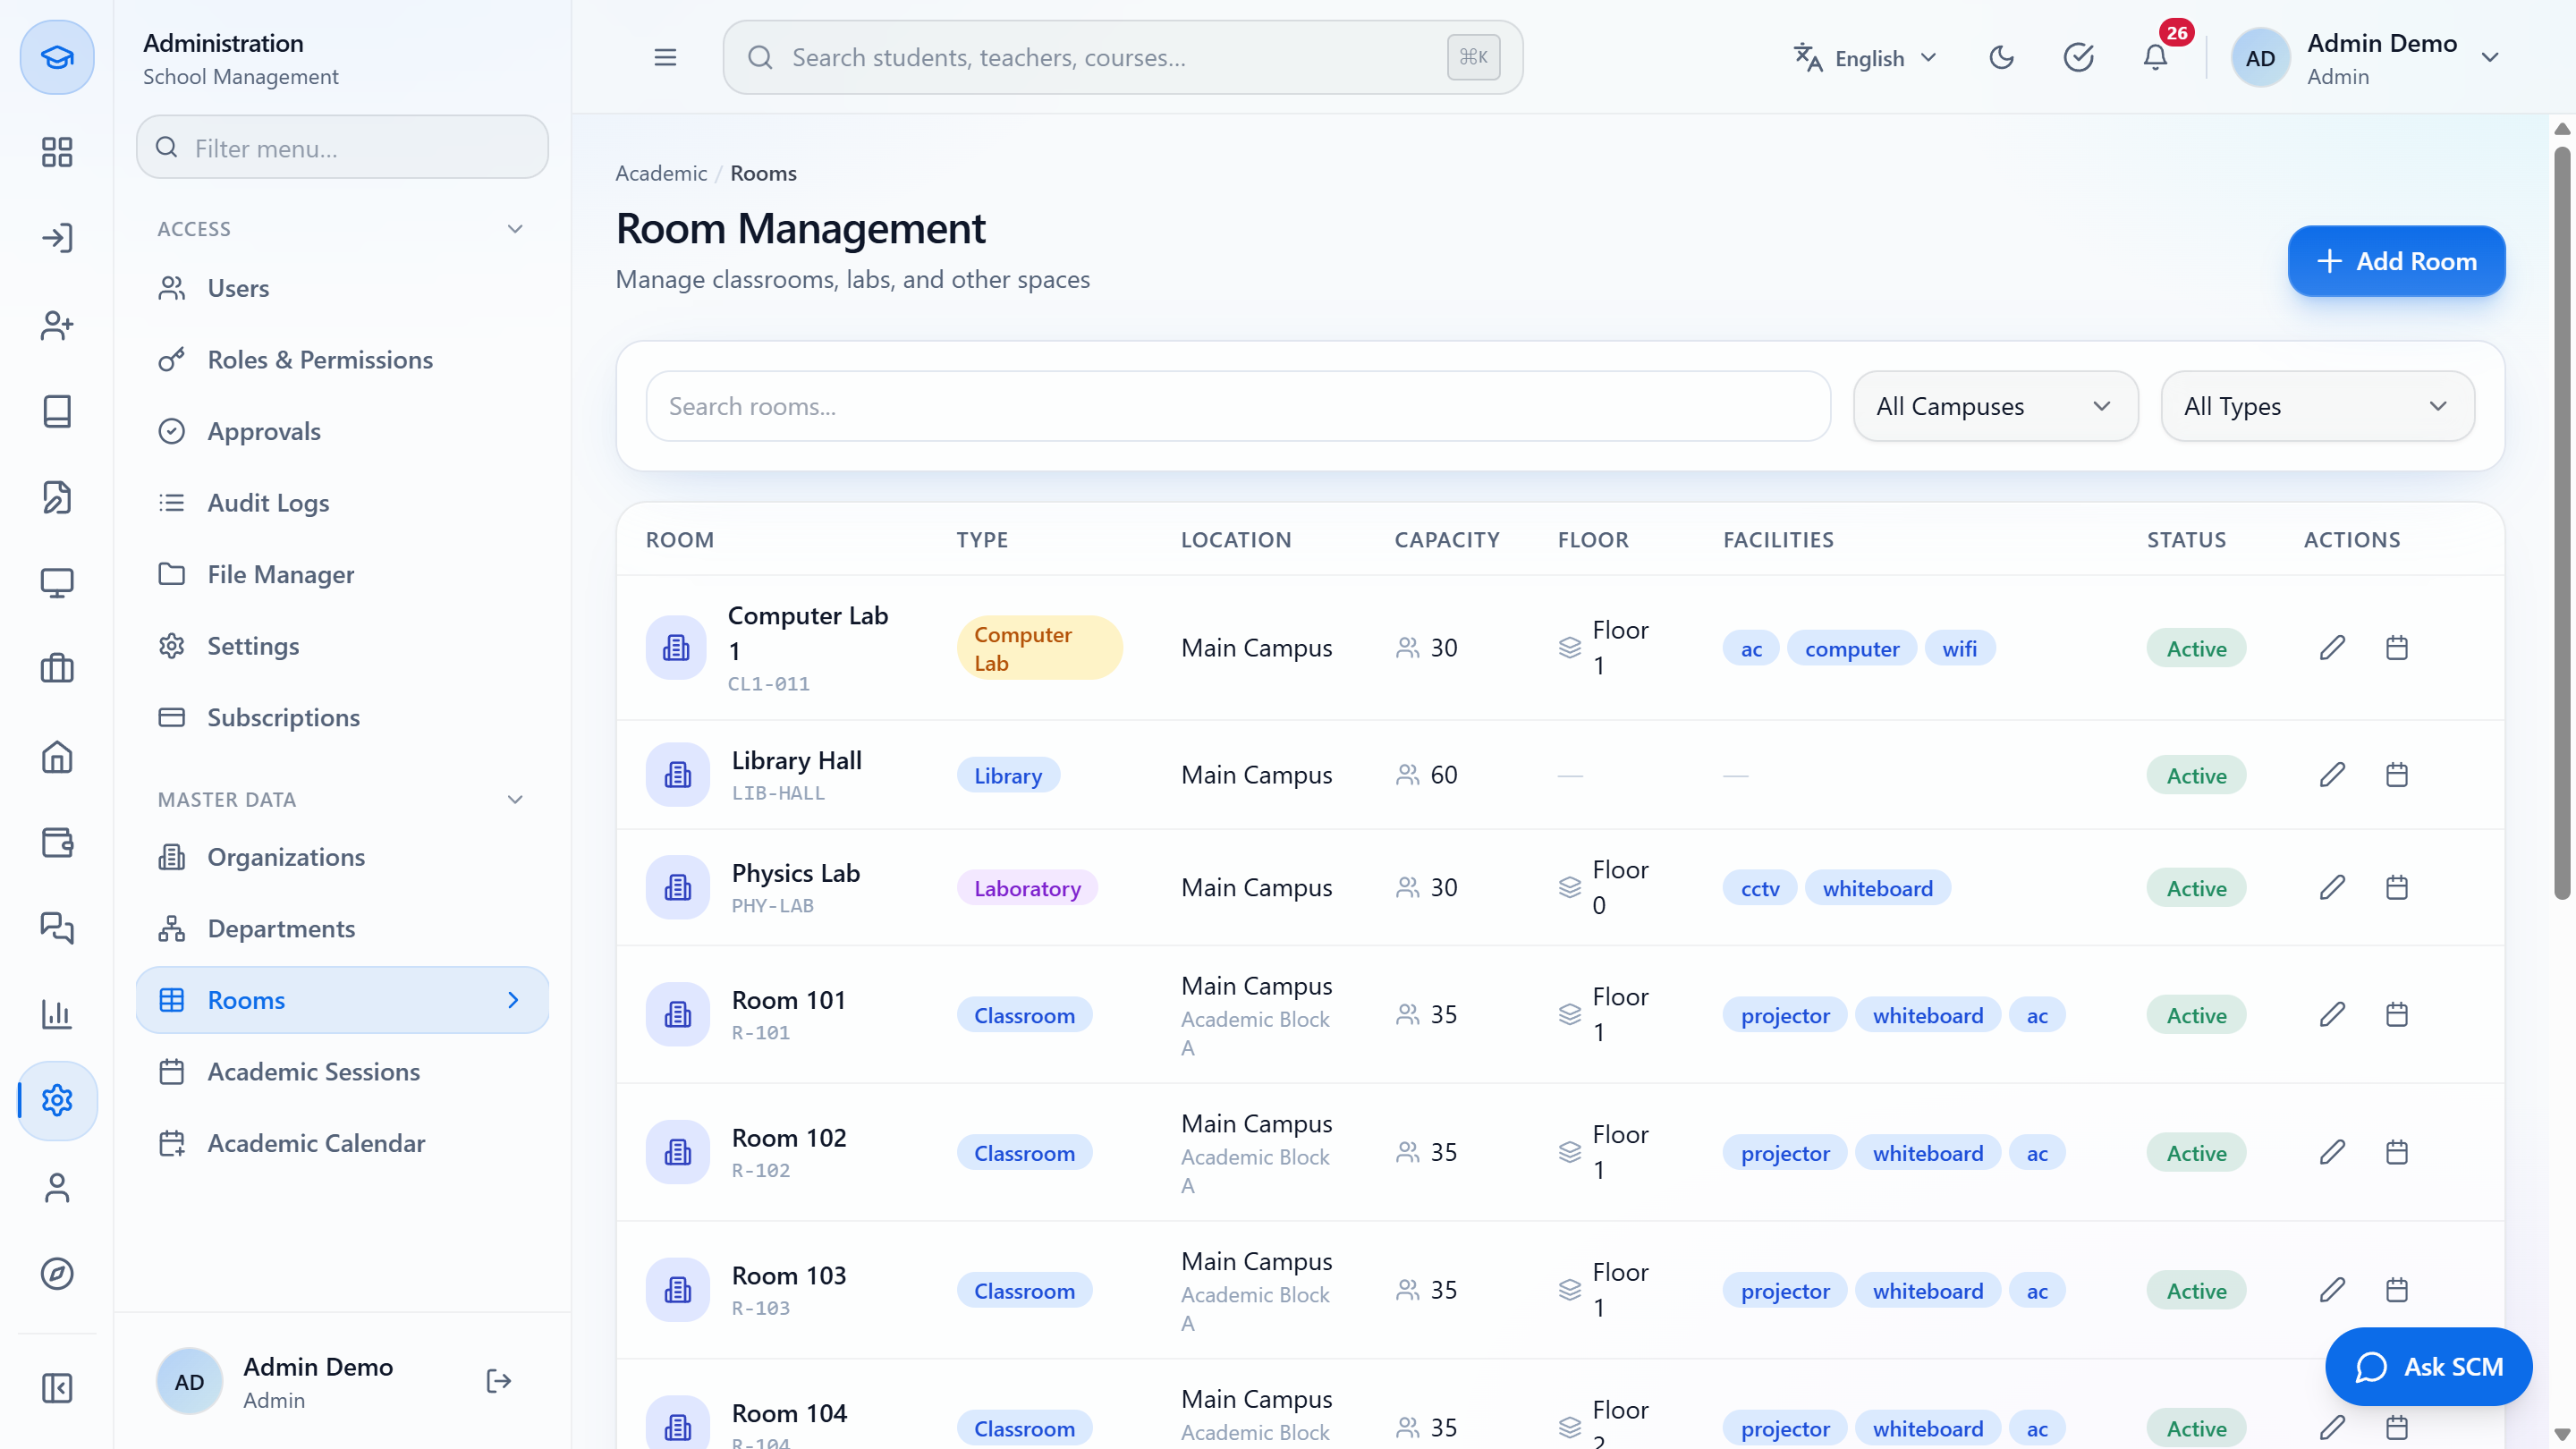
Click Administration › Master Data › Rooms. Room Management says "Manage classrooms, labs, and other spaces". The table shows Room (name and code), Type, Location (campus and building), Capacity, Floor, Facilities, Status and Actions (Edit and View Schedule).
Rooms page in Master Data
2
Search and filter
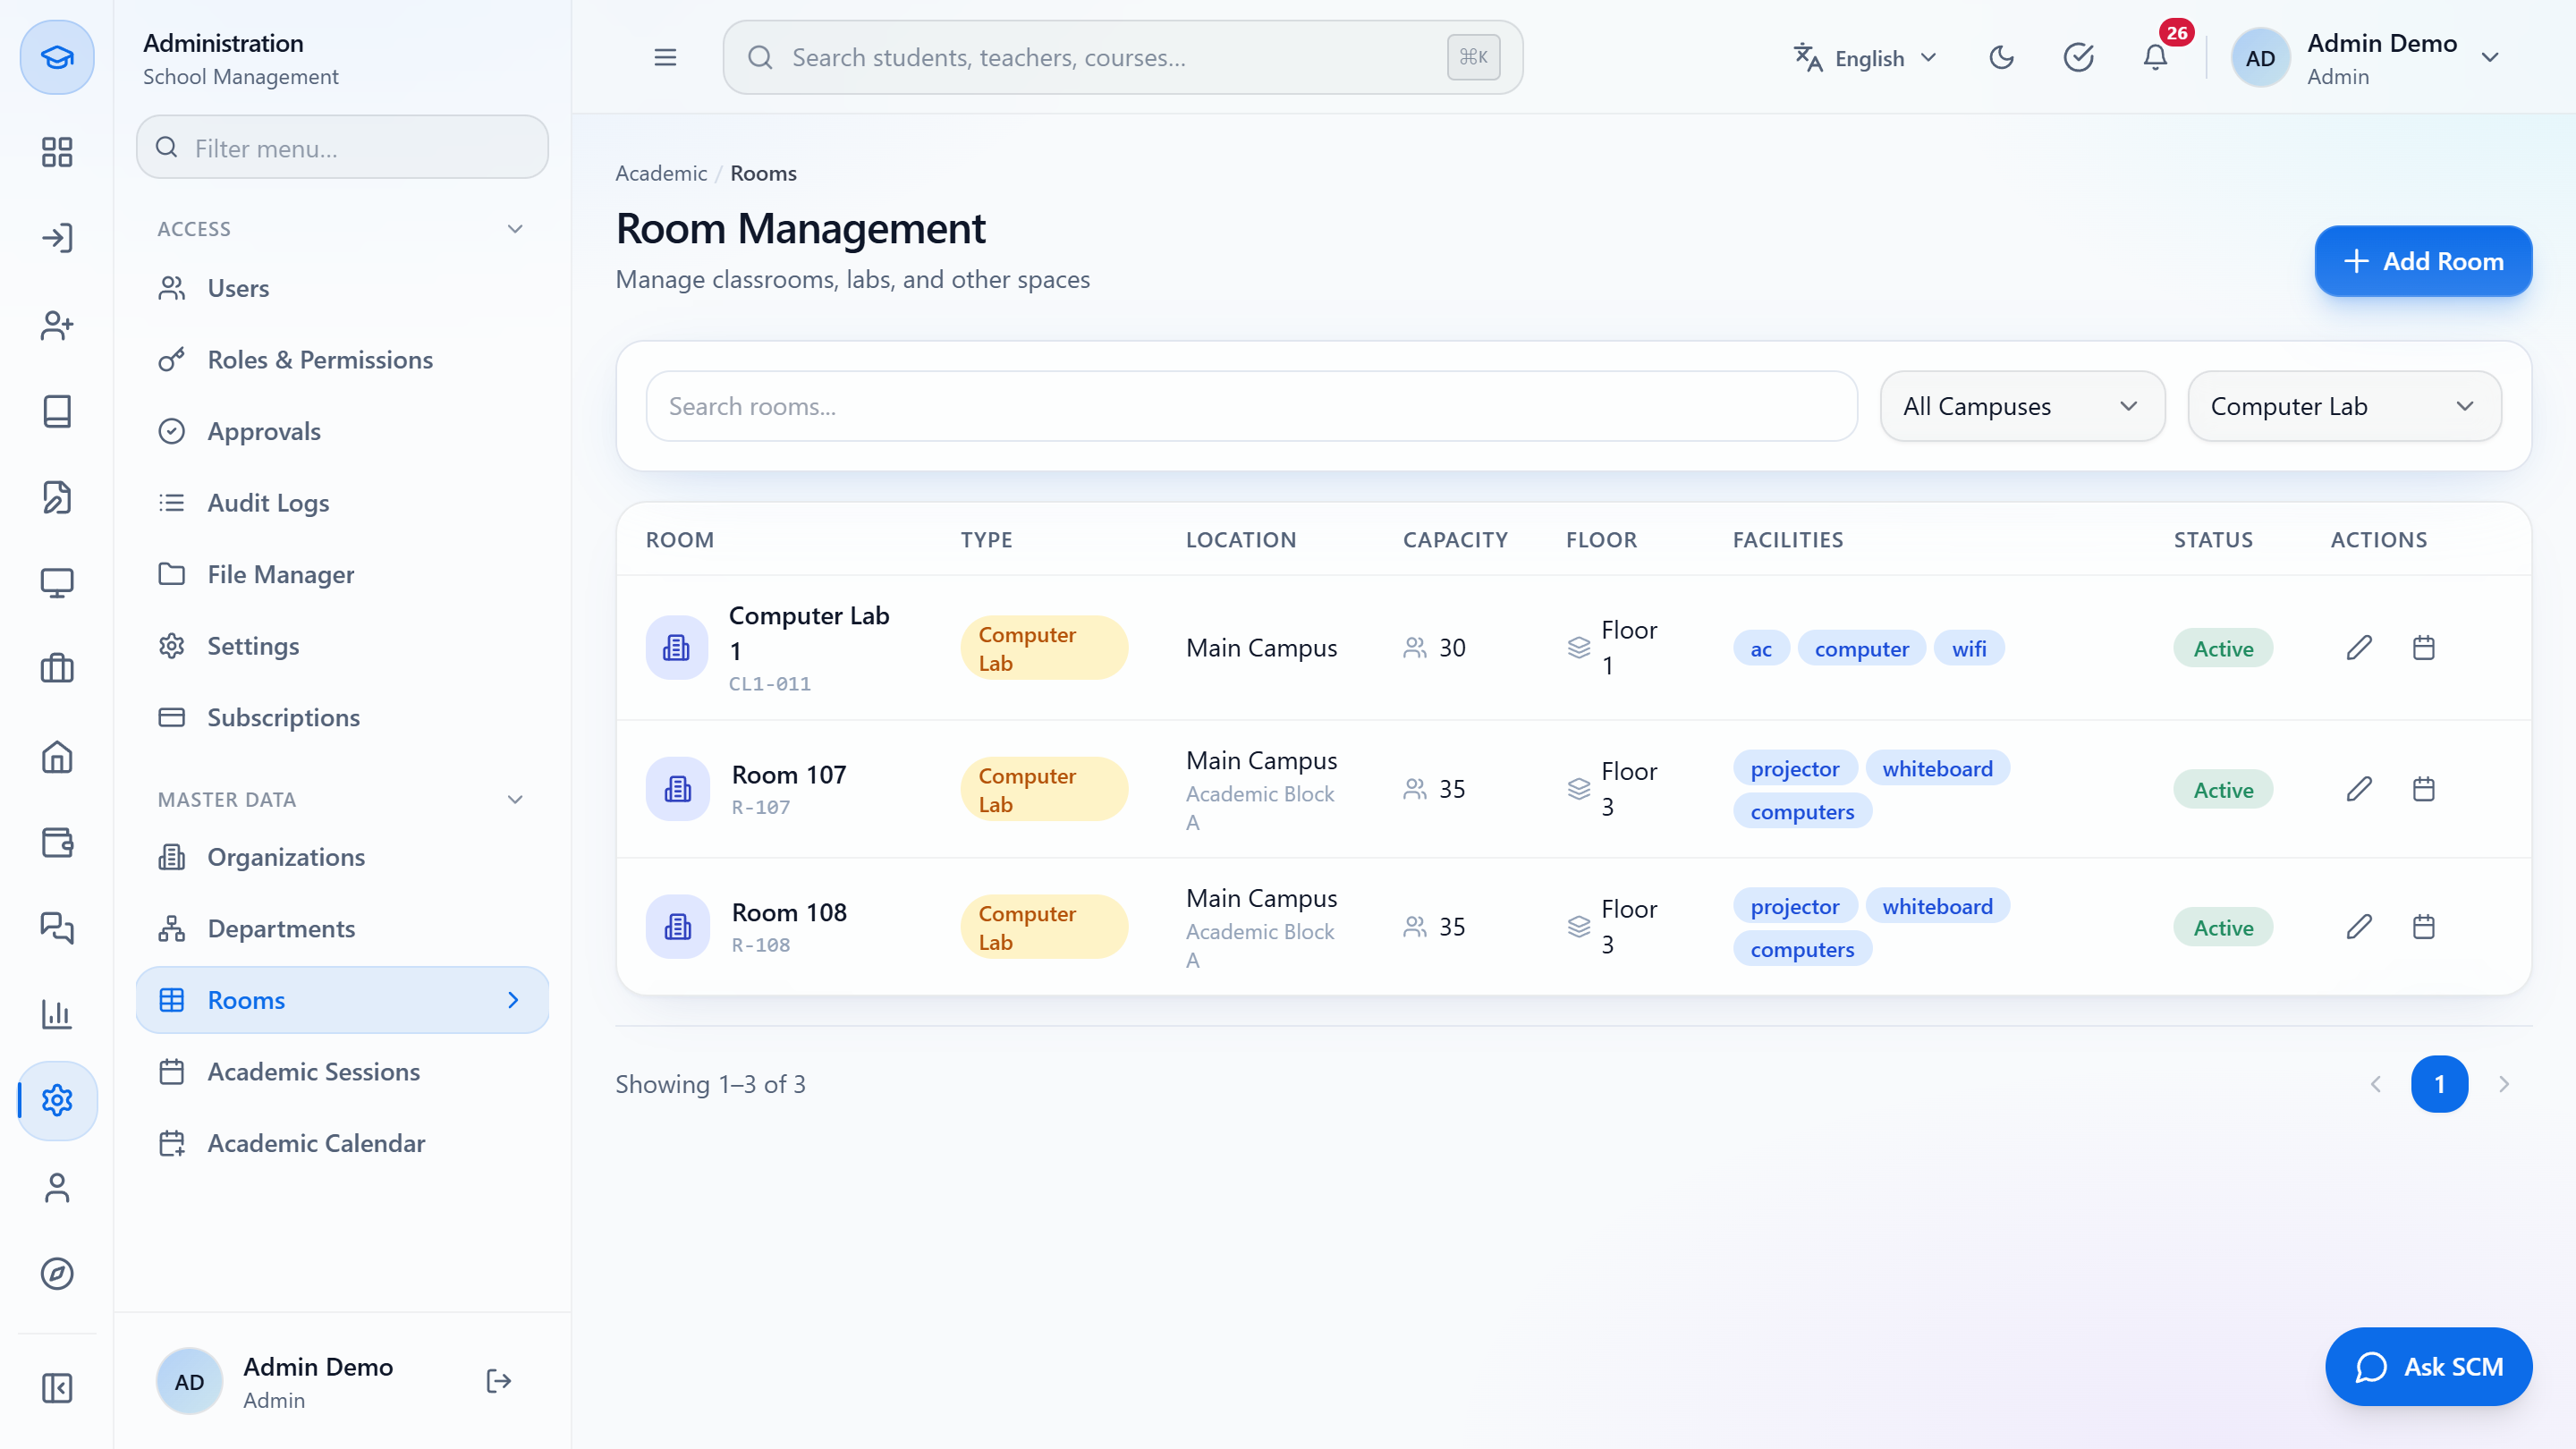
Use Search rooms for a name or code, the campus list (All Campuses, Main Campus) and the type list. The type list has nine types: Classroom, Laboratory, Lecture Hall, Seminar Room, Computer Lab, Gym, Library, Office and Conference. Choosing Computer Lab shows Room 107 and 108. When nothing matches you see No rooms found. with an Add Room button.
Rooms filtered by Computer Lab
3
Add a room
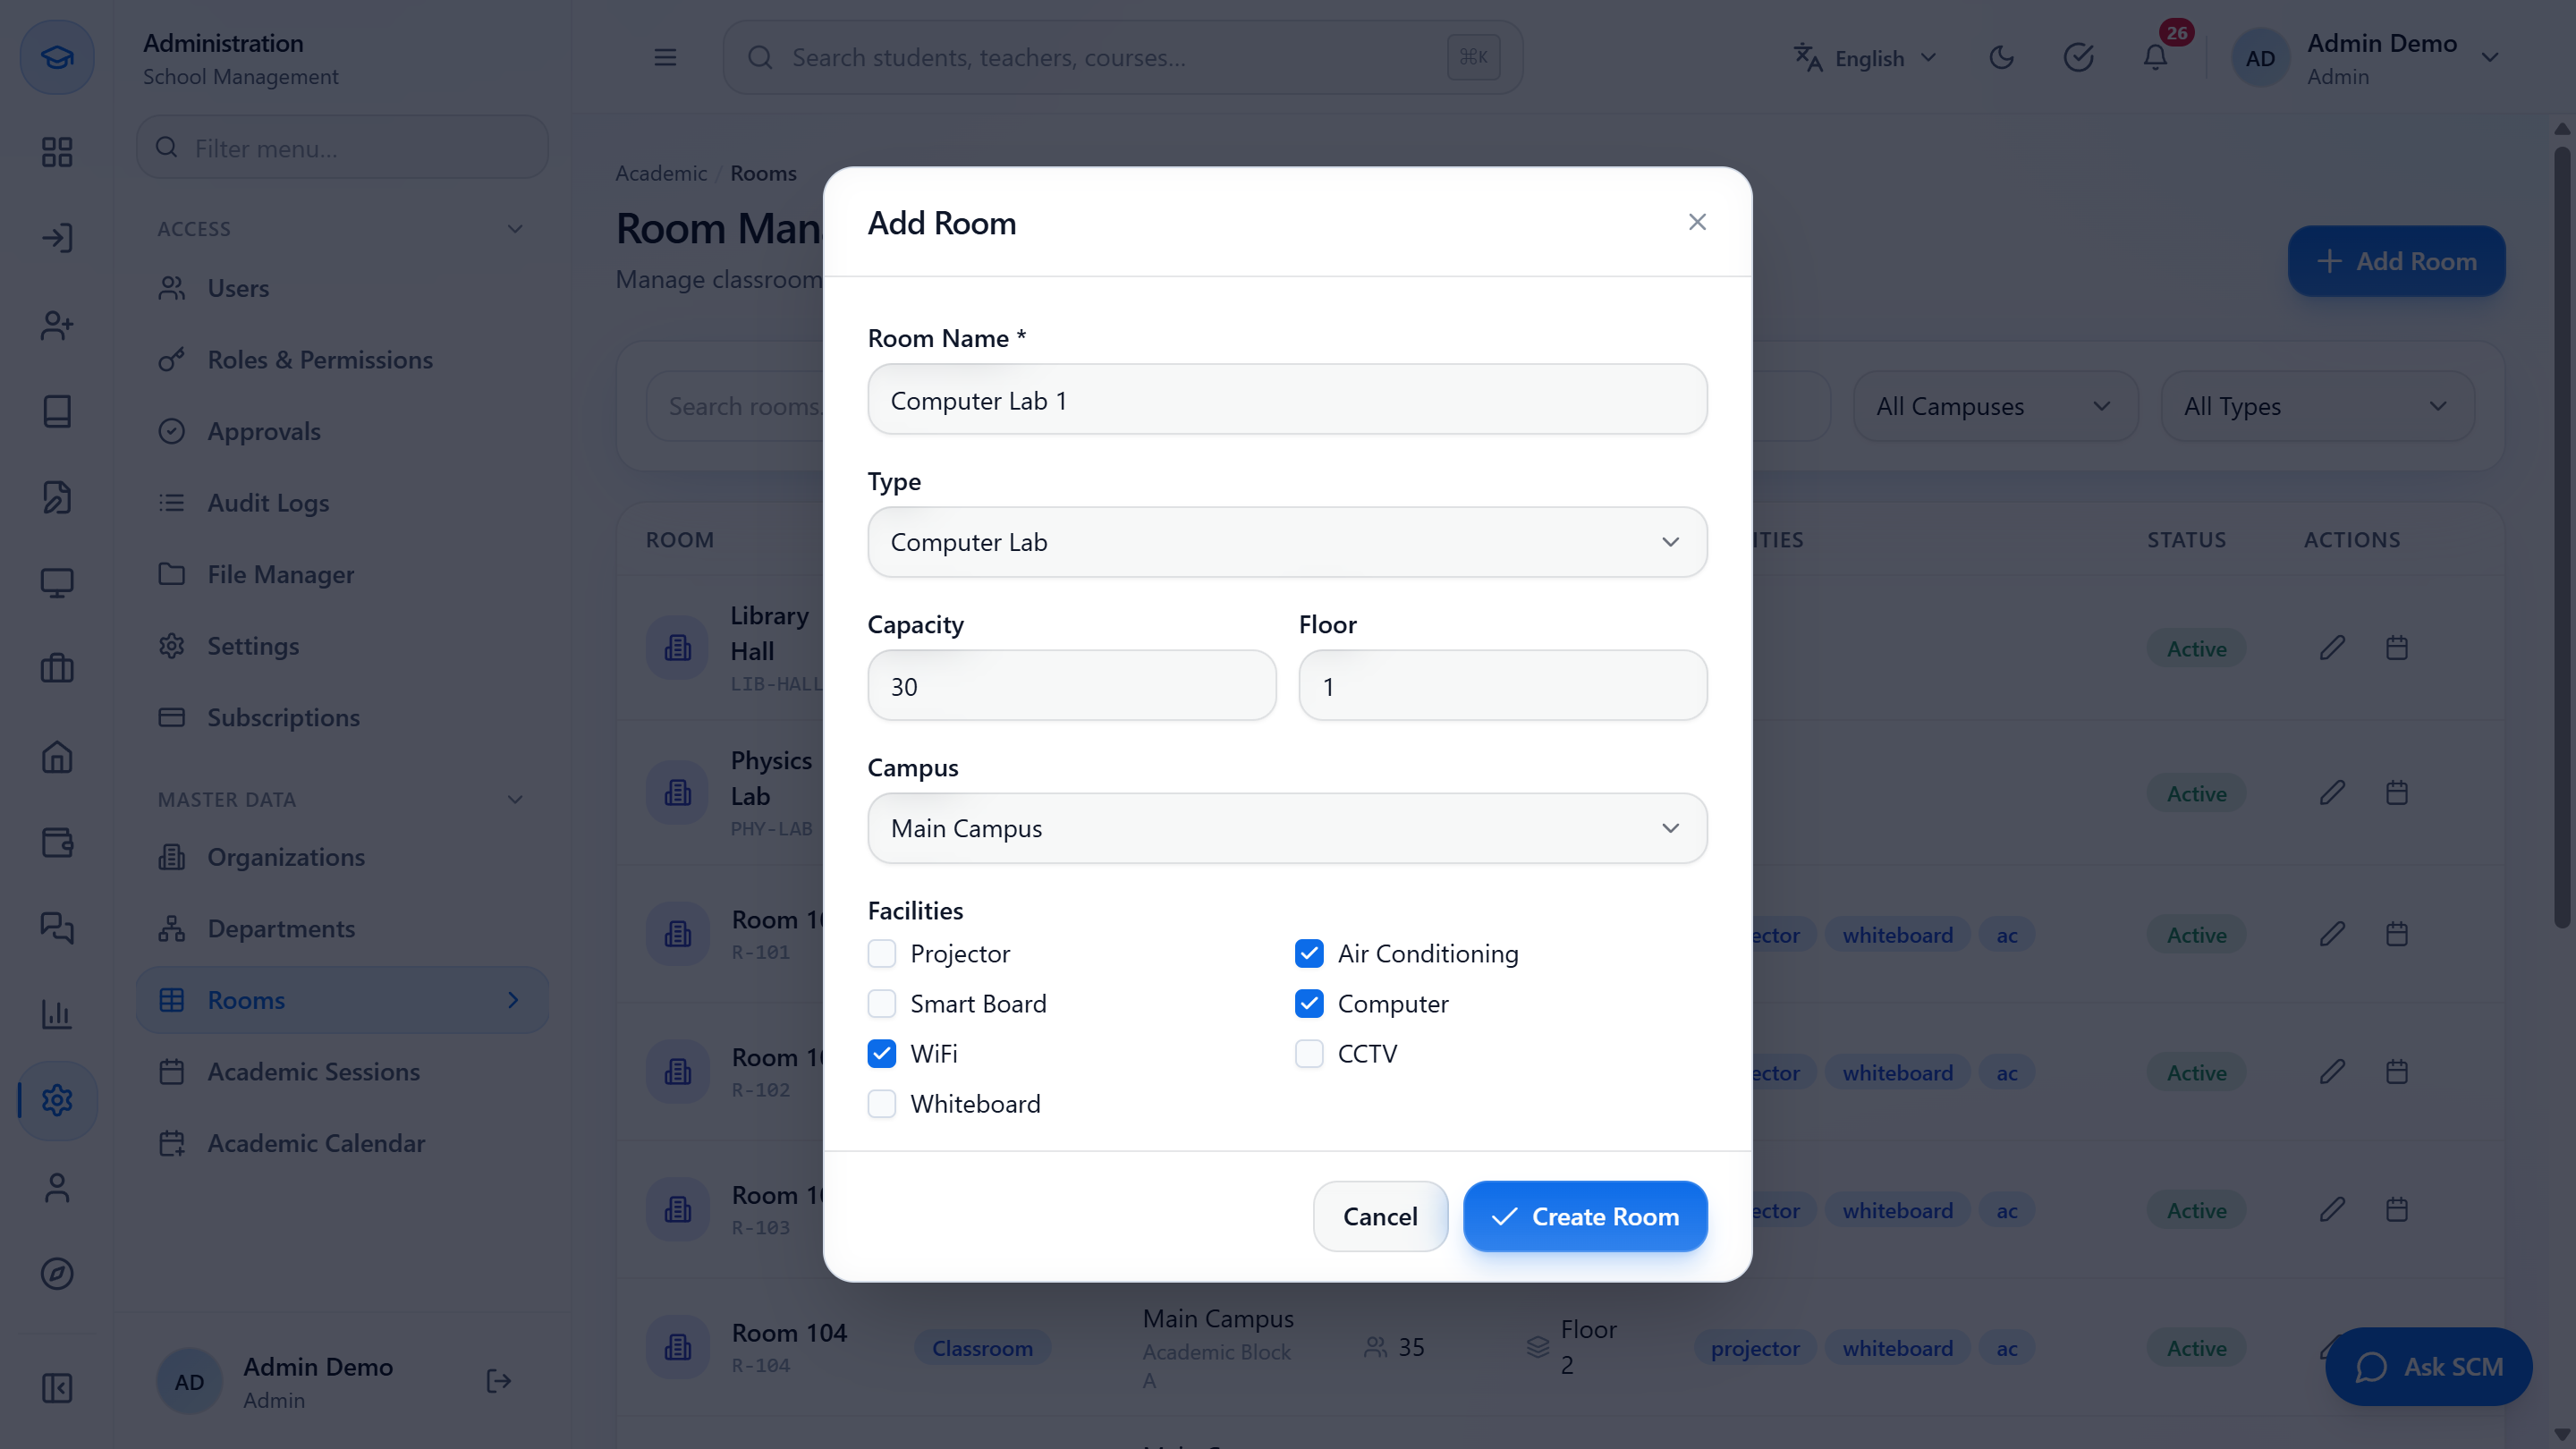
Press Add Room. A room needs a Room Name (Computer Lab 1) and a Campus; Create Room stays grey until both are set. Choose the Type (Computer Lab), Capacity (30), Floor (1; ground is 0) and the Building, which appears once the campus is chosen. Tick the Facilities the room has: Projector, Air Conditioning, Smart Board, Computer, WiFi, CCTV, Whiteboard. For this lab: Air Conditioning, Computer and WiFi.
Add Room dialog filled in
4
Check the new room
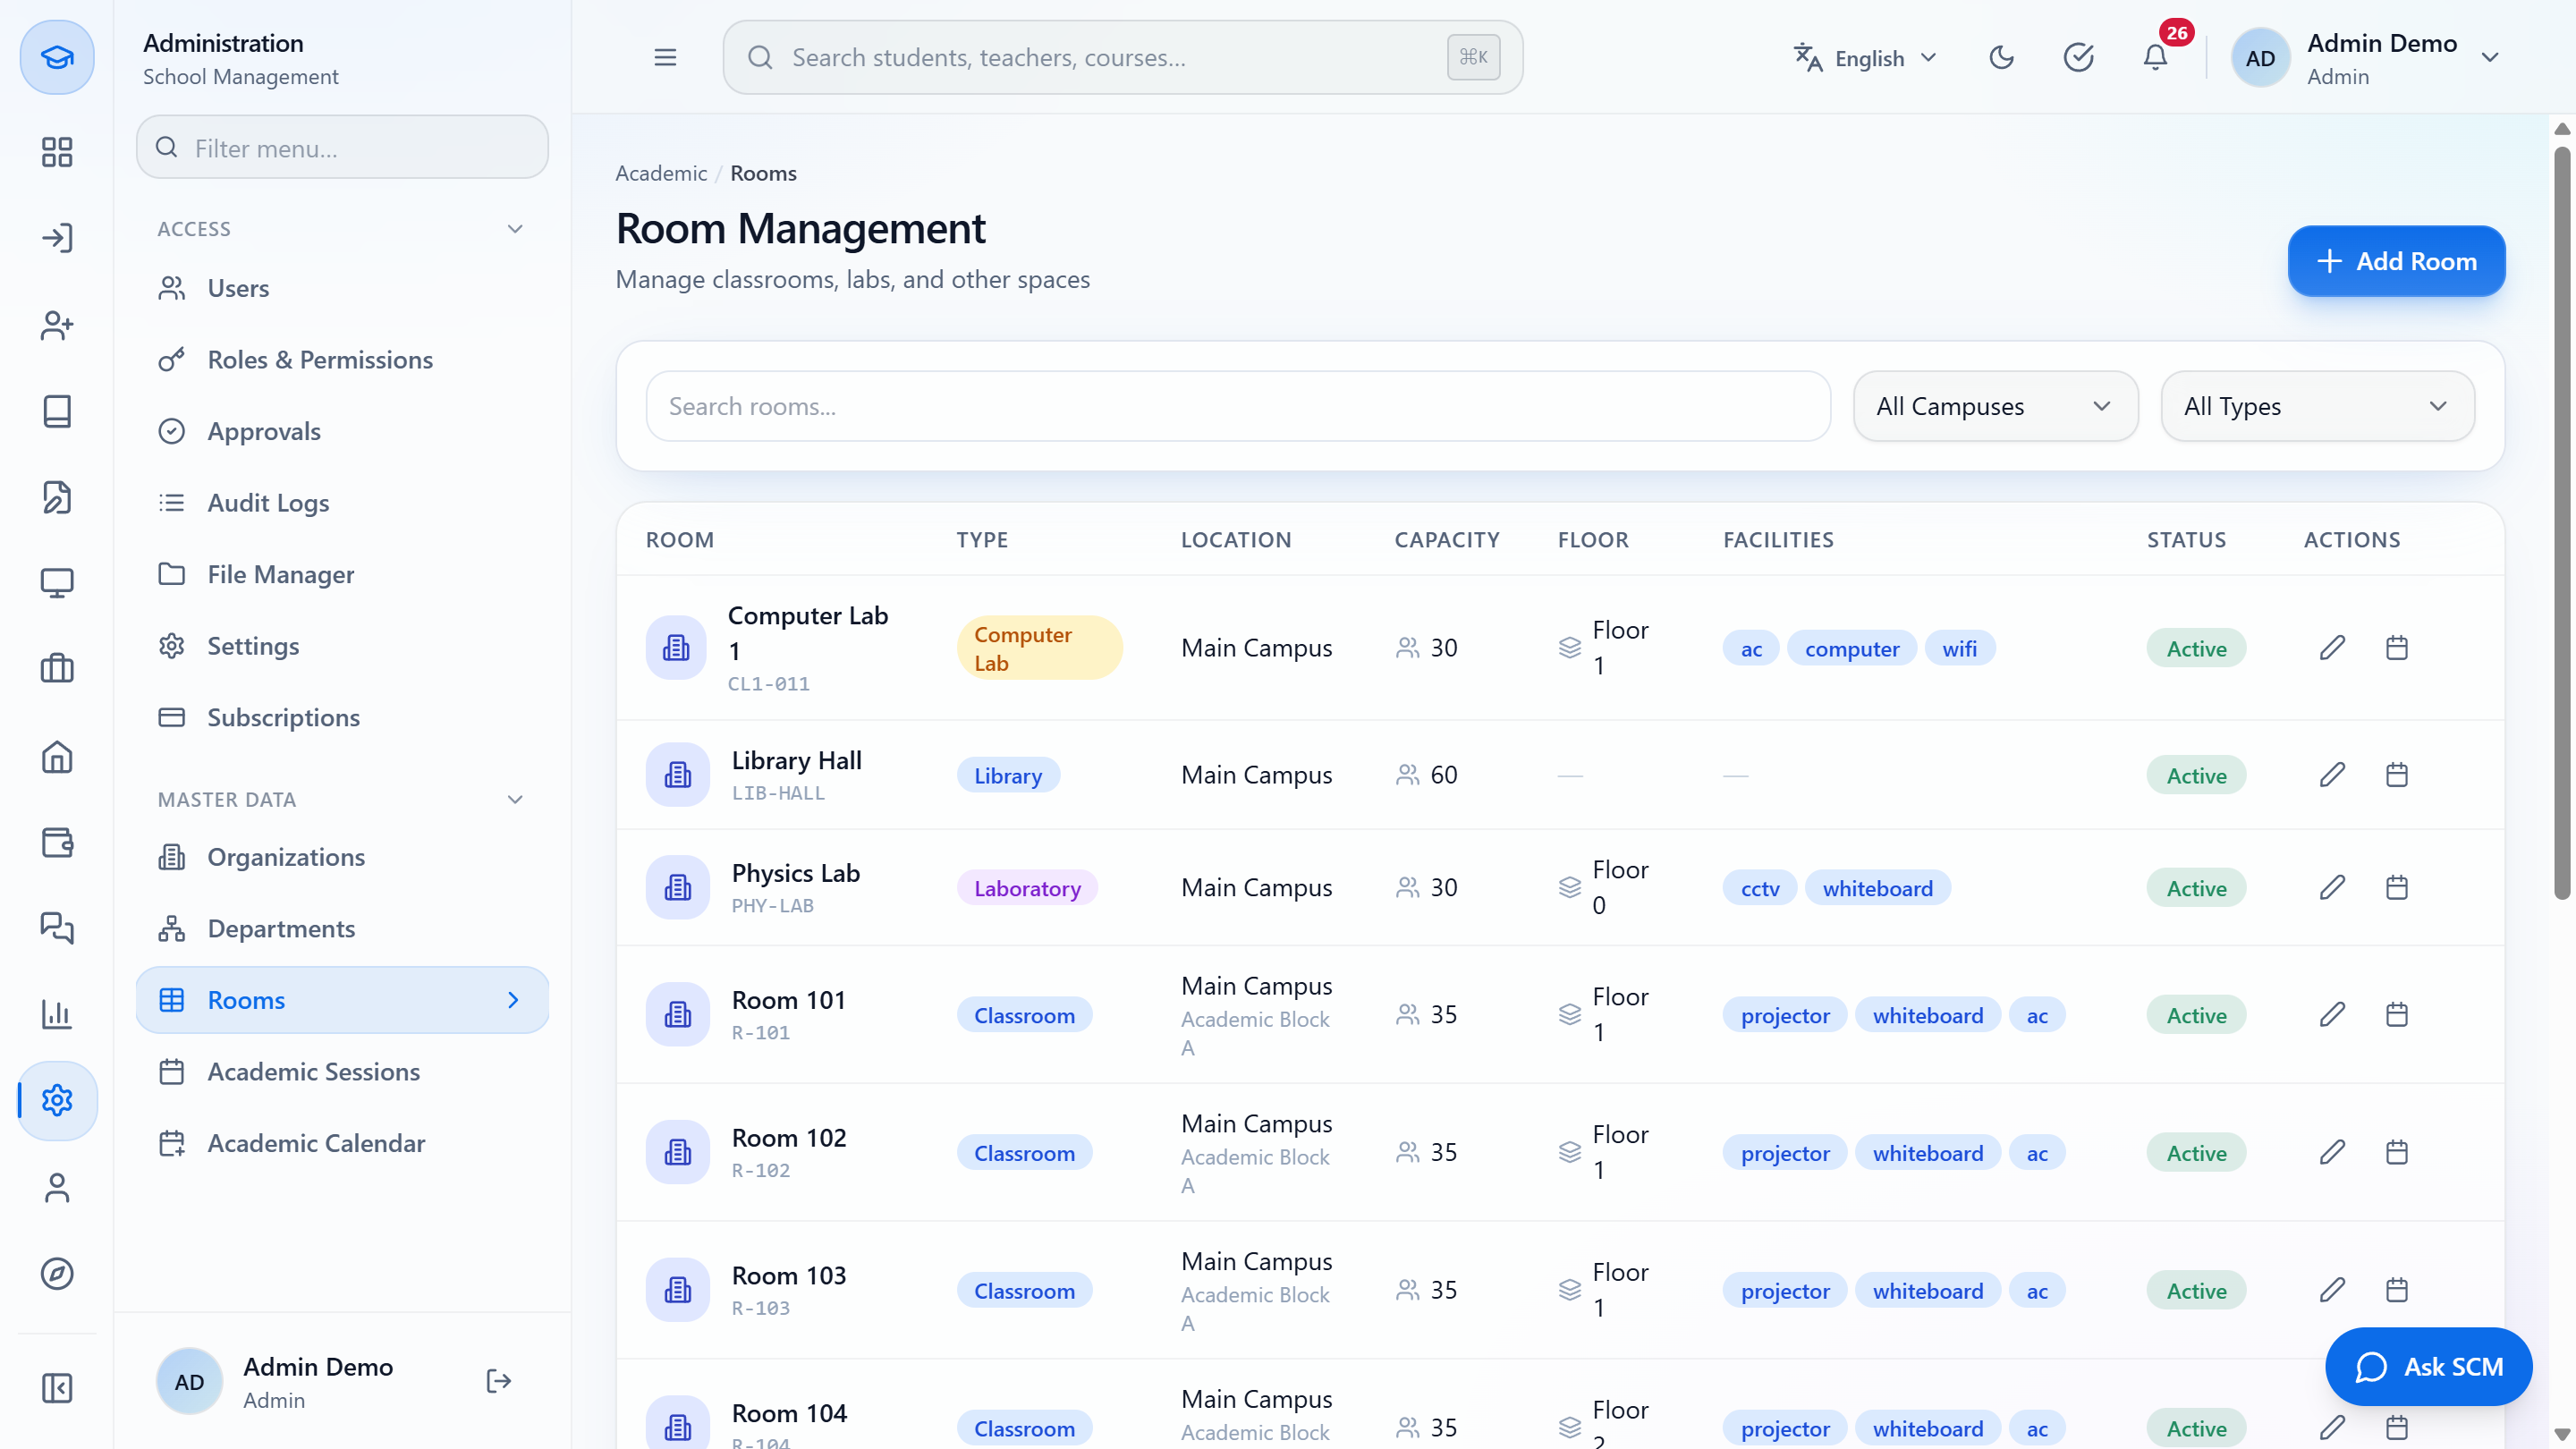
The toast says Room created. Computer Lab 1 joins the list with a generated code (CL1-011), type, campus, capacity 30, floor 1 and its facility badges.
New room in the list
5
Edit a room
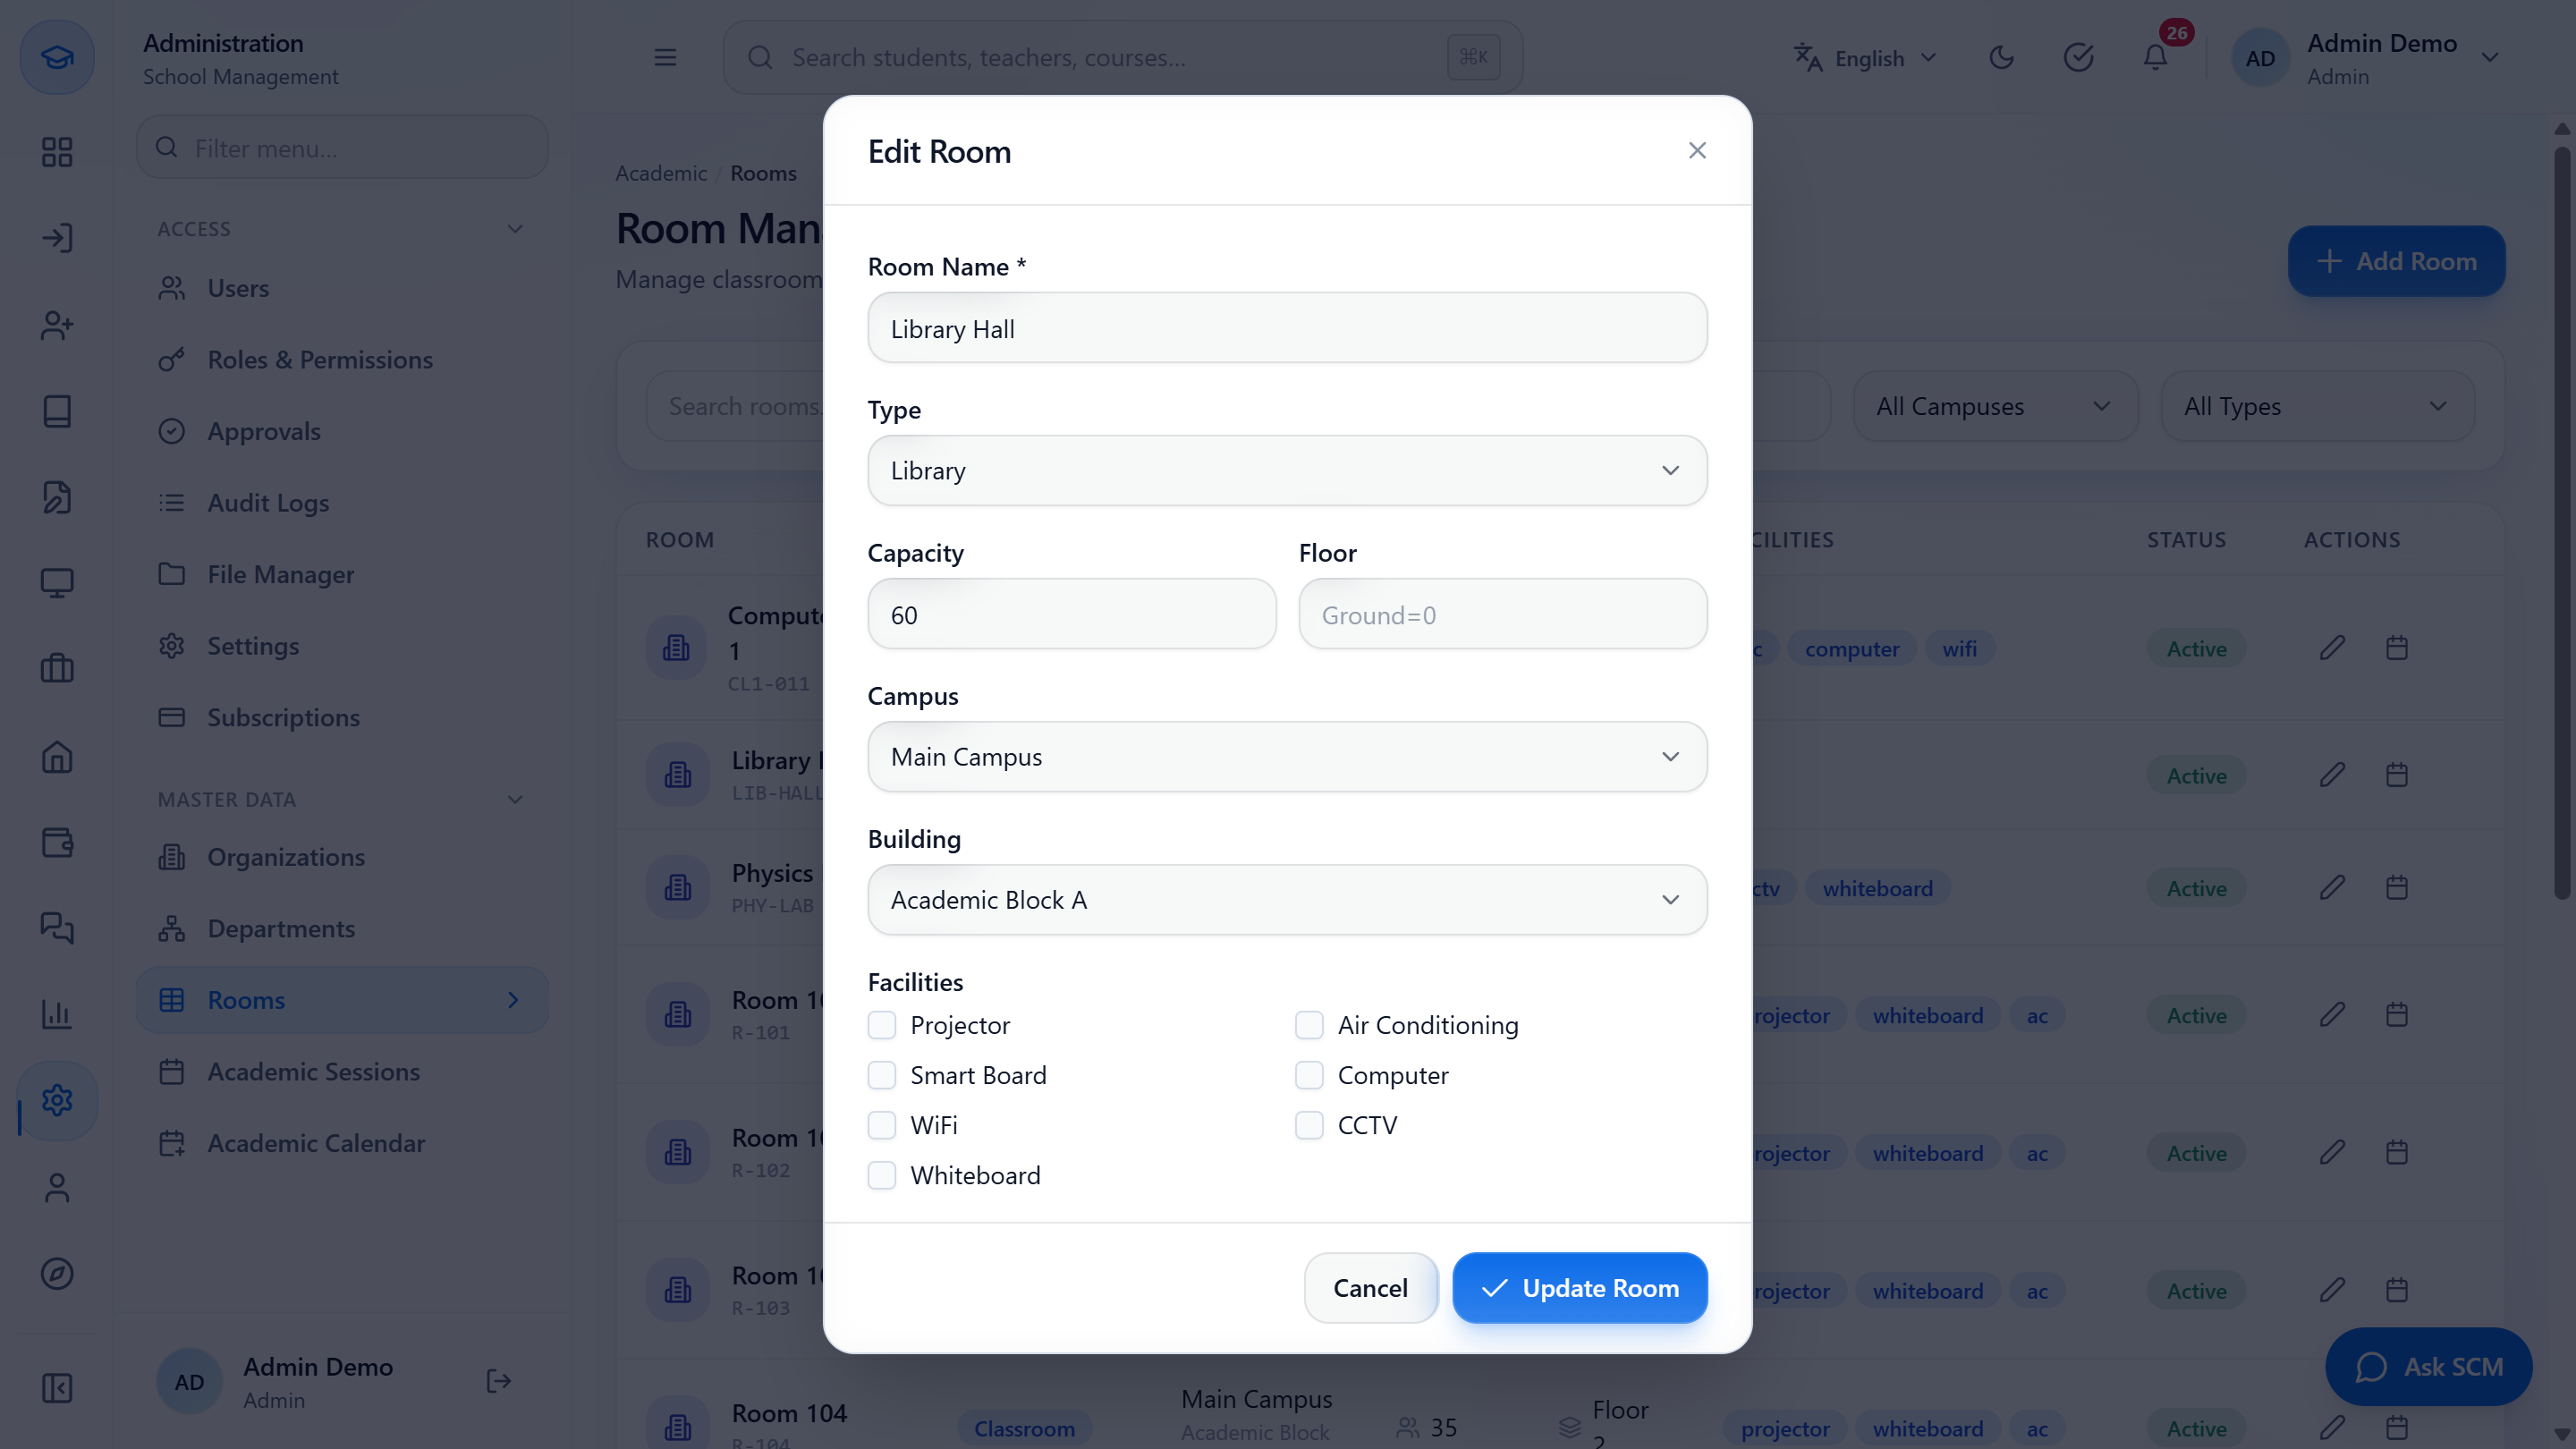
The pencil opens Edit Room with the room's values filled in. Change the floor, the building or the facilities and press Update Room. The toast is Room updated and the row shows the change, for example Floor 0 with the badges cctv and whiteboard.
Edit Room dialog with the values filled in
6
See when the room is used
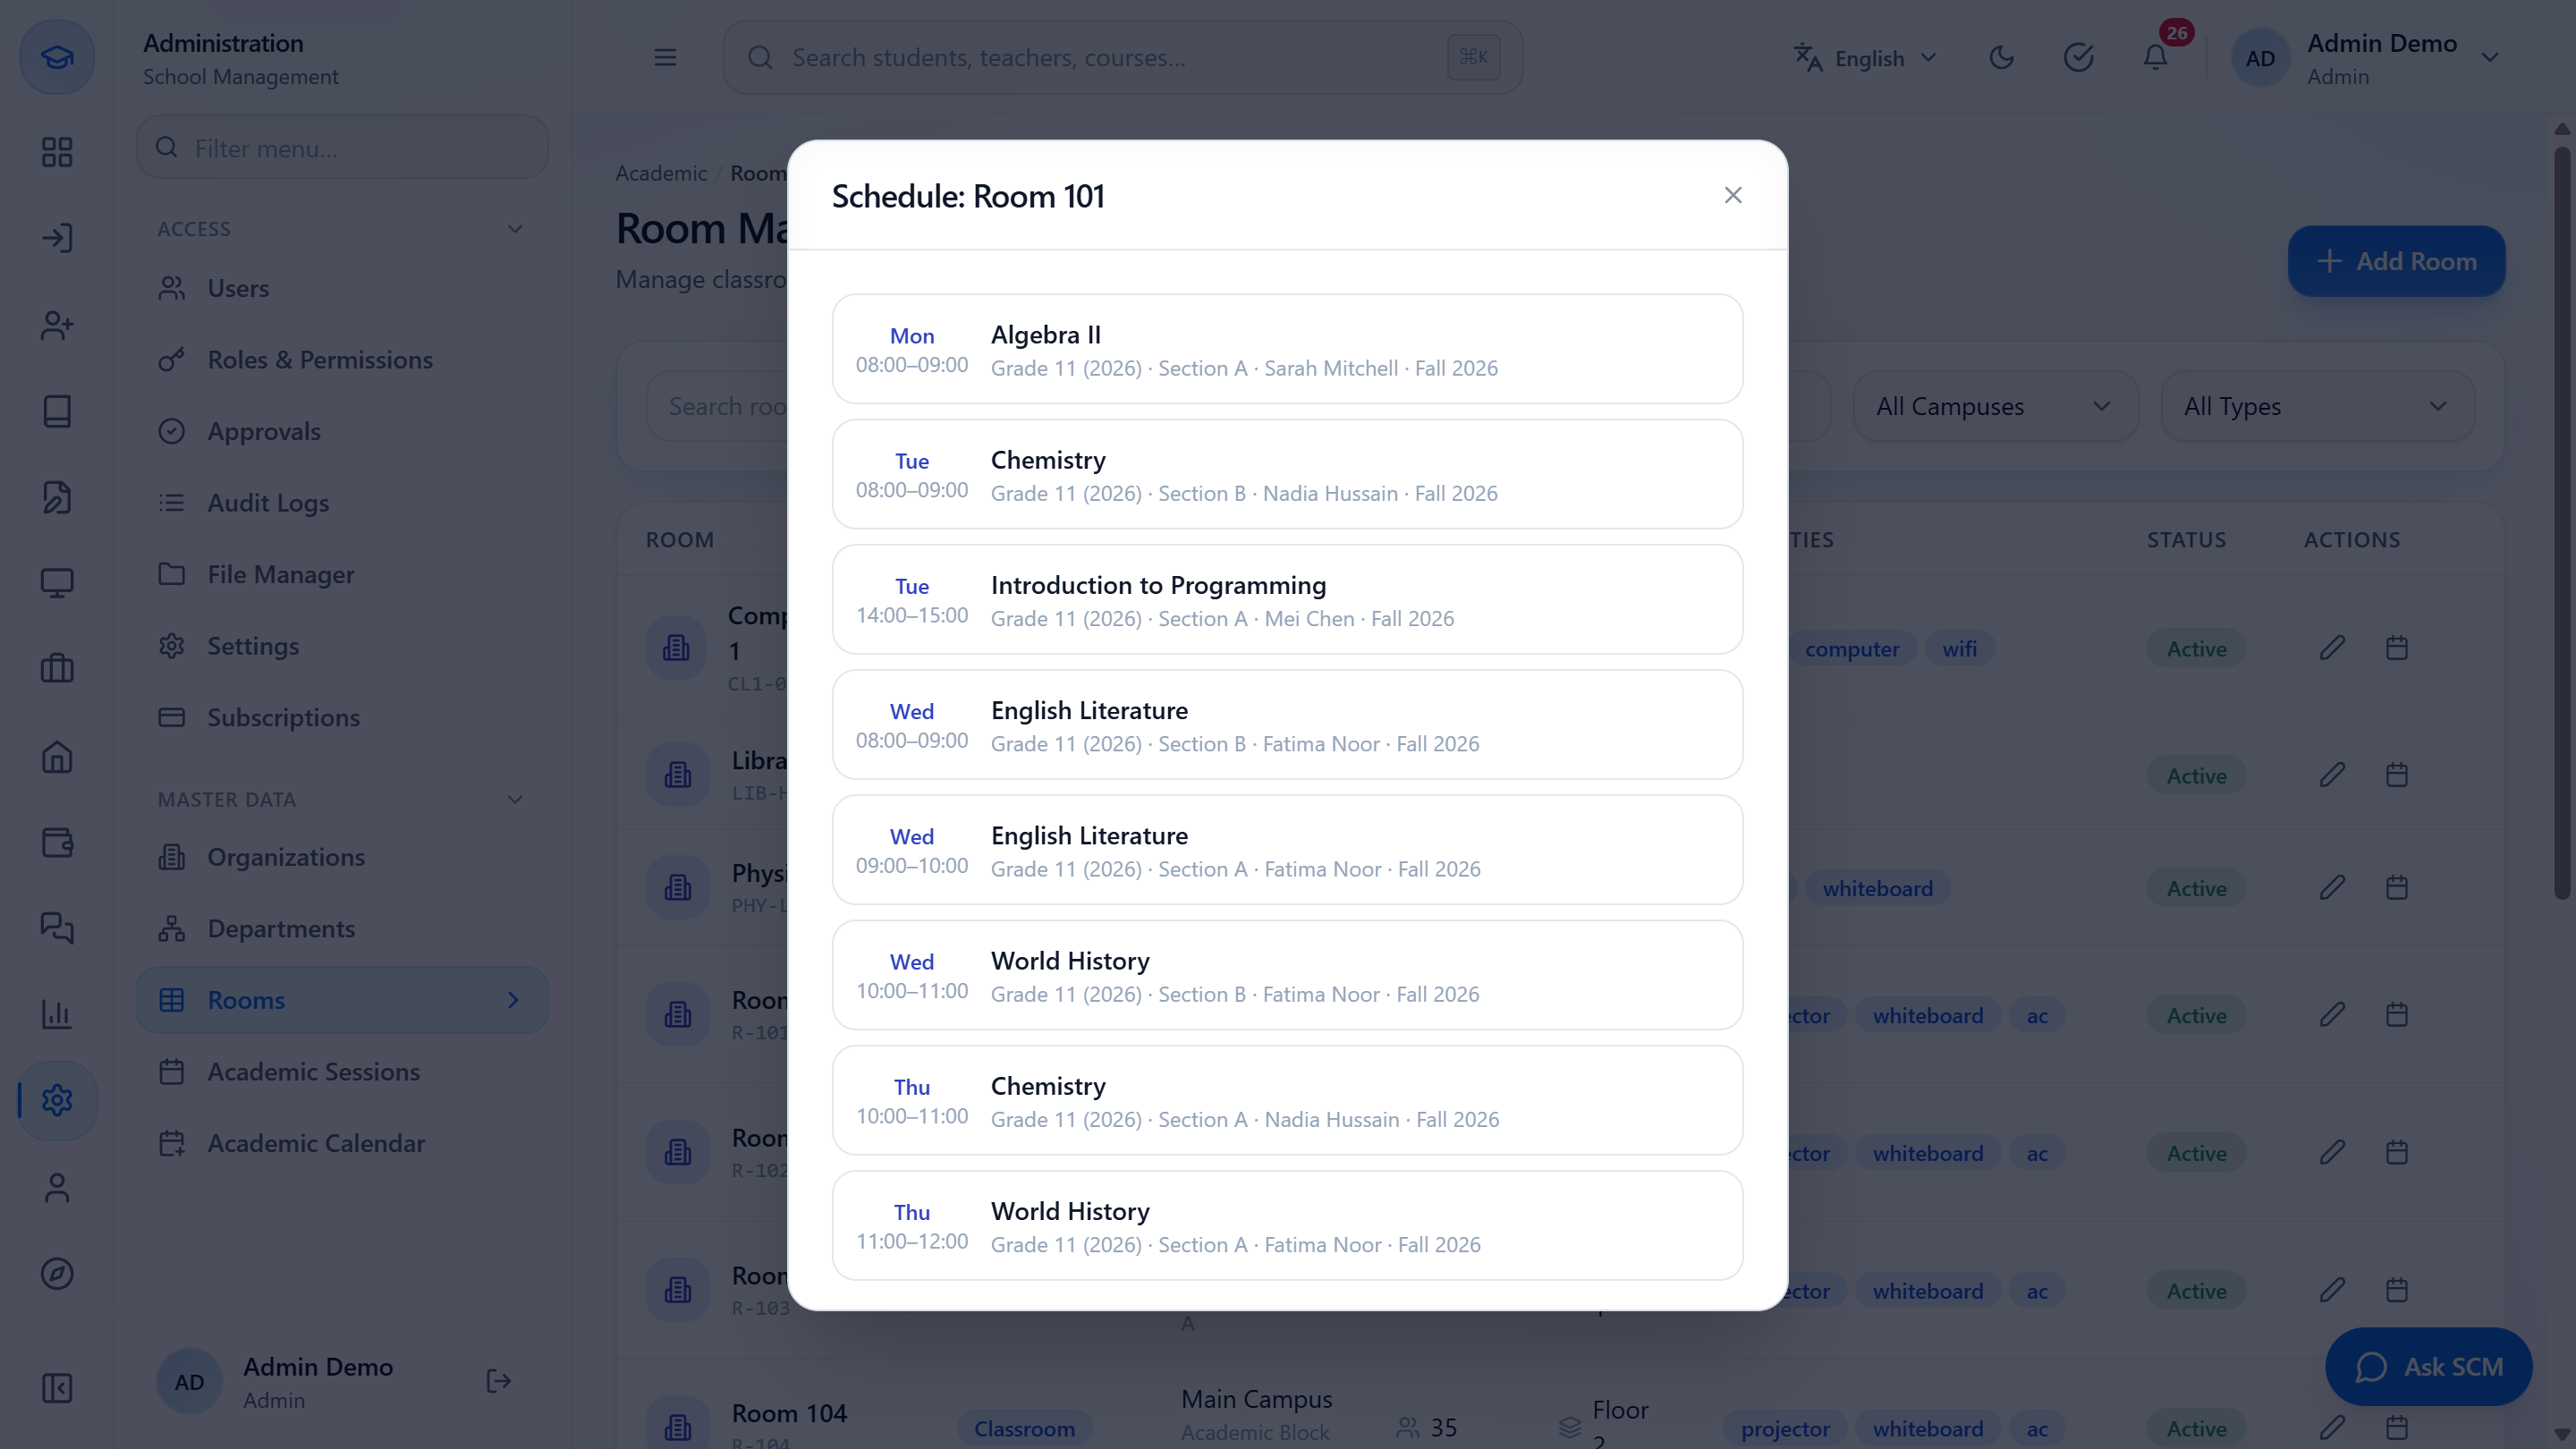
The calendar icon (View Schedule) opens "Schedule: Room 101". Each lecture is a row with the day and time (Mon 08:00–09:00) and the course (Algebra II), and under it the batch, section, teacher and term (Grade 11 (2026) · Section A · Sarah Mitchell · Fall 2026). A room with no lectures says No scheduled lectures for this room.
Schedule of Room 101 with lectures
Check it worked
The new room appears in the list with its code and facilities.
An edited room shows the new floor or facilities in its row.
The schedule of a room lists the lectures that the timetable has placed there.
Common mistakes
Mistake
What you see
Fix
Create Room stays grey
No name or campus yet
Enter a name and choose a campus
Looking for Building before choosing a campus
The field is not shown
Choose the campus first
Searching with a type filter that excludes the room
No rooms found.
Set the type back to All Types
Quick reference
Item
Meaning
Room code
Generated from the name, for example CL1-011
Floor
Ground is 0
Facilities
What the room has (Projector to Whiteboard)
View Schedule
The lectures held in the room
Frequently asked questions
What does a room need before I can add it? A name and a campus. Create Room stays disabled until both are set. The Building field appears once the campus is chosen.
How do I see when a room is in use? Press the calendar icon (View Schedule) on the room's row. Each lecture shows its day, time and course, with the batch, section, teacher and term underneath. A room with no lectures says "No scheduled lectures for this room."
Can I change a room after I created it? Yes. The pencil opens Edit Room with the values filled in. Change the floor, building or facilities and press Update Room; the row shows the change.