How to find who changed what in your dispatch audit log
You will open the audit log, narrow it by action, person, date or booking number, open one entry to see the values before and after, export the result to CSV and handle the system alerts. You need this when a booking, a role or a setting changed and you must know who did it and when.
Who it is forTaxi or fleet operator owner or dispatch managerTime10 minutesProductFMSLevelBeginner
Before you start
Steps
1
Open the audit log
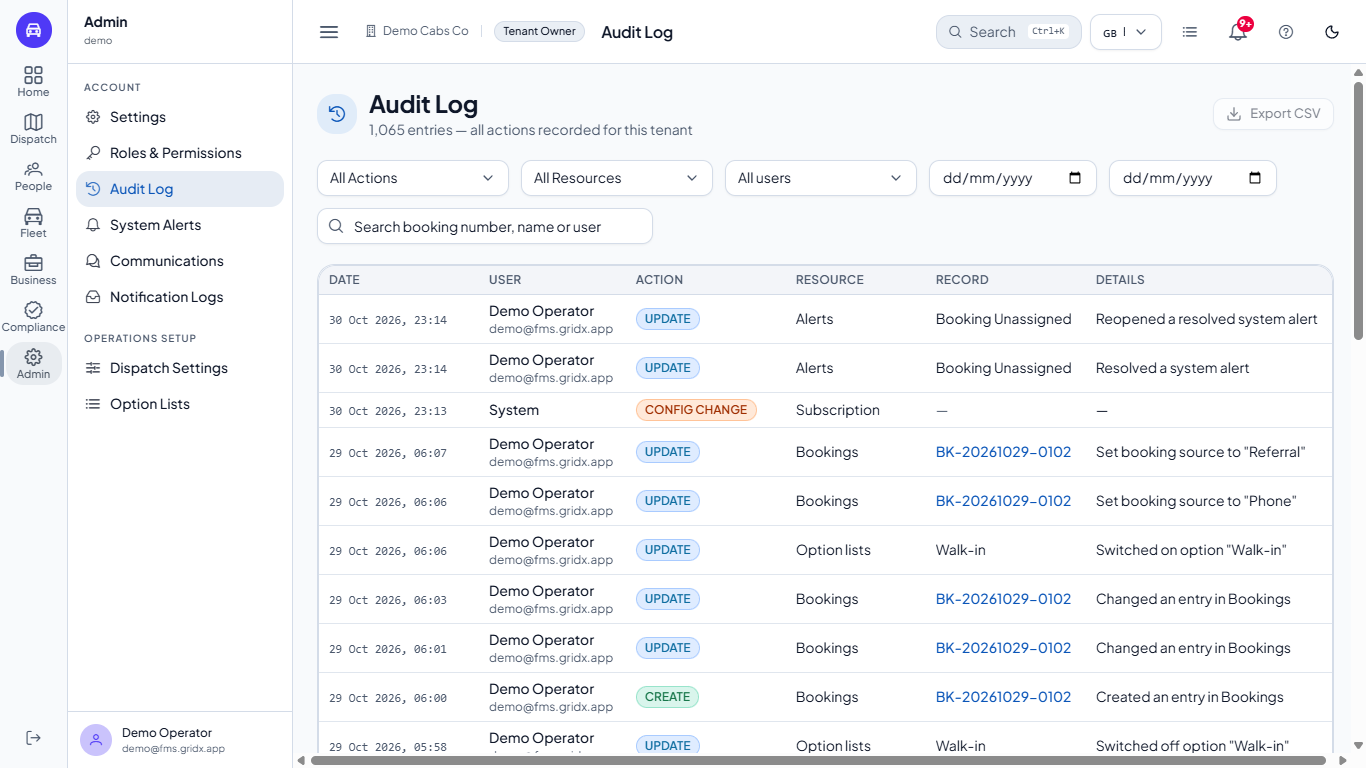
Go to Admin > Audit Log. The subtitle tells you how many entries the company has. Each row shows the date and time, the user (name and email, or System), an action chip such as UPDATE or CONFIG CHANGE, the area, the record and a short sentence under Details. Entries come 30 to a page, newest first.
Audit Log with filters, a table of entries and the Export CSV button
2
Filter by action or area
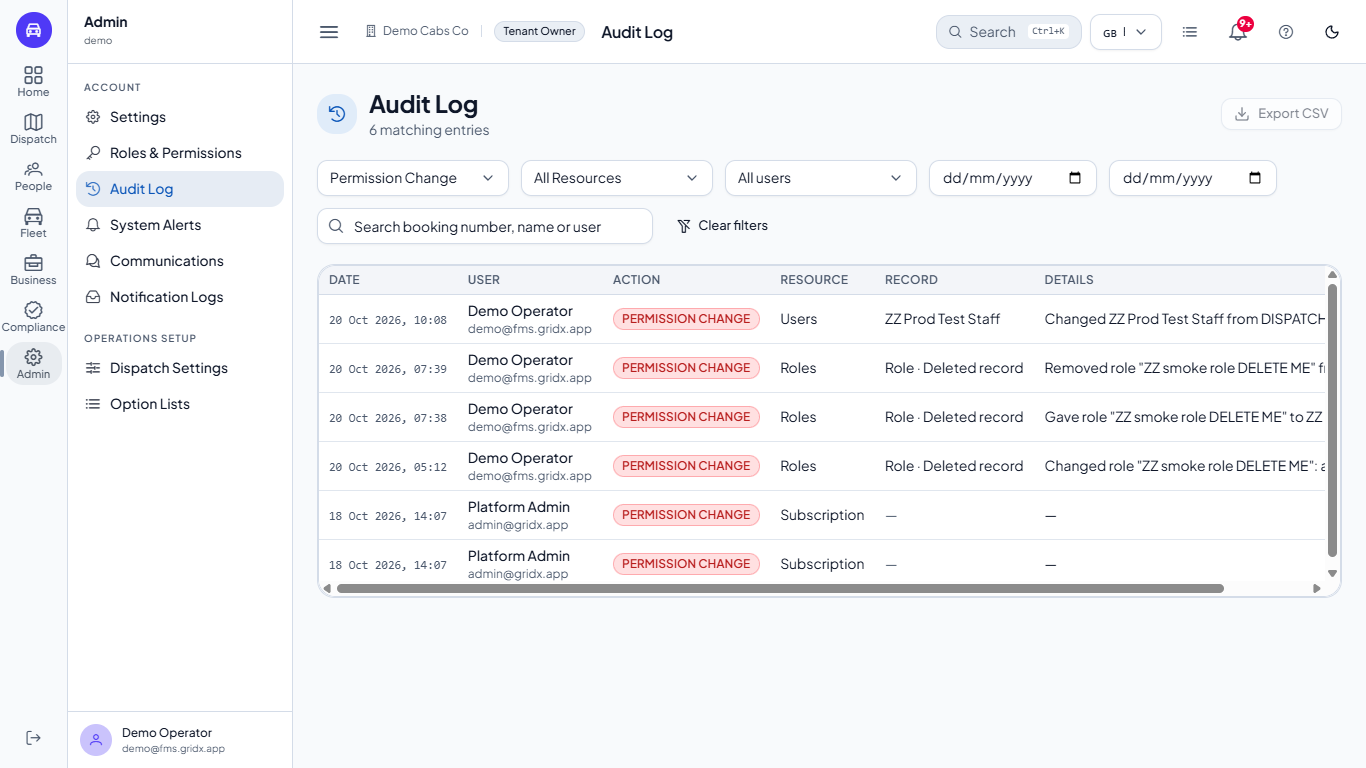
Open Filter by action and choose one of Create, Update, Delete, Login, Logout, Export, Import, Config Change or Permission Change. Choosing Permission Change shows only who changed access, here six entries, and the counter reads 6 matching entries. Filter by resource narrows to Bookings, Drivers, Vehicles, Contracts, Users, Roles, Zones, Settings, Rate cards or Dispatch settings. Clear filters brings the full list back.
Audit Log filtered to Permission Change showing six entries
3
Filter by person and dates
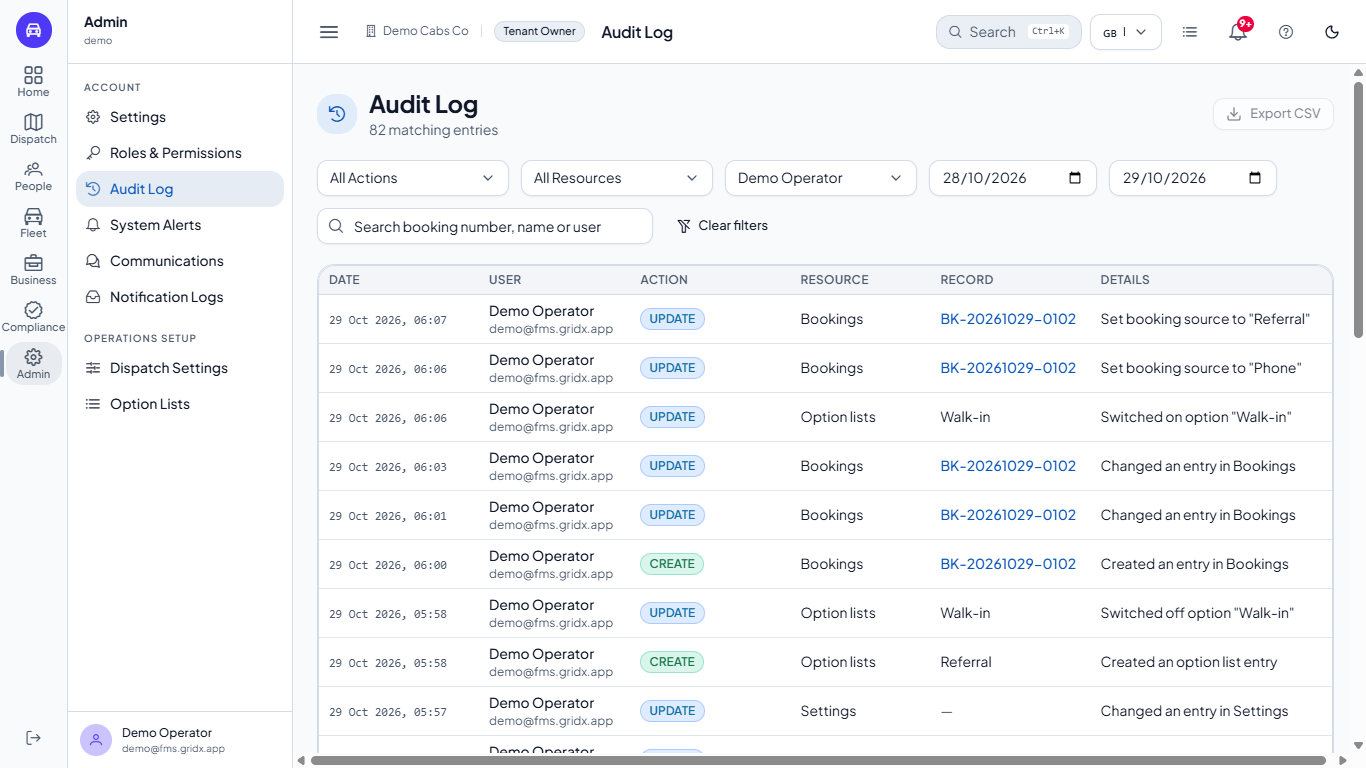
Open Filter by user and pick a person, then set From date and To date to look at one period. The To day is included. Here Demo Operator between 28 and 29 October has 82 matching entries.
Audit Log filtered by user Demo Operator from 28 to 29 October
4
Search
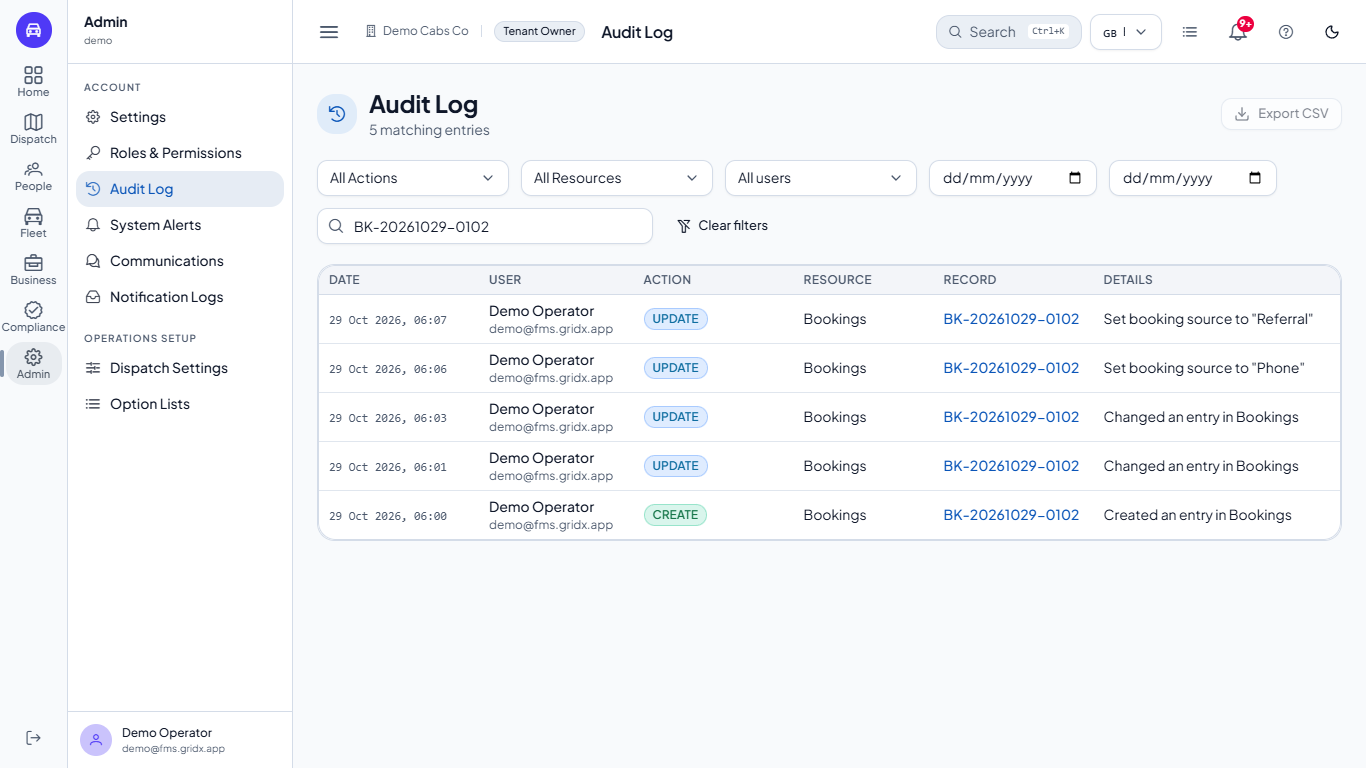
Type a booking number, a name or a user in the search box. A booking number such as BK-20261029-0102 shows its five entries: the creation and each change made to it.
Audit Log with a booking number typed in the search box showing five entries
5
Open the record
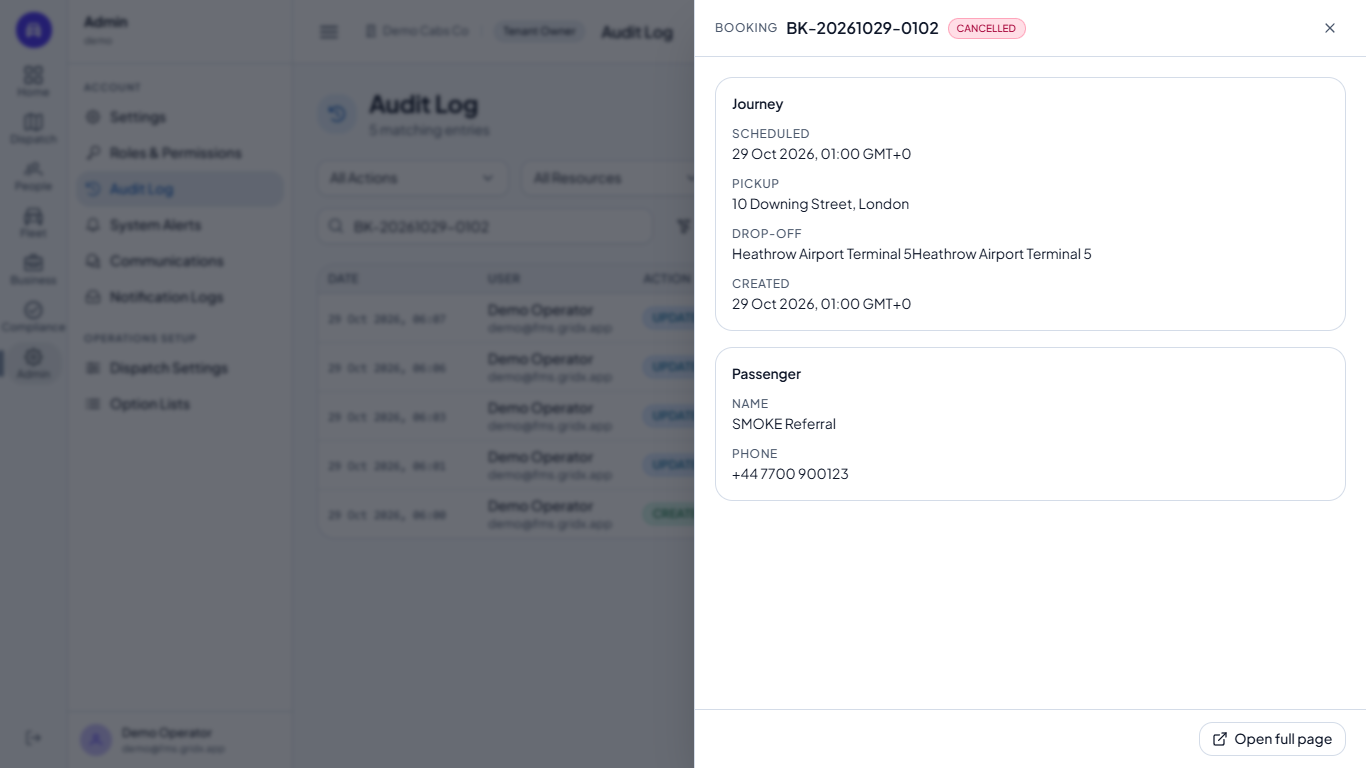
Click the blue record link. The booking opens in a panel beside the log, so you can check it without losing your place. Use Open full page when you need the whole booking, and close the panel to go back.
Booking opened in a side drawer from the Record link
6
See what changed
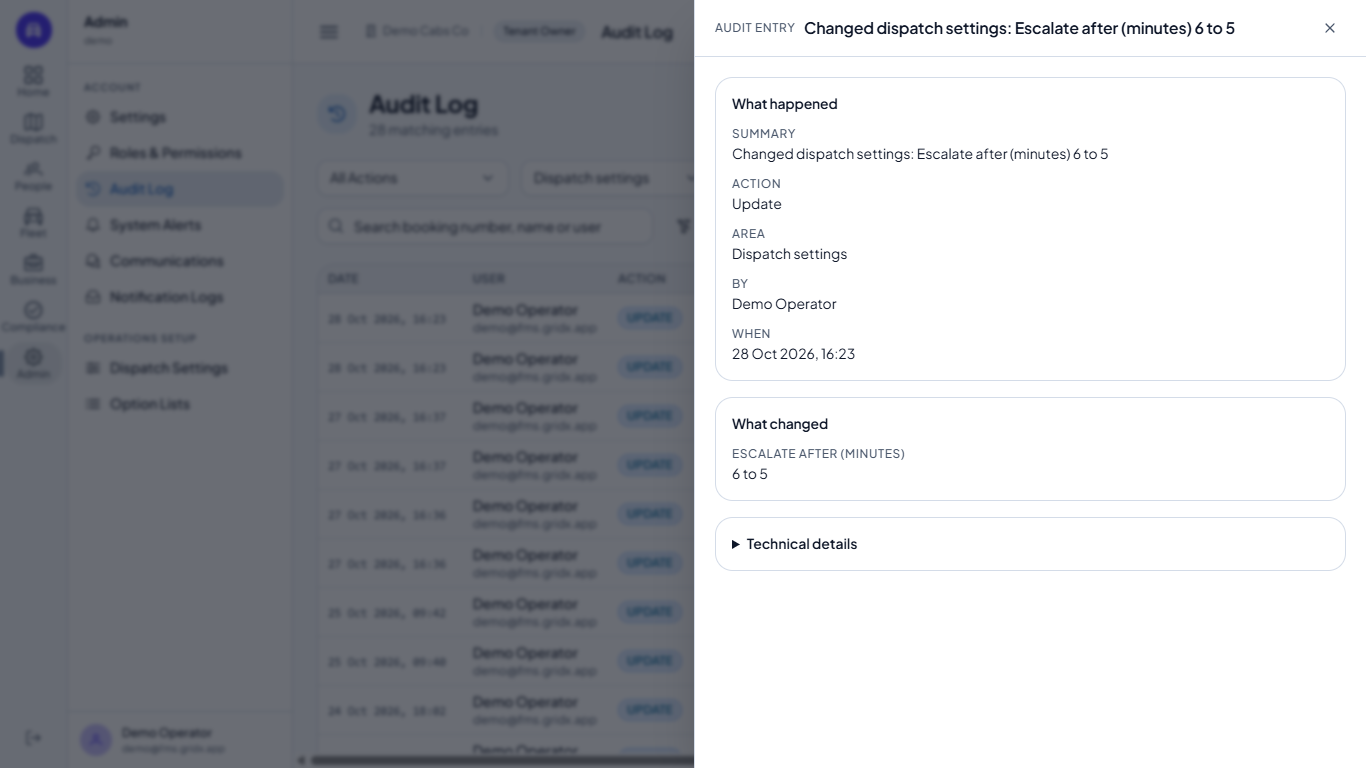
Click a row. A panel opens on the right. What happened gives the Summary, Action, Area, By and When. What changed lists each field with its old and new value, here Alert after mins from 6 to 5. Press Escape or the close button to return.
Audit entry drawer with What happened and What changed
7
Open the technical details
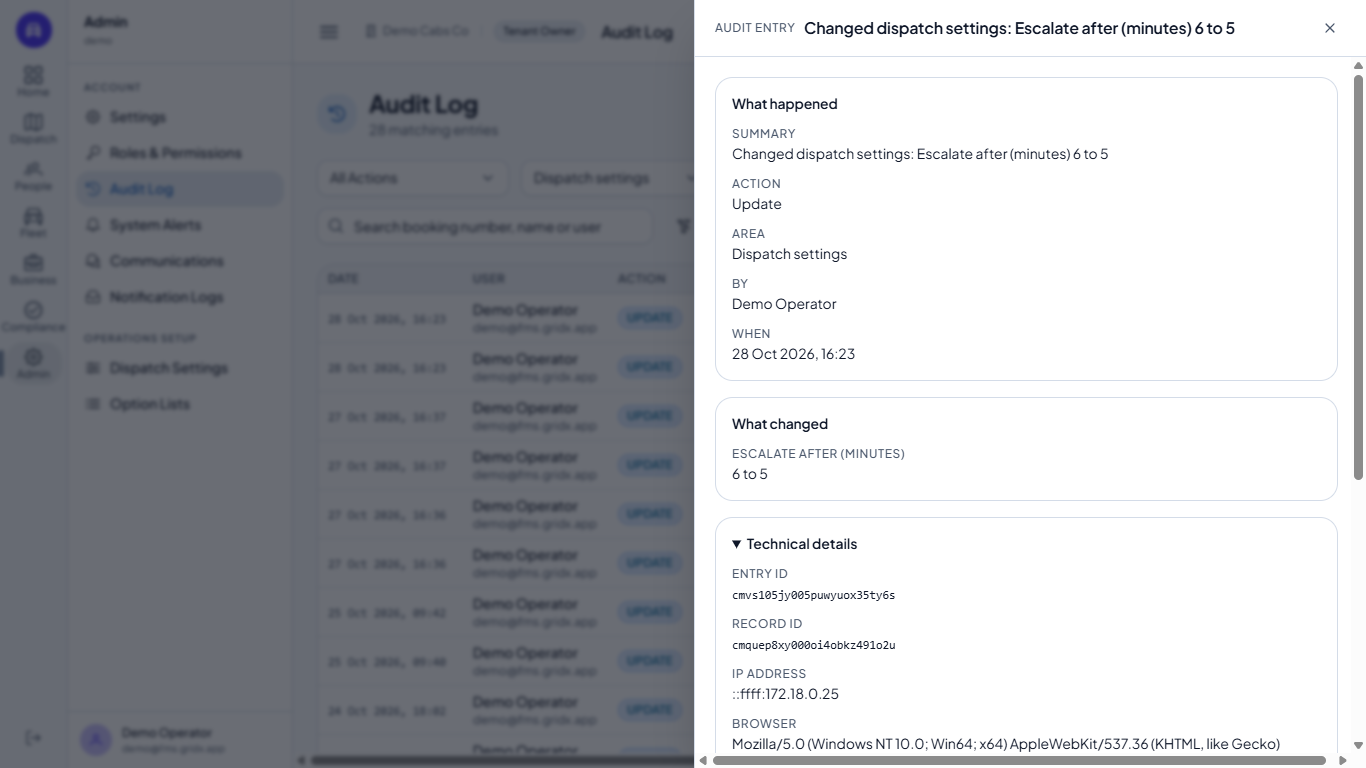
Open Technical details for the Entry ID, Record ID, IP address, Browser and the full Details of the entry. When the entry has a record, the Source link at the bottom opens it.
Audit entry technical details with entry ID, record ID, IP address and browser
8
Export to CSV
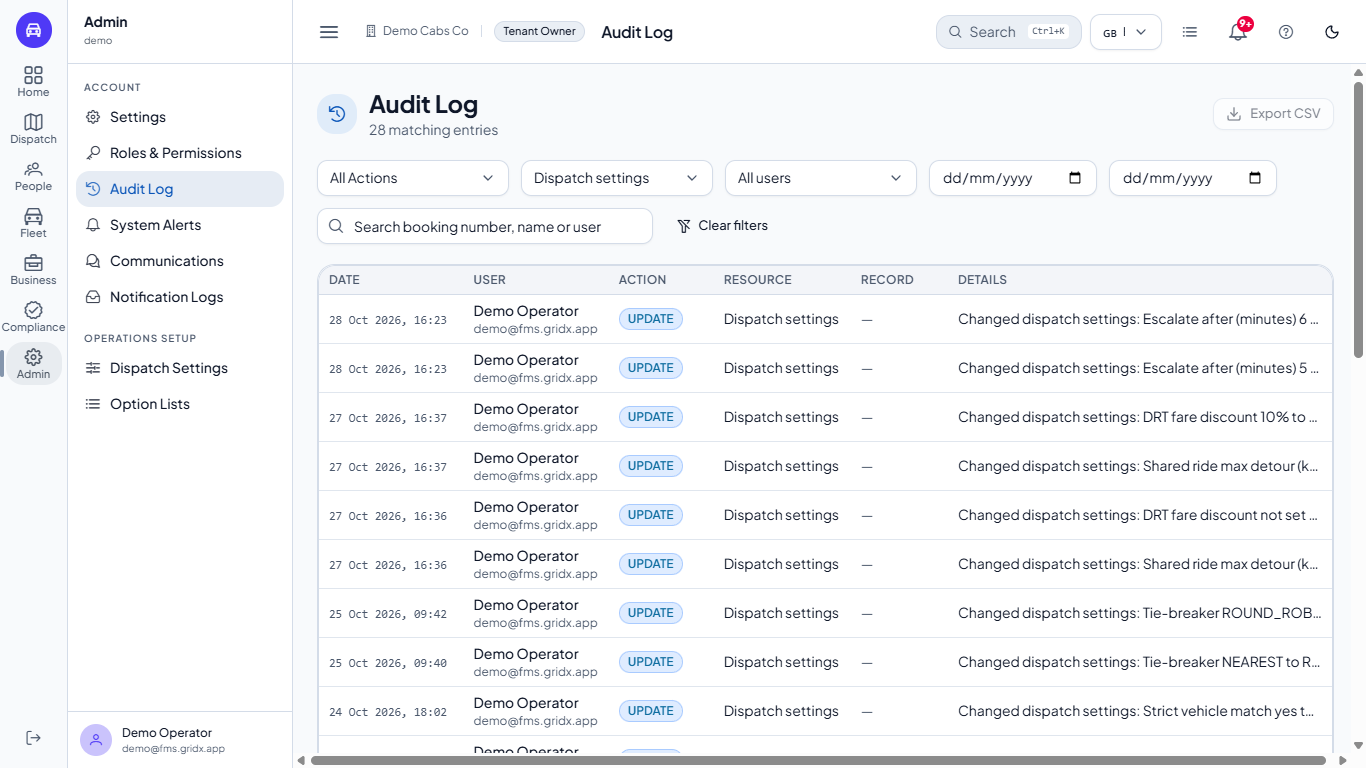
Set the filters you want and click Export CSV. The file holds every entry that matches your filters (not only the page you see), with the date, user, user email, action, area, record, details and IP address in plain words. With no filter it holds the whole log.
Audit Log filtered to Dispatch settings with the Export CSV button
9
Read the alerts in the bell
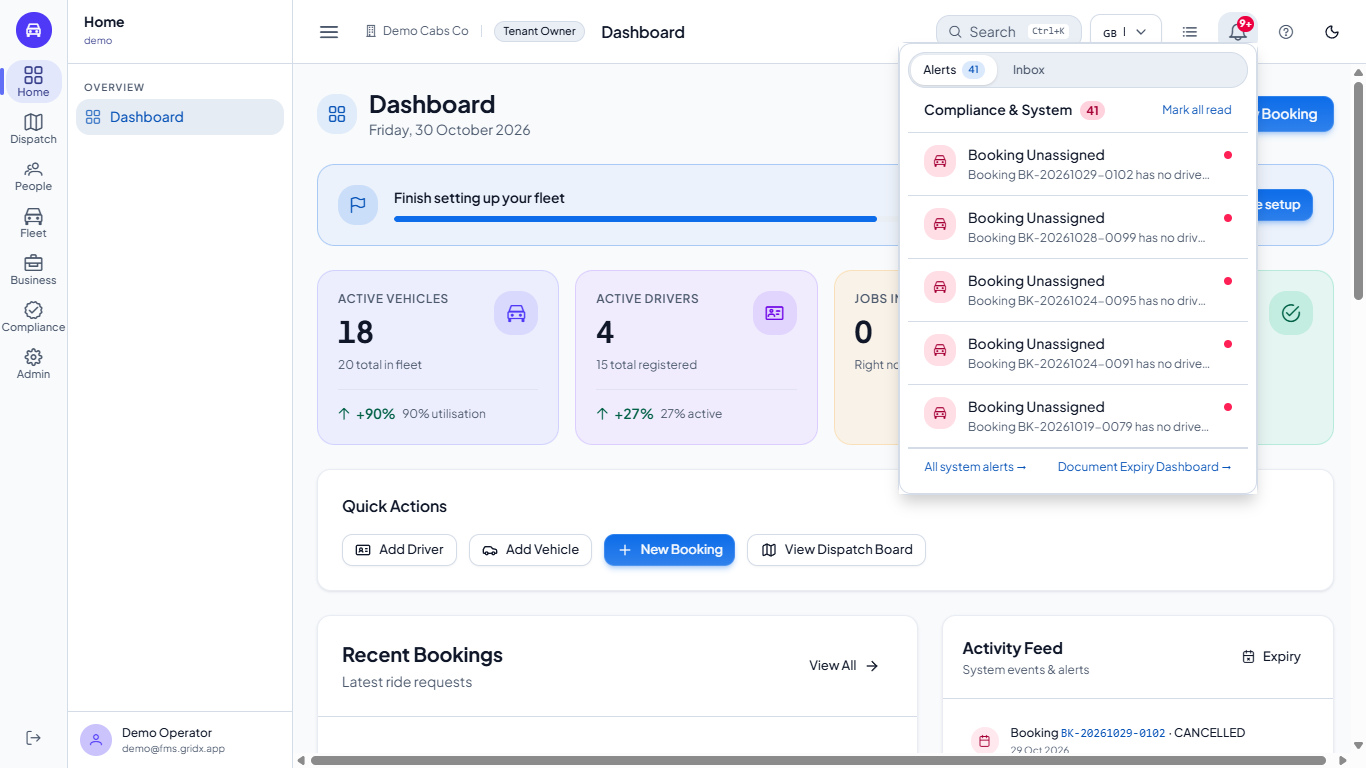
Click the bell in the top bar. The Alerts tab lists Compliance & System alerts, for example Booking Unassigned with the booking number, and a red dot marks an unread alert. Click an alert to open the booking, or use All system alerts and Document Expiry Dashboard at the bottom. The Inbox tab holds your messages.
The bell popup with three Booking Unassigned alerts and Mark all read
10
Mark all read
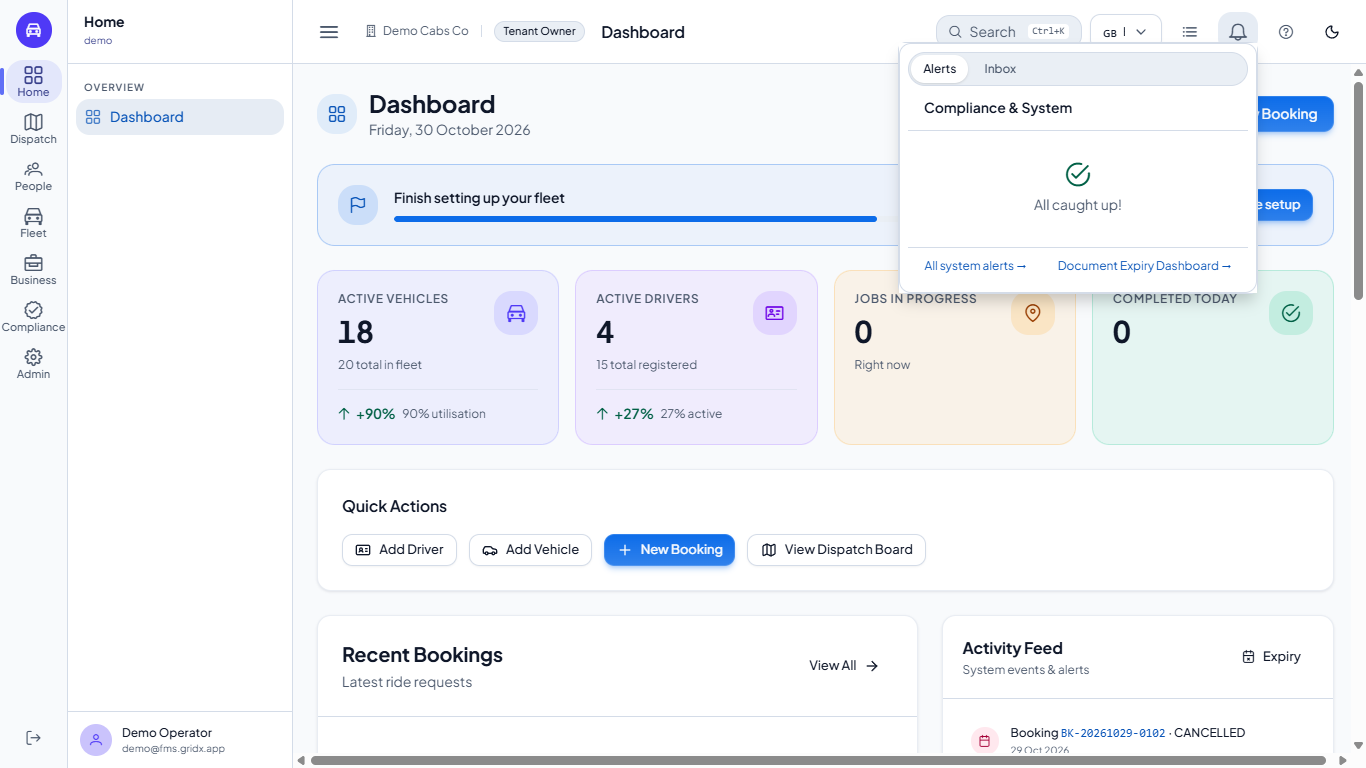
Choose Mark all read. The badge disappears and the popup says All caught up!. This is saved, so it stays that way after you reload.
The bell popup saying All caught up
11
Work through System Alerts
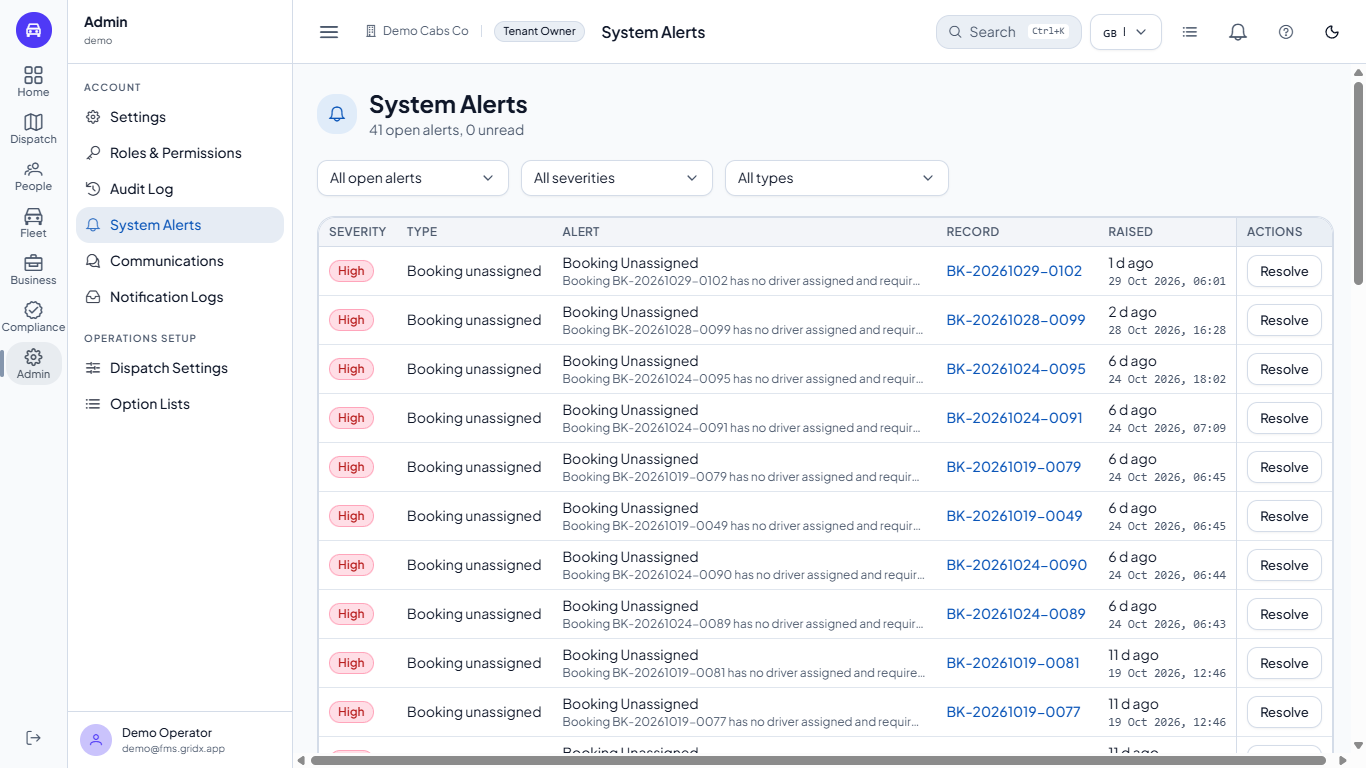
Go to Admin > System Alerts for the full list. Filter by status (All open alerts or Unread only), by severity (Low, Medium, High, Critical) and by type, such as Booking unassigned or Cold chain breach. Click the record to open the booking in a panel, and choose Resolve when the alert is handled.
System Alerts screen with filters, severity, type, record and Resolve
Check it worked
Filtering by Permission Change shows the role and user access changes with the person who made them.
An opened entry shows the same date and user as its row.
After Mark all read and a reload, the bell still says All caught up!.
How do I see who changed a user's role? Filter the audit log by Permission Change, then open the entry to see who did it, when, and what changed.
Can I see the IP address of a change? Yes. Open the entry and expand Technical details to see the IP address and the browser. The CSV export has it too.
How many entries are shown at a time? Thirty per page, with the total in the subtitle. Export CSV saves all matching entries.