How to keep an event's files together and restrict ID scans
A wedding generates paper: the agreed menu, the decor proof, the ID scan of the person who booked. The Documents tab keeps them with the event and lets you restrict identity scans to the people who may see them.
Who it is forEvent coordinator / front-desk staffTime6 minutesProductMMSLevelBeginner
Before you start
Steps
1
Open the Documents tab
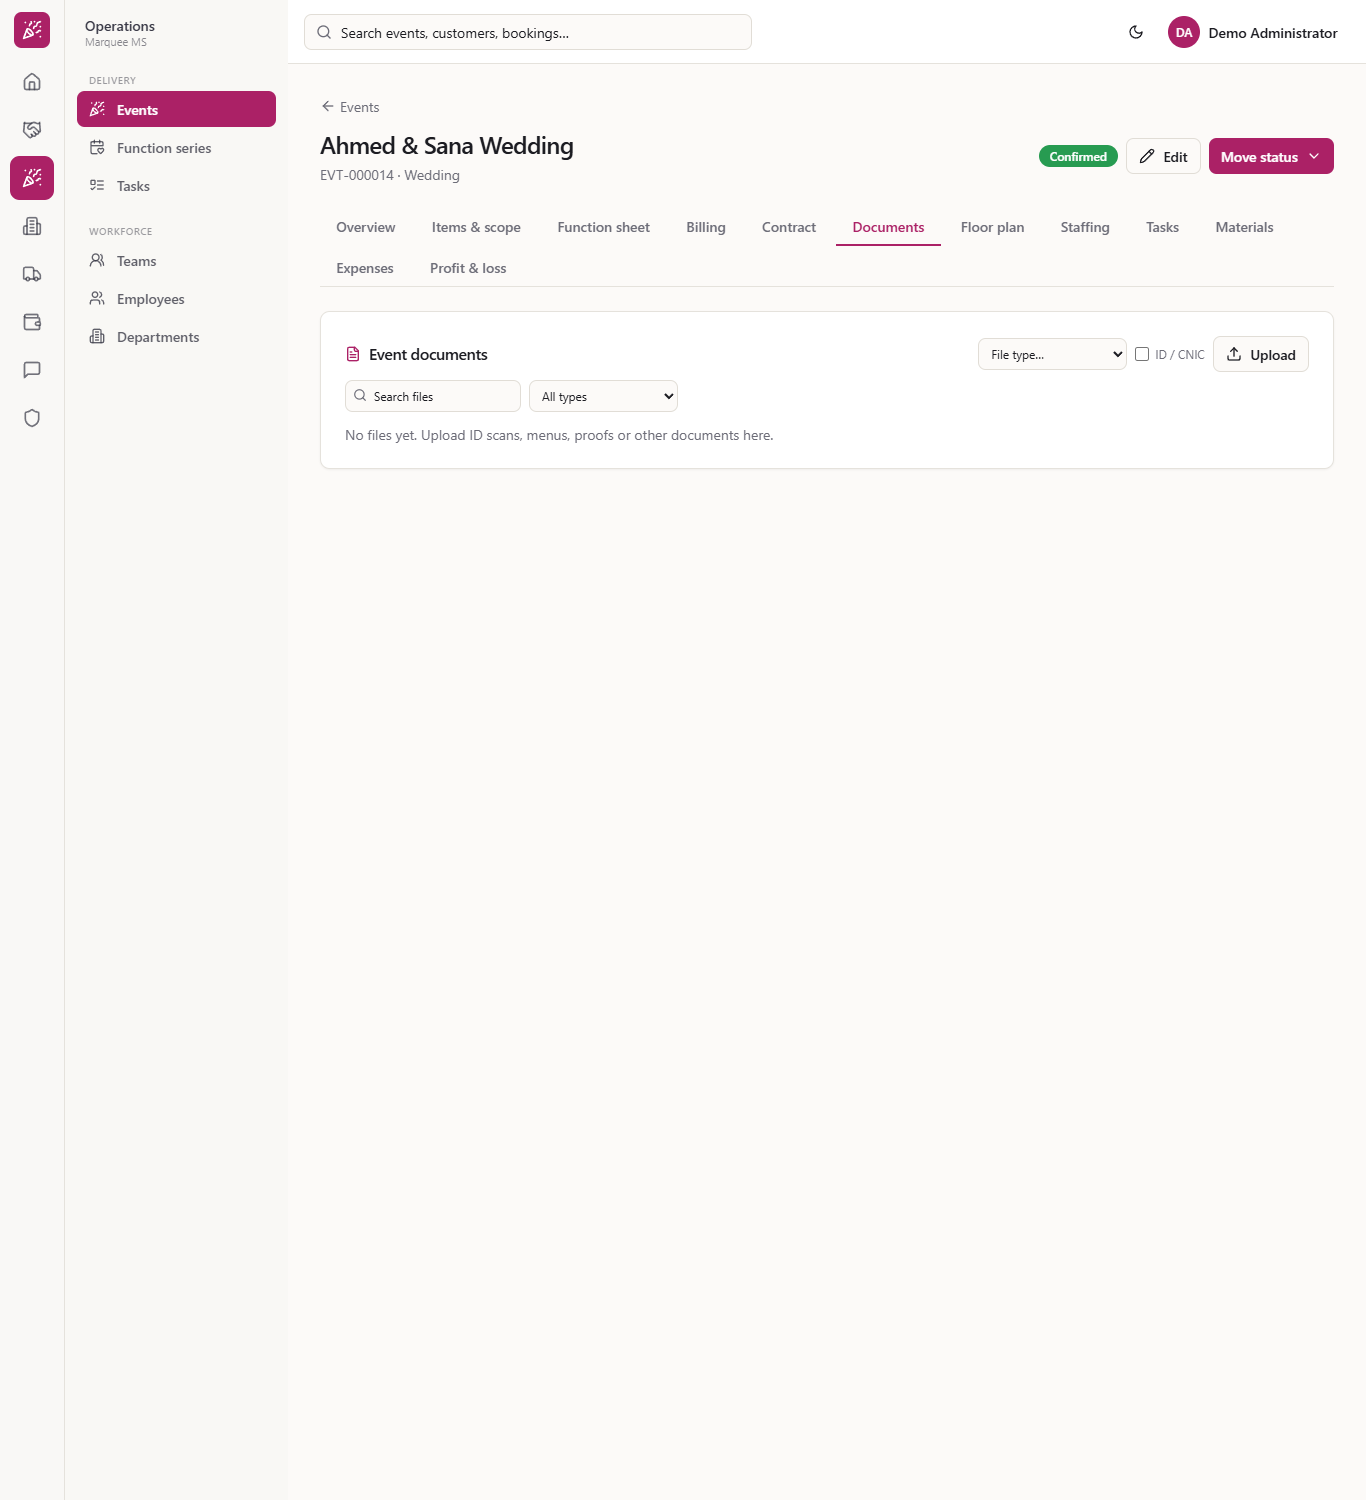
Open the event (here Ahmed & Sana Wedding) and choose Documents. The card Event documents has a File type… box, a checkbox ID / CNIC, an Upload button, a Search files box and an All types filter. A new event says "No files yet. Upload ID scans, menus, proofs or other documents here."
Documents tab with no files
2
Choose a file type
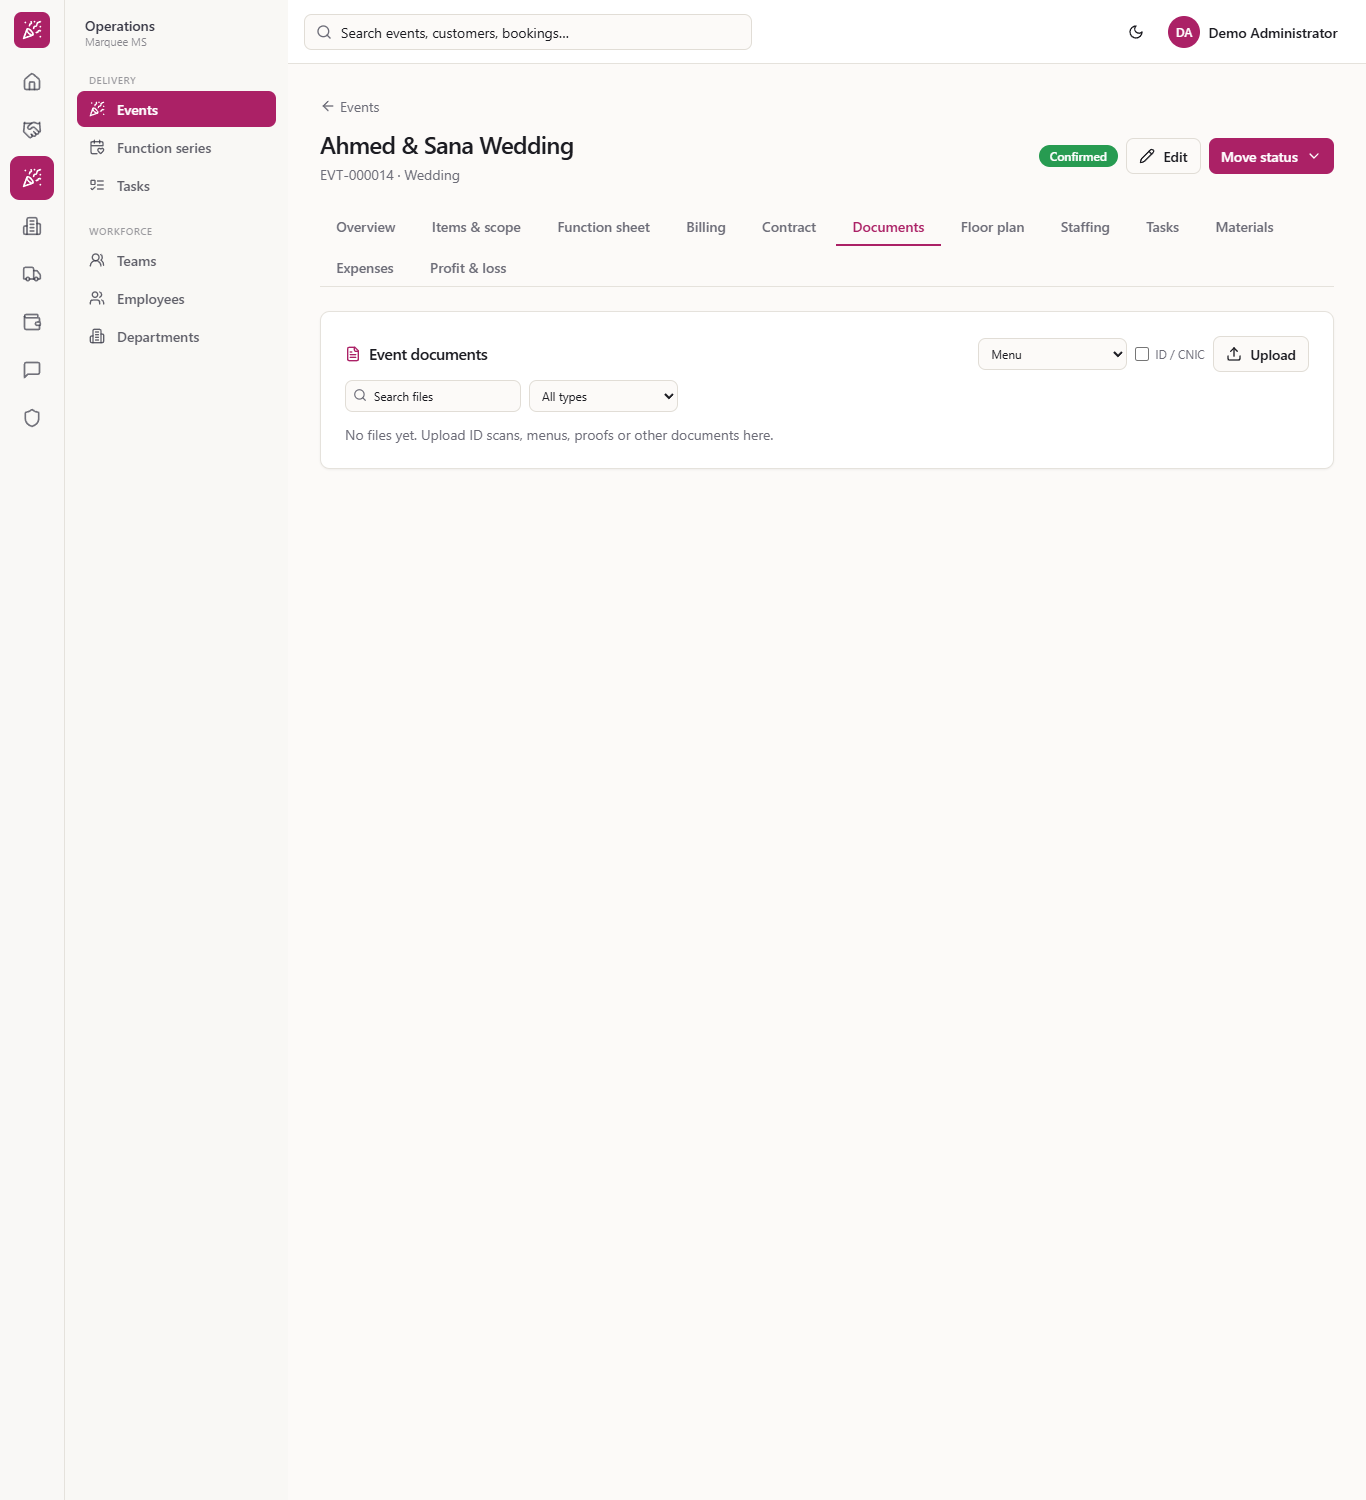
Before you upload, open File type… and choose what the file is: Menu, Proof / approval, Contract, Invoice / receipt, Photo, ID / CNIC (restricted) or Other. The box keeps your last choice for the next upload.
The File type list
3
Upload the file
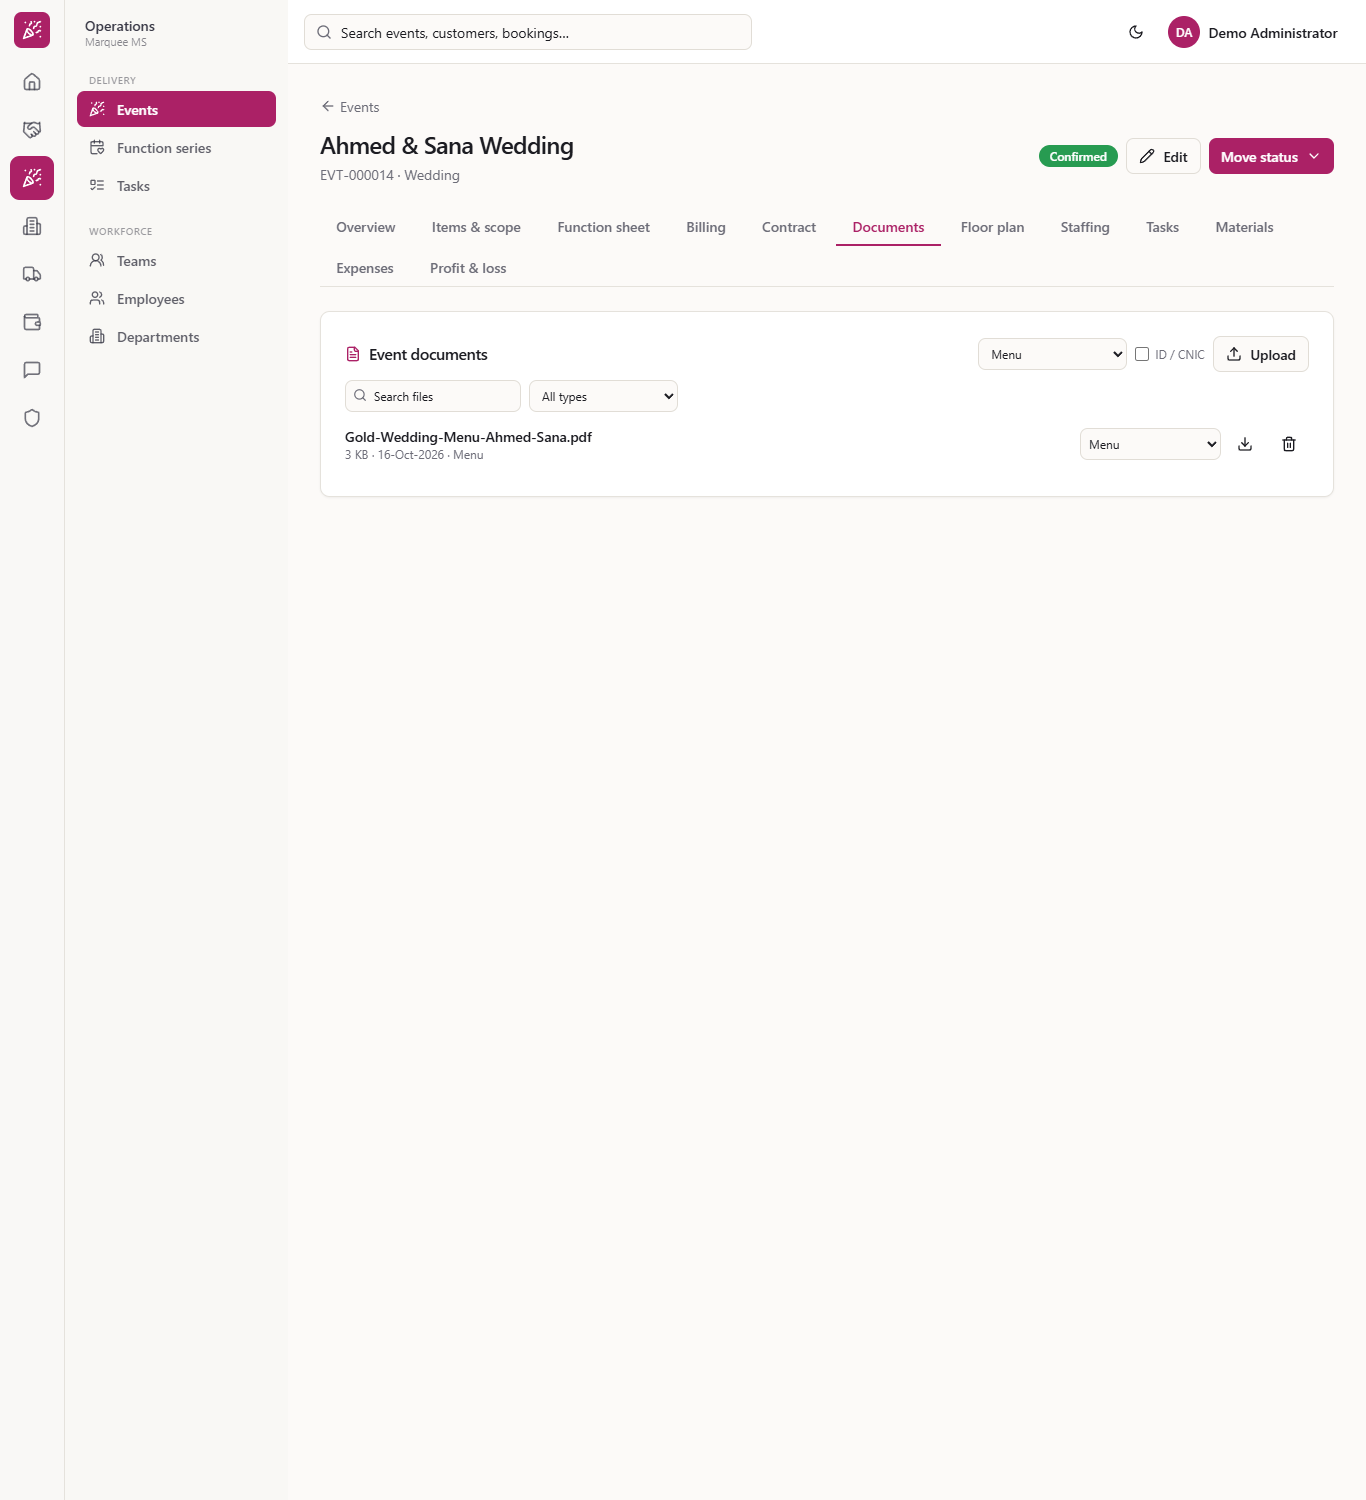
Press Upload and choose one file. Files can be up to 25 MB. The file is saved at once and appears as, for example, "Gold-Wedding-Menu-Ahmed-Sana.pdf · 3 KB · 16-Oct-2026 · Menu", with its own type box, a download icon and a bin.
The menu PDF in the list after upload
4
ID scans are restricted automatically
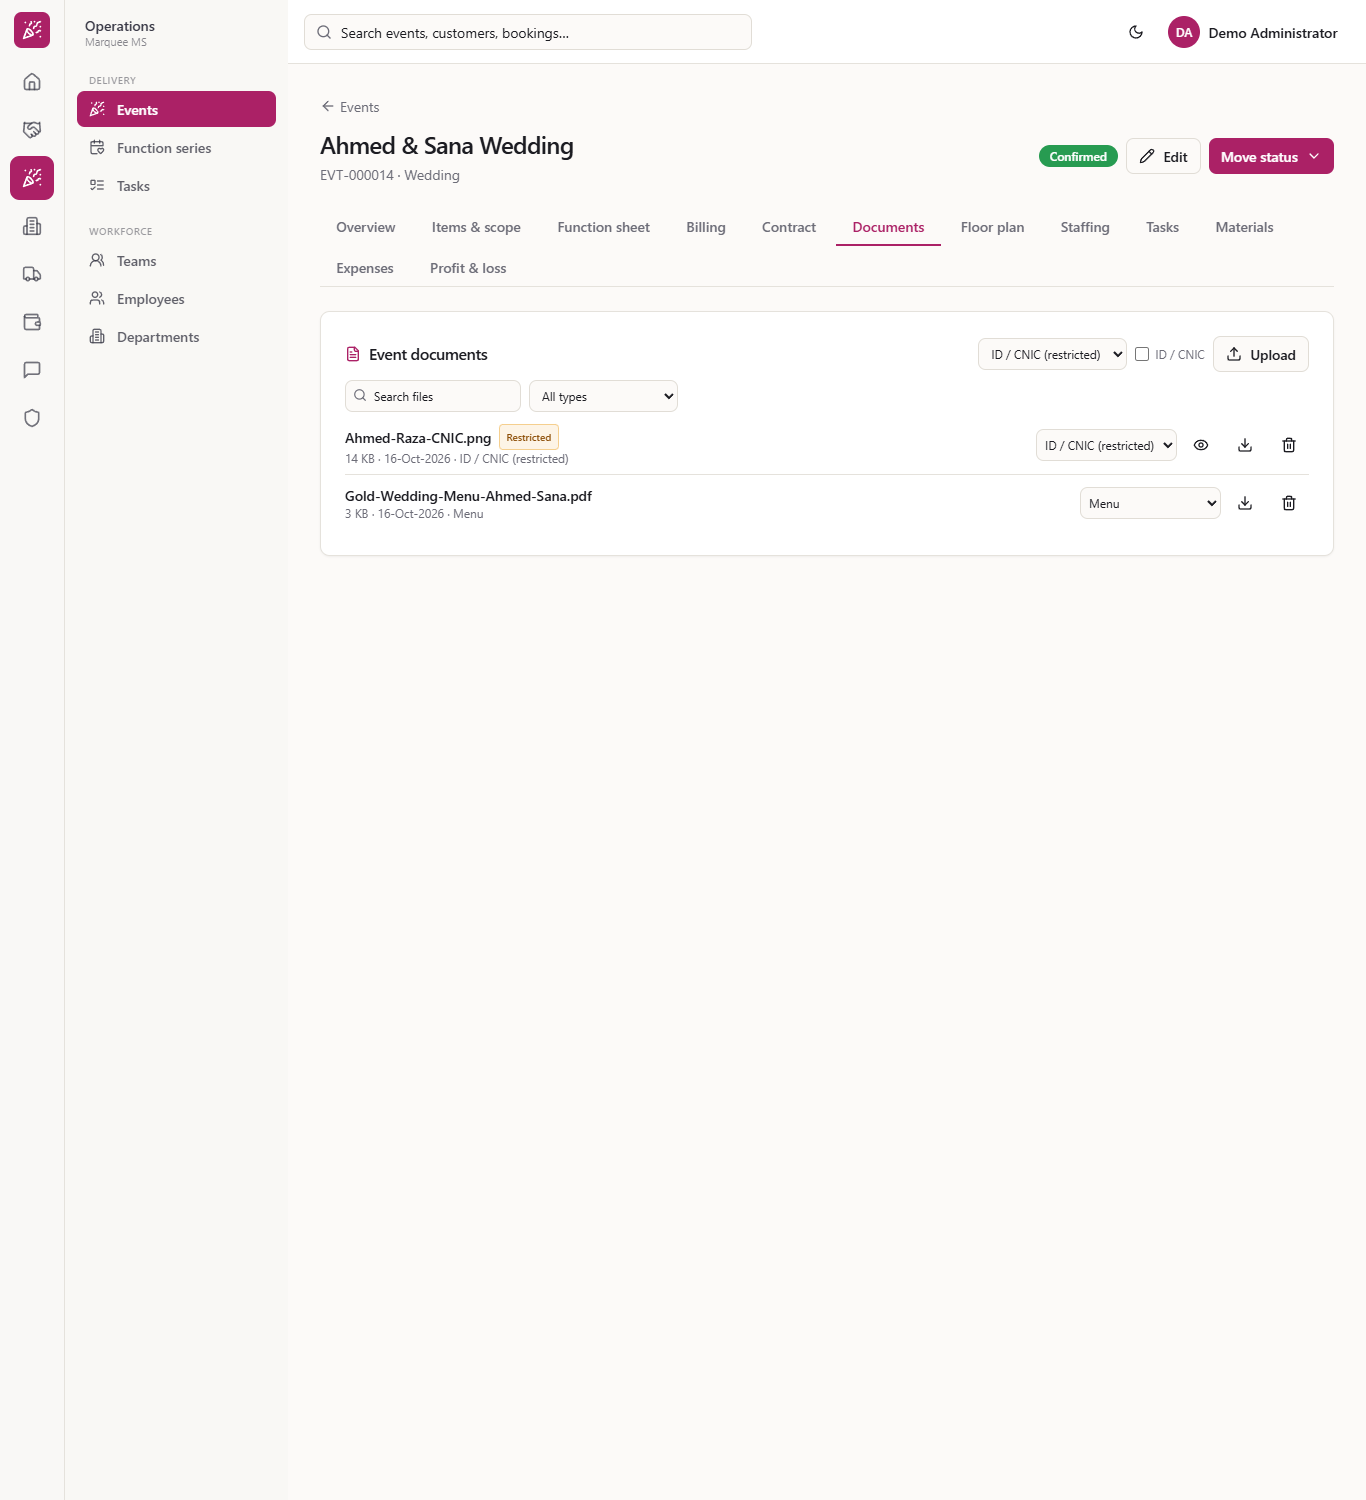
Choose ID / CNIC (restricted) and upload the scan. Ahmed-Raza-CNIC.png appears with an amber Restricted badge even though the ID / CNIC box was not ticked.
An ID scan with the amber Restricted badge
5
Restrict any other file
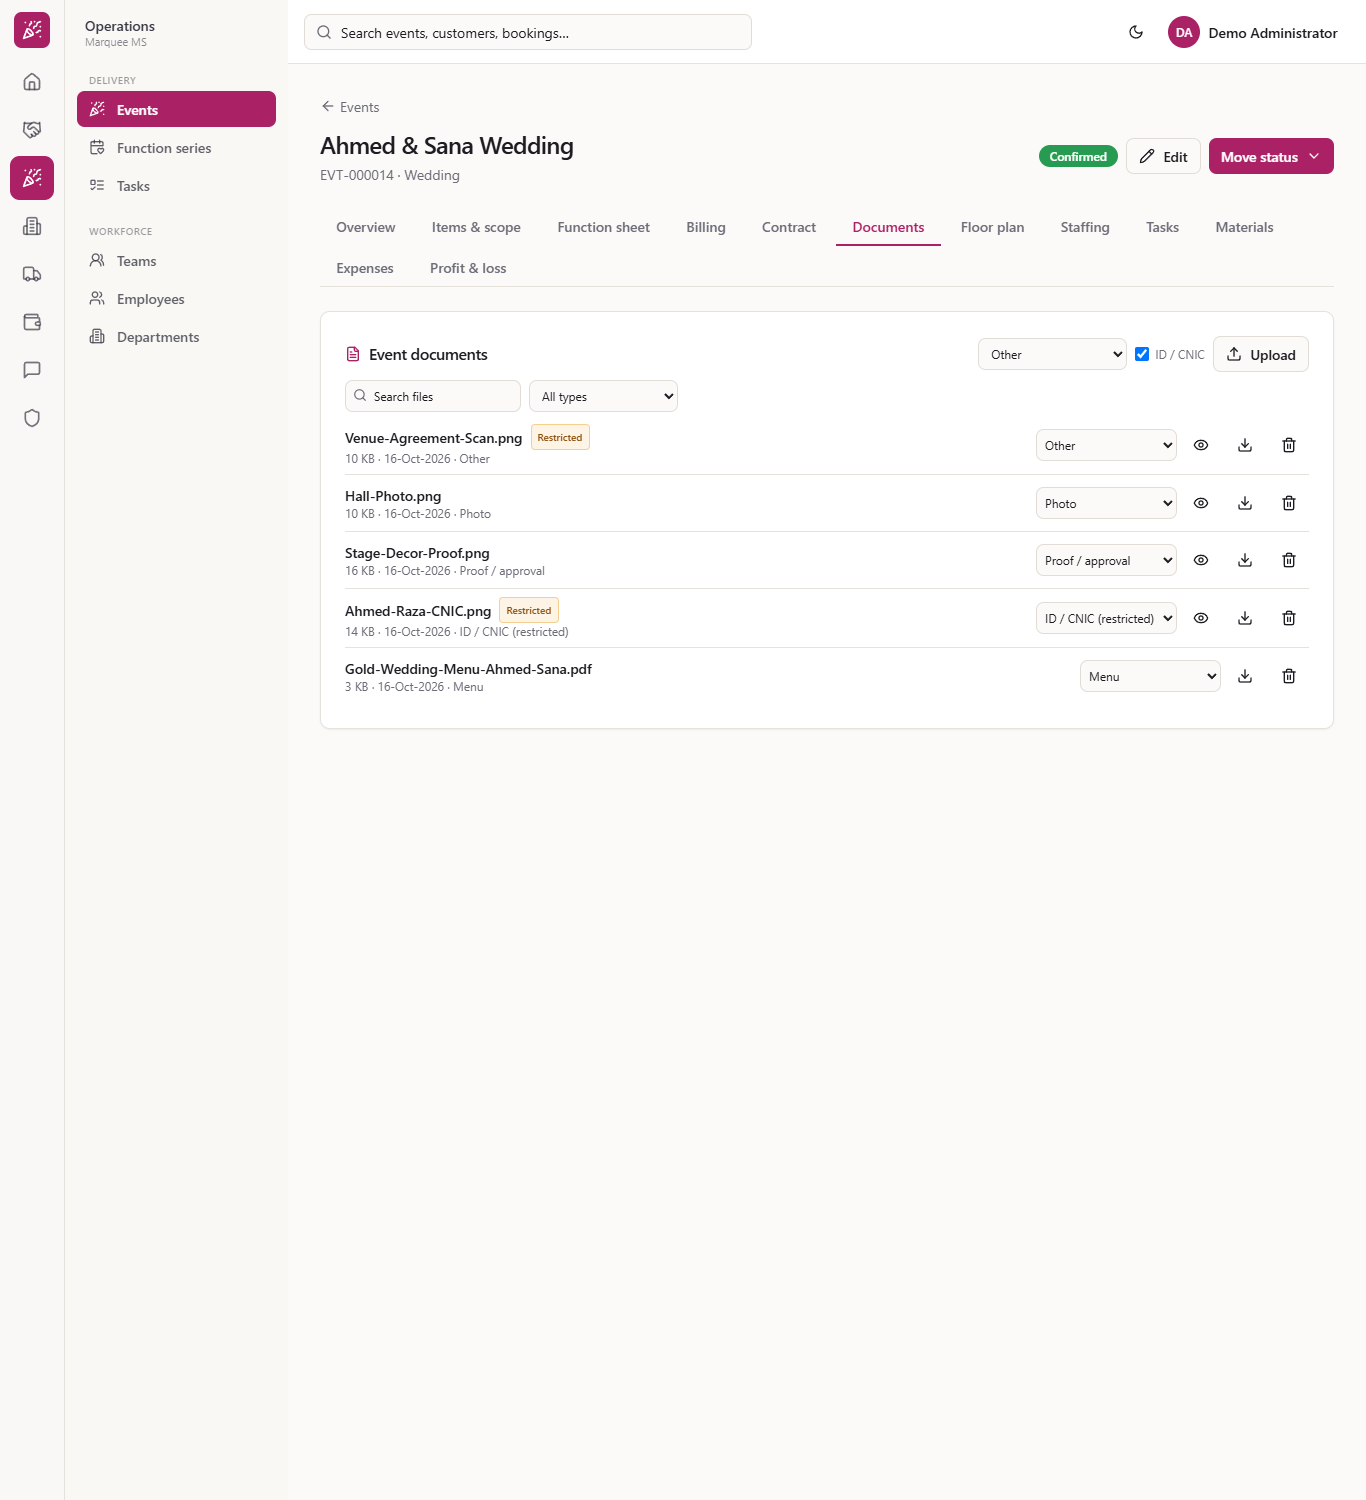
For another private file, such as a signed agreement scan, tick ID / CNIC before you press Upload. Hover the box and it says it restricts viewing to users with the sensitive-documents permission. The file, here Venue-Agreement-Scan.png with the type Other, gets the Restricted badge.
ID / CNIC box ticked and a restricted file of type Other
6
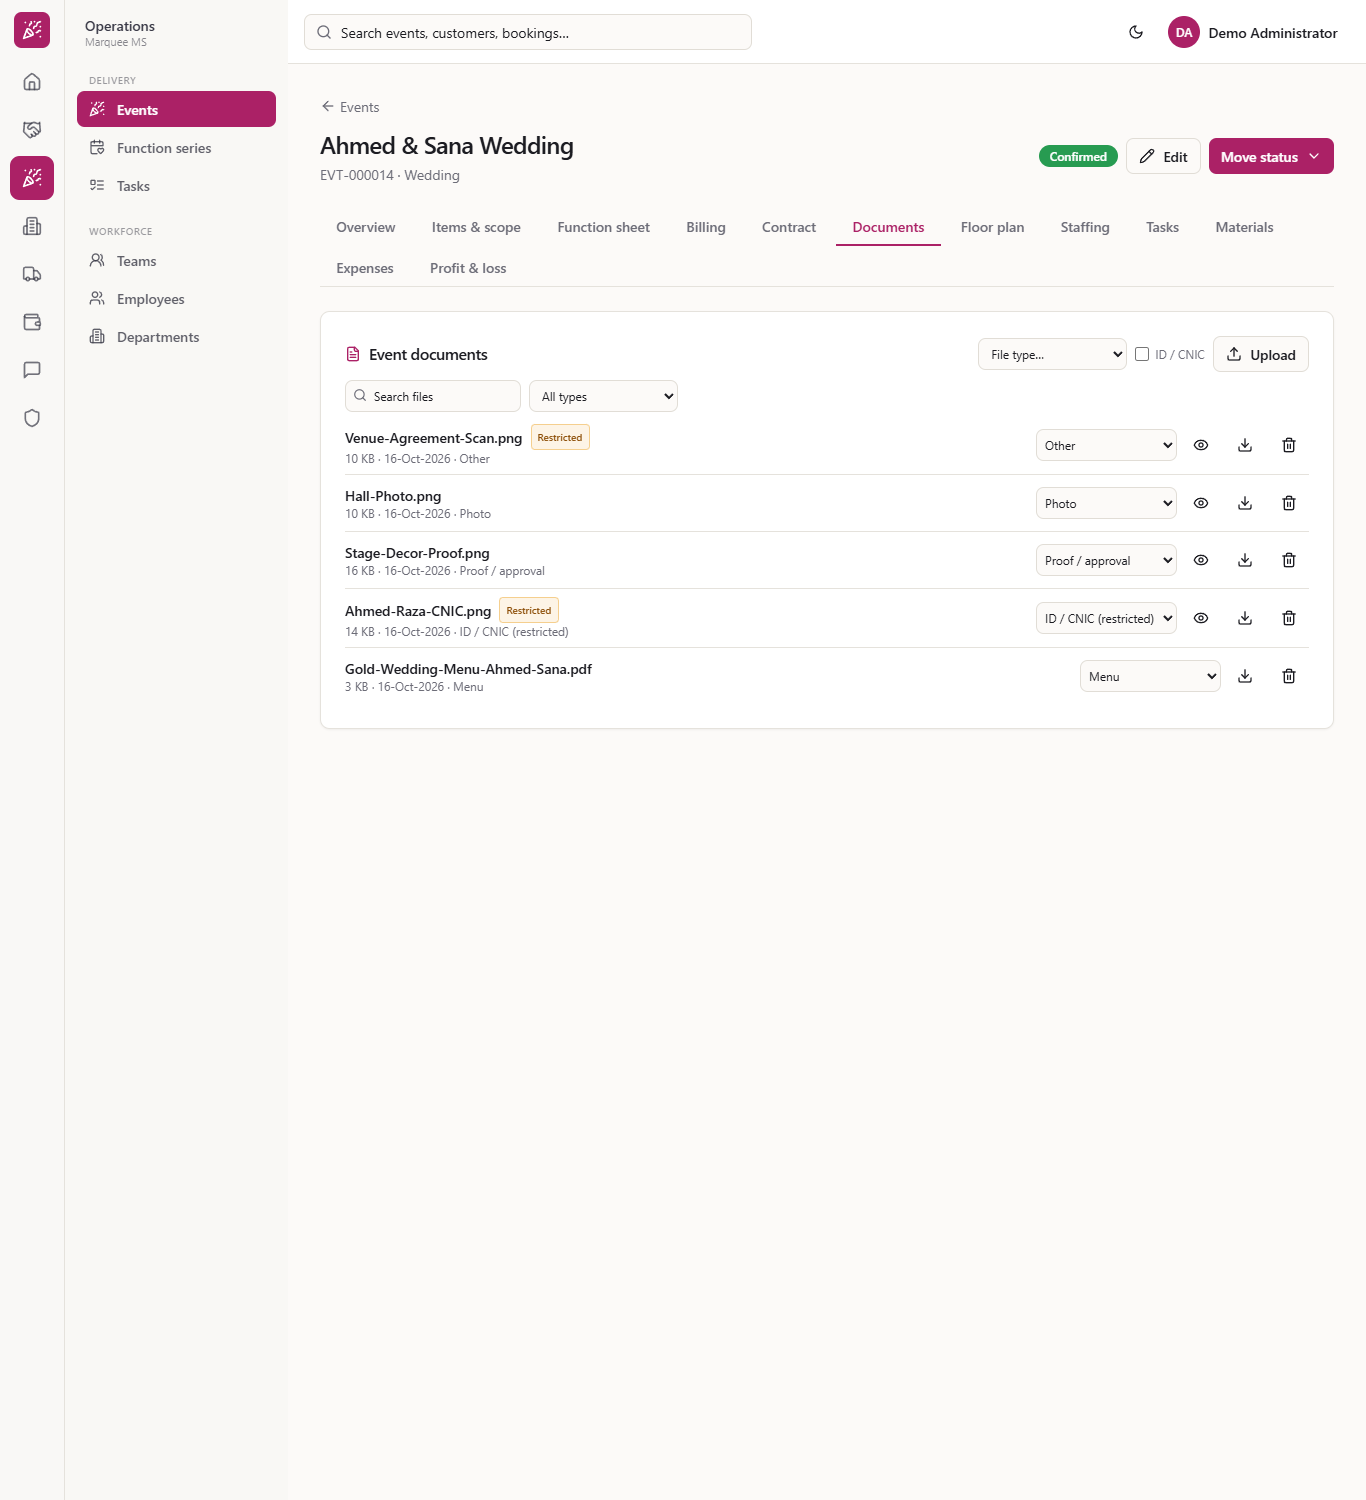
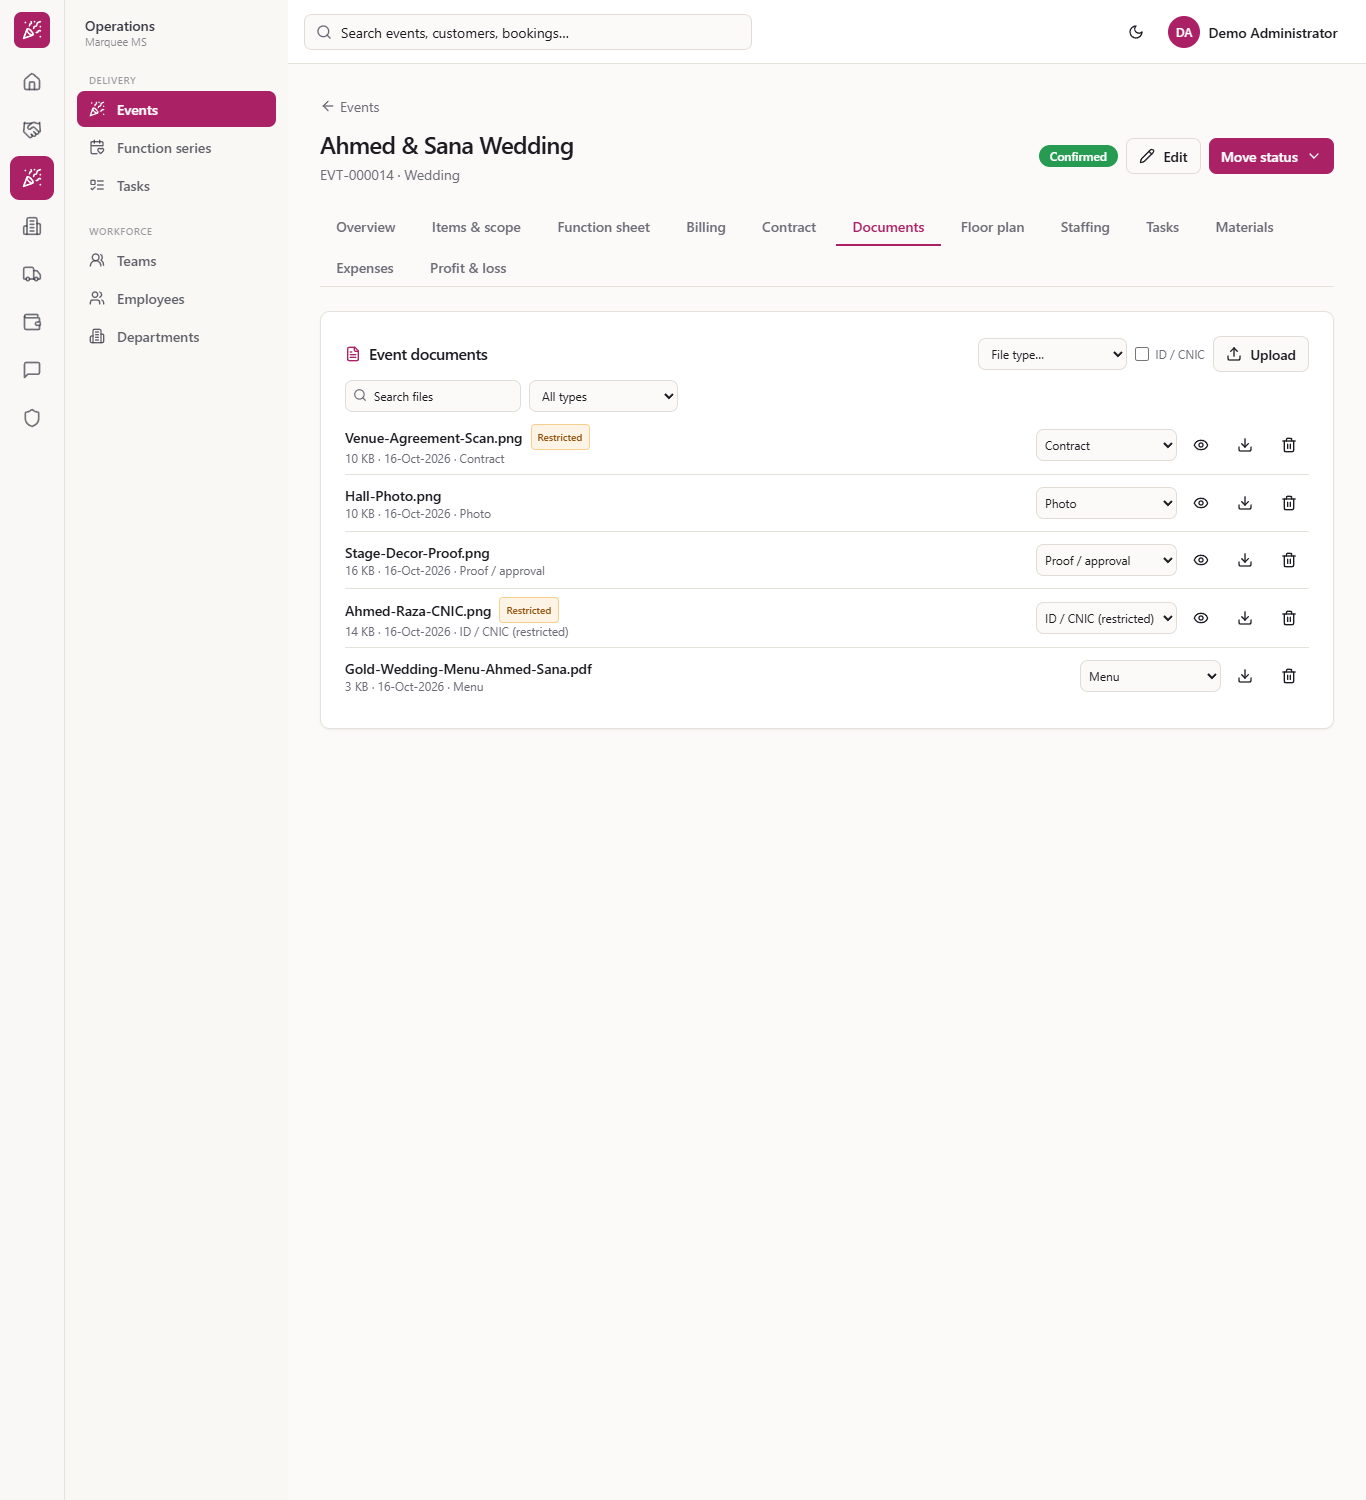
Read the list
Each row shows the name, the Restricted badge where it applies and "size · date · type". A file with no type reads "No type" and offers Set type…. Images have an eye icon, and every file has a download icon and a bin. The newest file is on top.
The list of files, newest first
7
Search by name
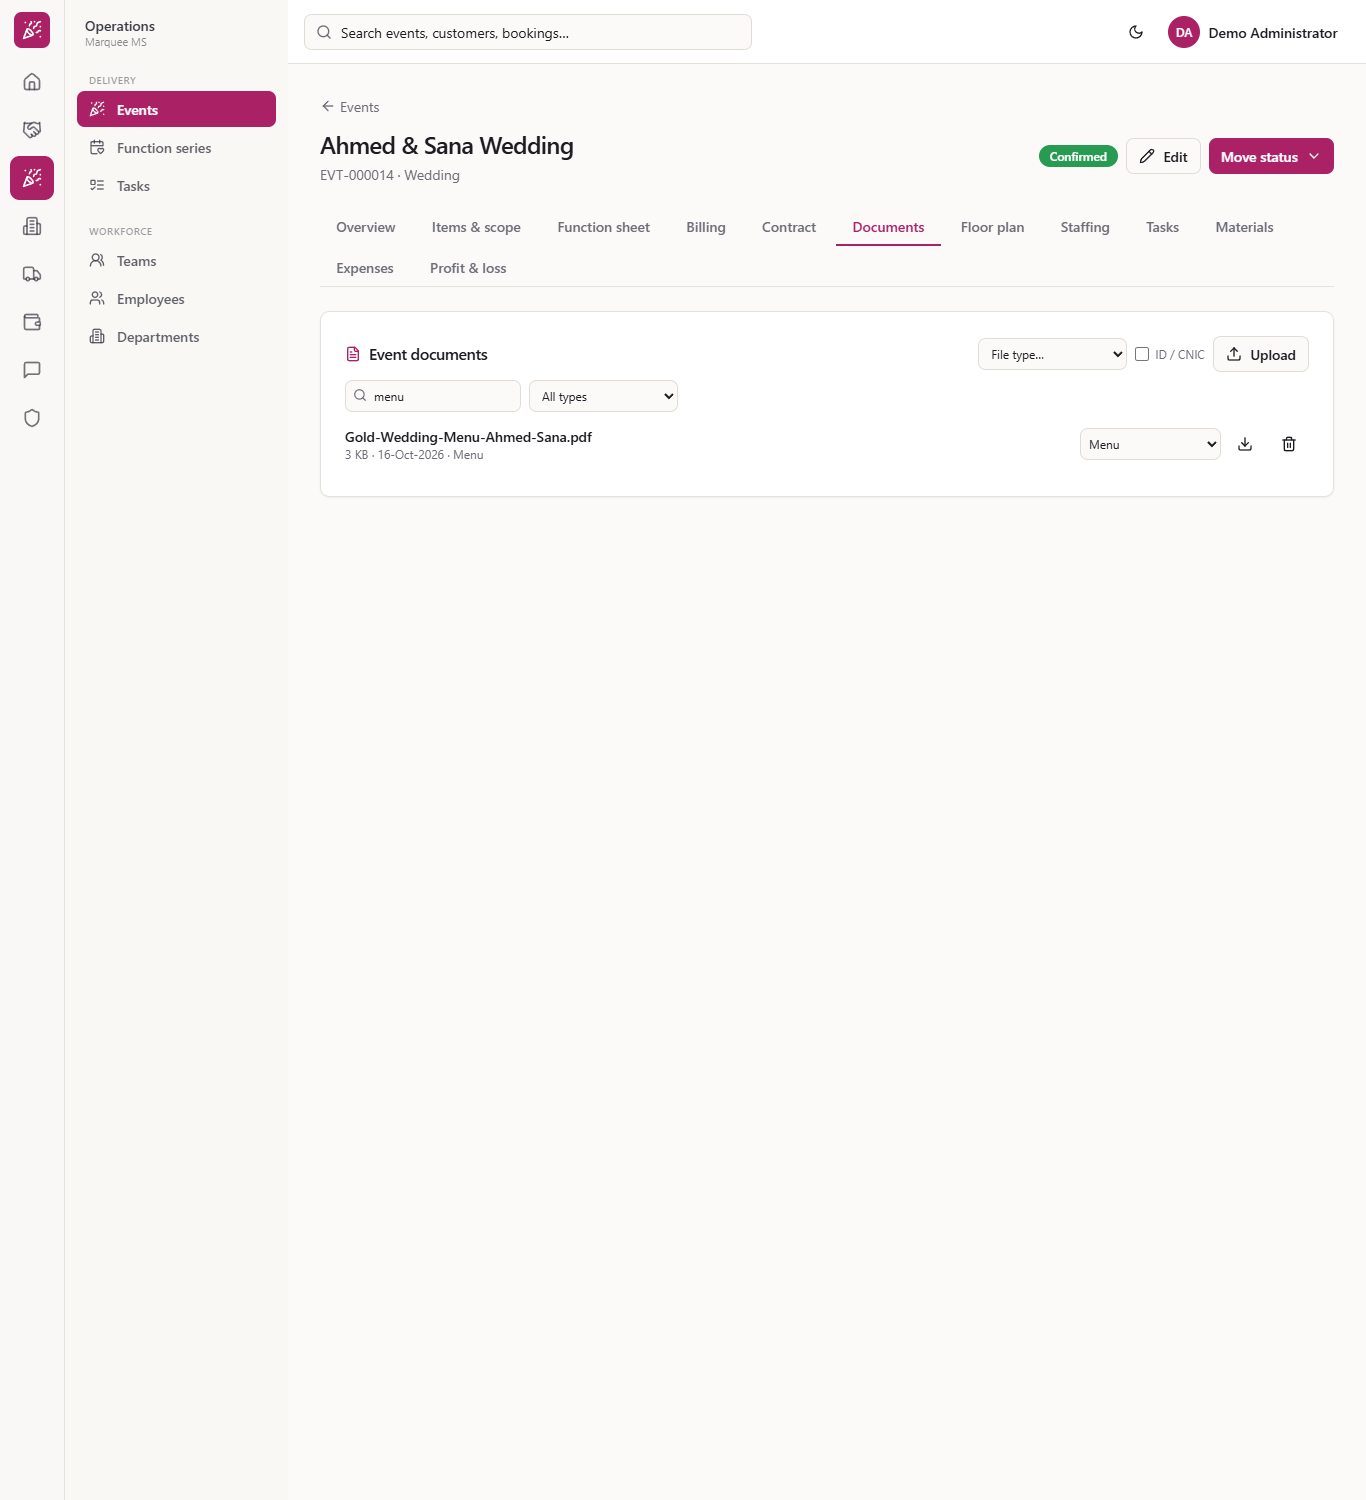
Type part of a name in Search files, for example "menu", and only Gold-Wedding-Menu-Ahmed-Sana.pdf remains.
Search files narrowing the list to the menu
8
Filter by type
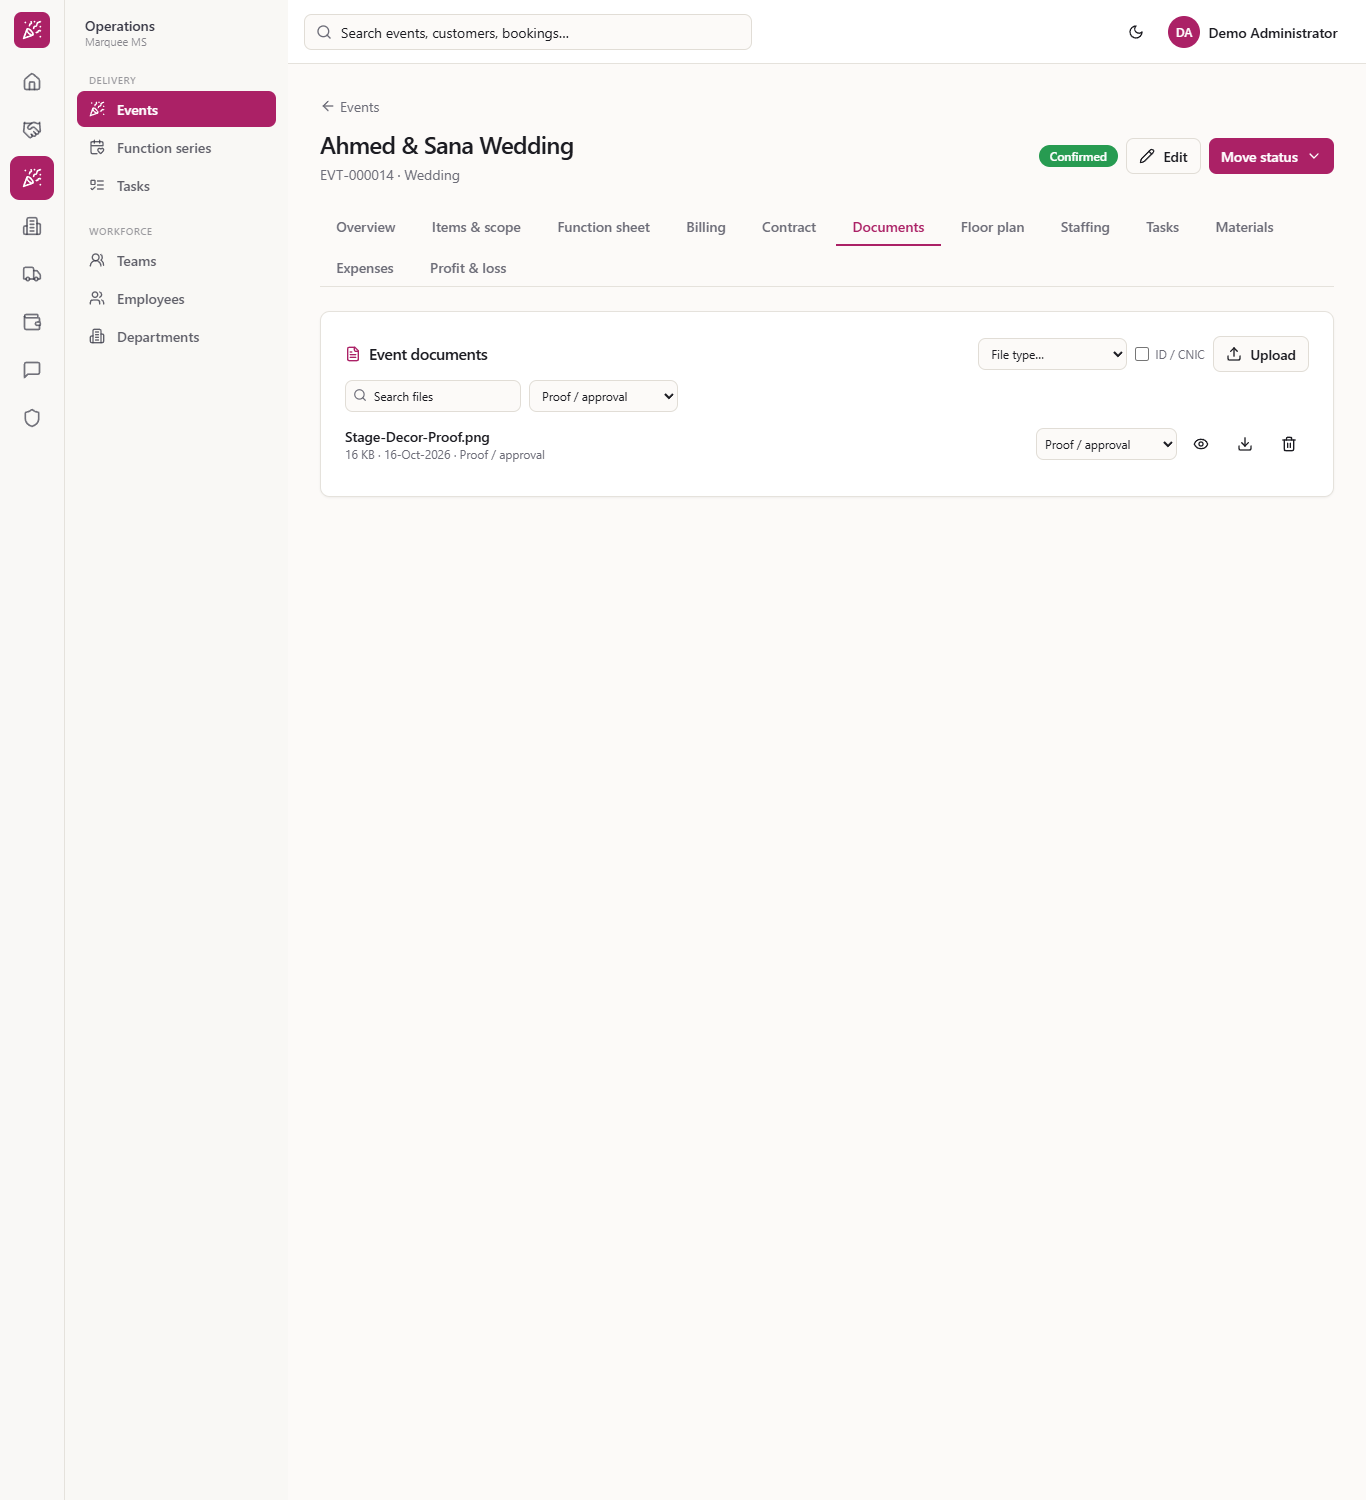
Open the All types filter and choose a type such as Proof / approval. Only Stage-Decor-Proof.png remains. Choose All types to see everything again.
The list filtered to Proof / approval
9
Change the type
If a file is labelled wrongly, use the type box on its own row. Here Venue-Agreement-Scan.png now reads Contract and keeps its Restricted badge.
A file relabelled to Contract
10
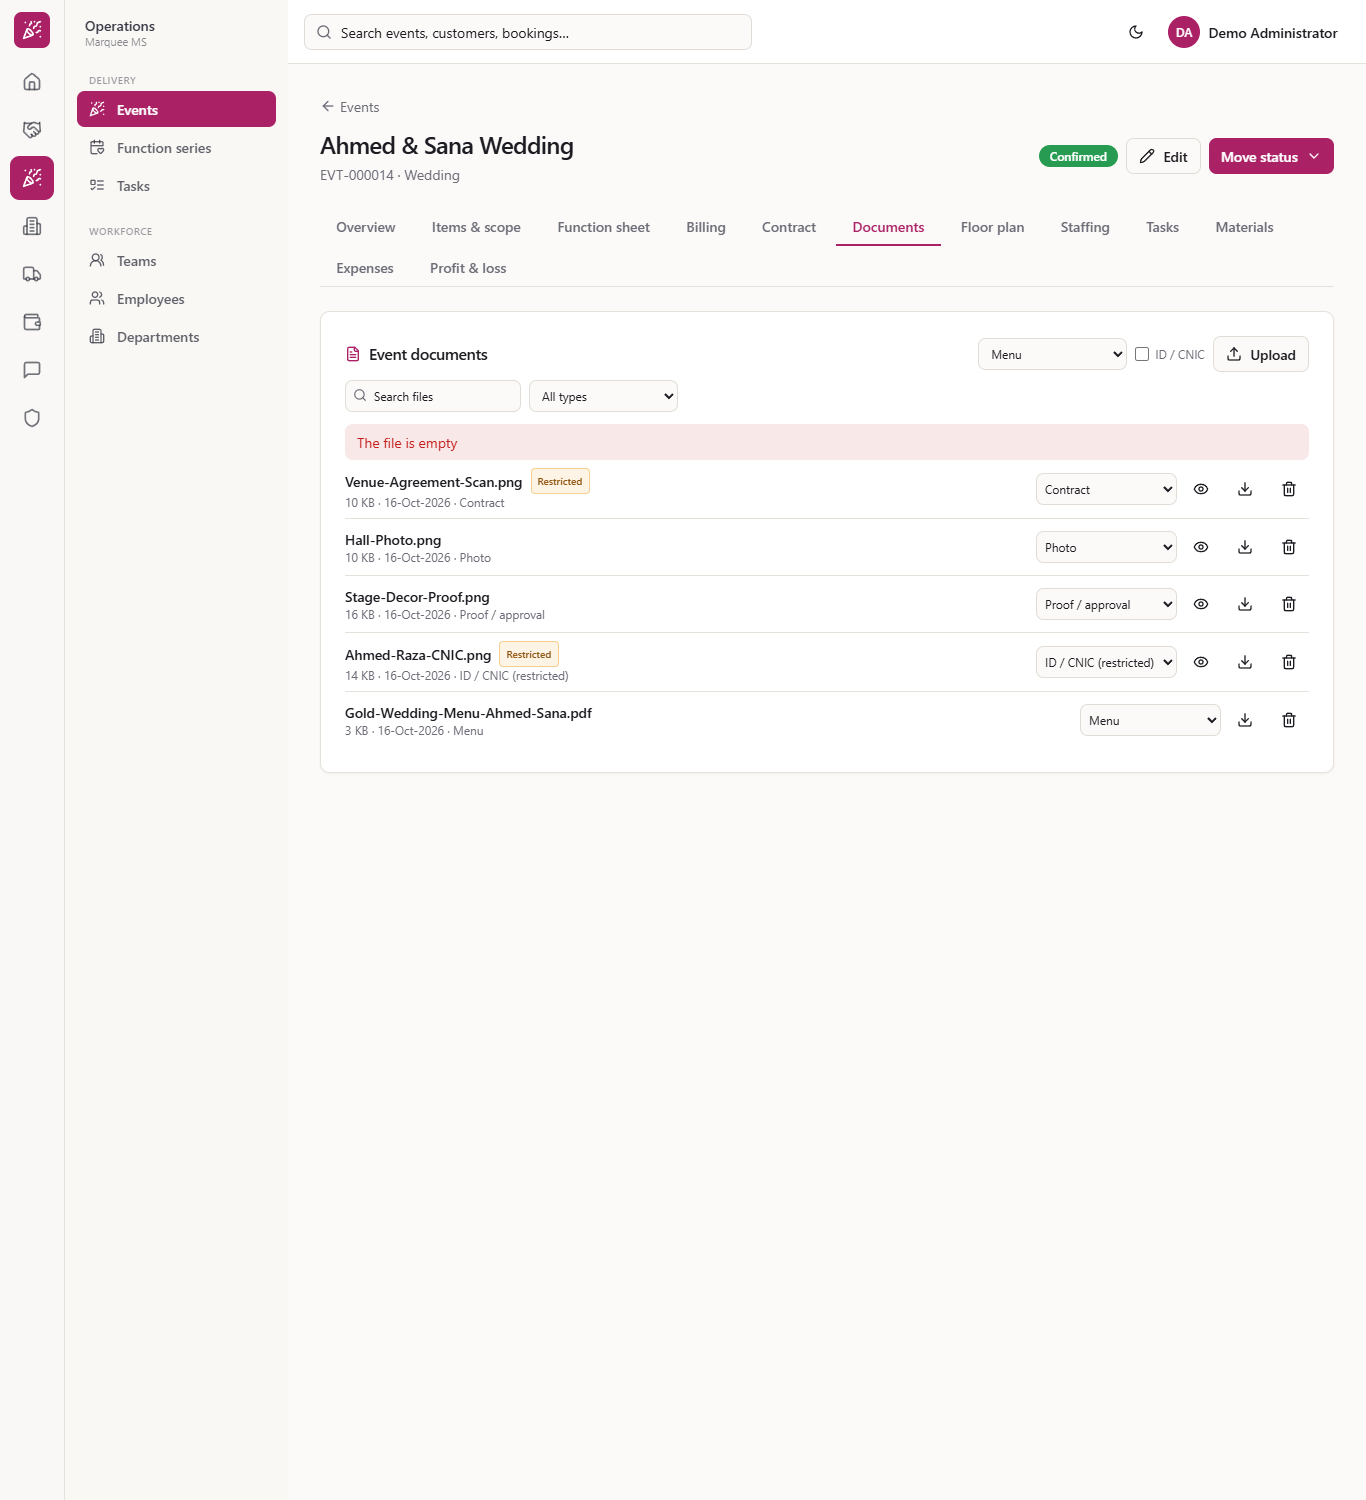
An empty file is refused
Upload an empty file and a red message says "The file is empty". Nothing is added.
The message The file is empty
11
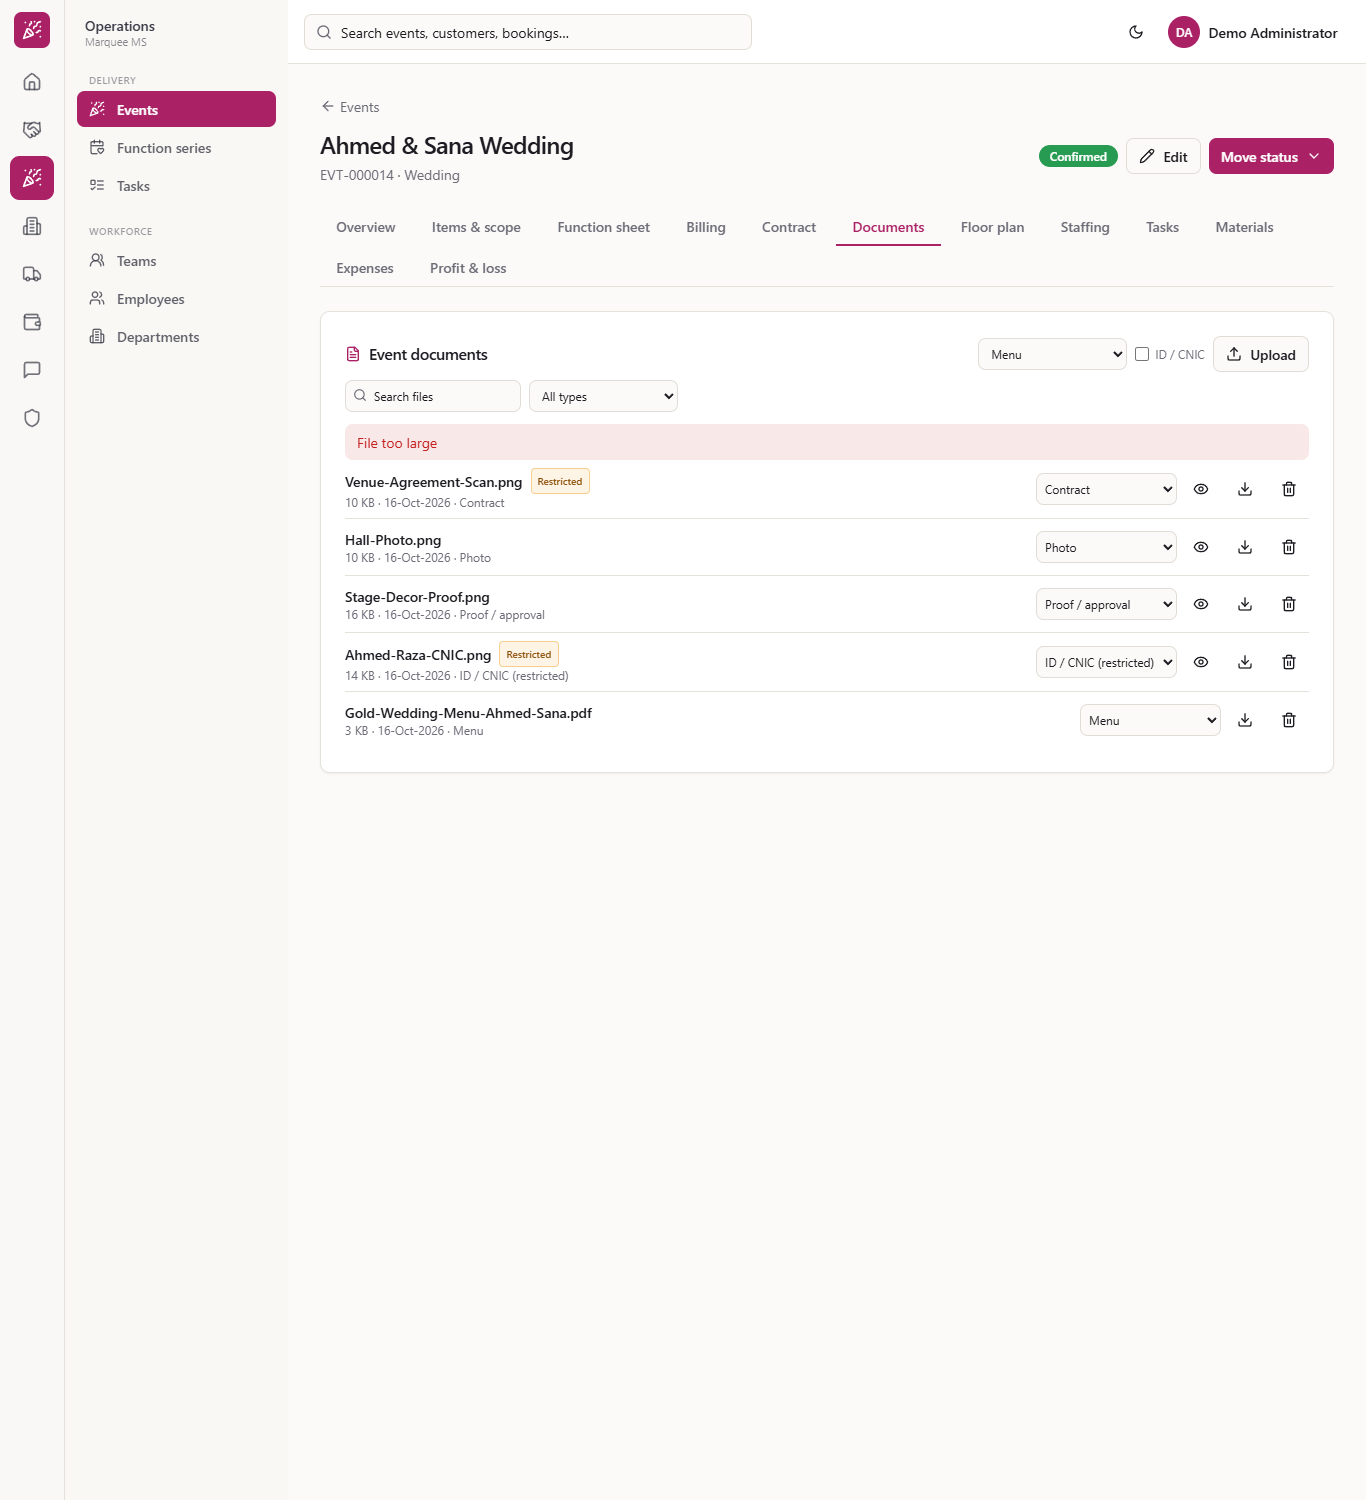
A file over 25 MB is refused
Upload a file over 25 MB and the message says "File too large". Reduce the size and try again.
The message File too large
12
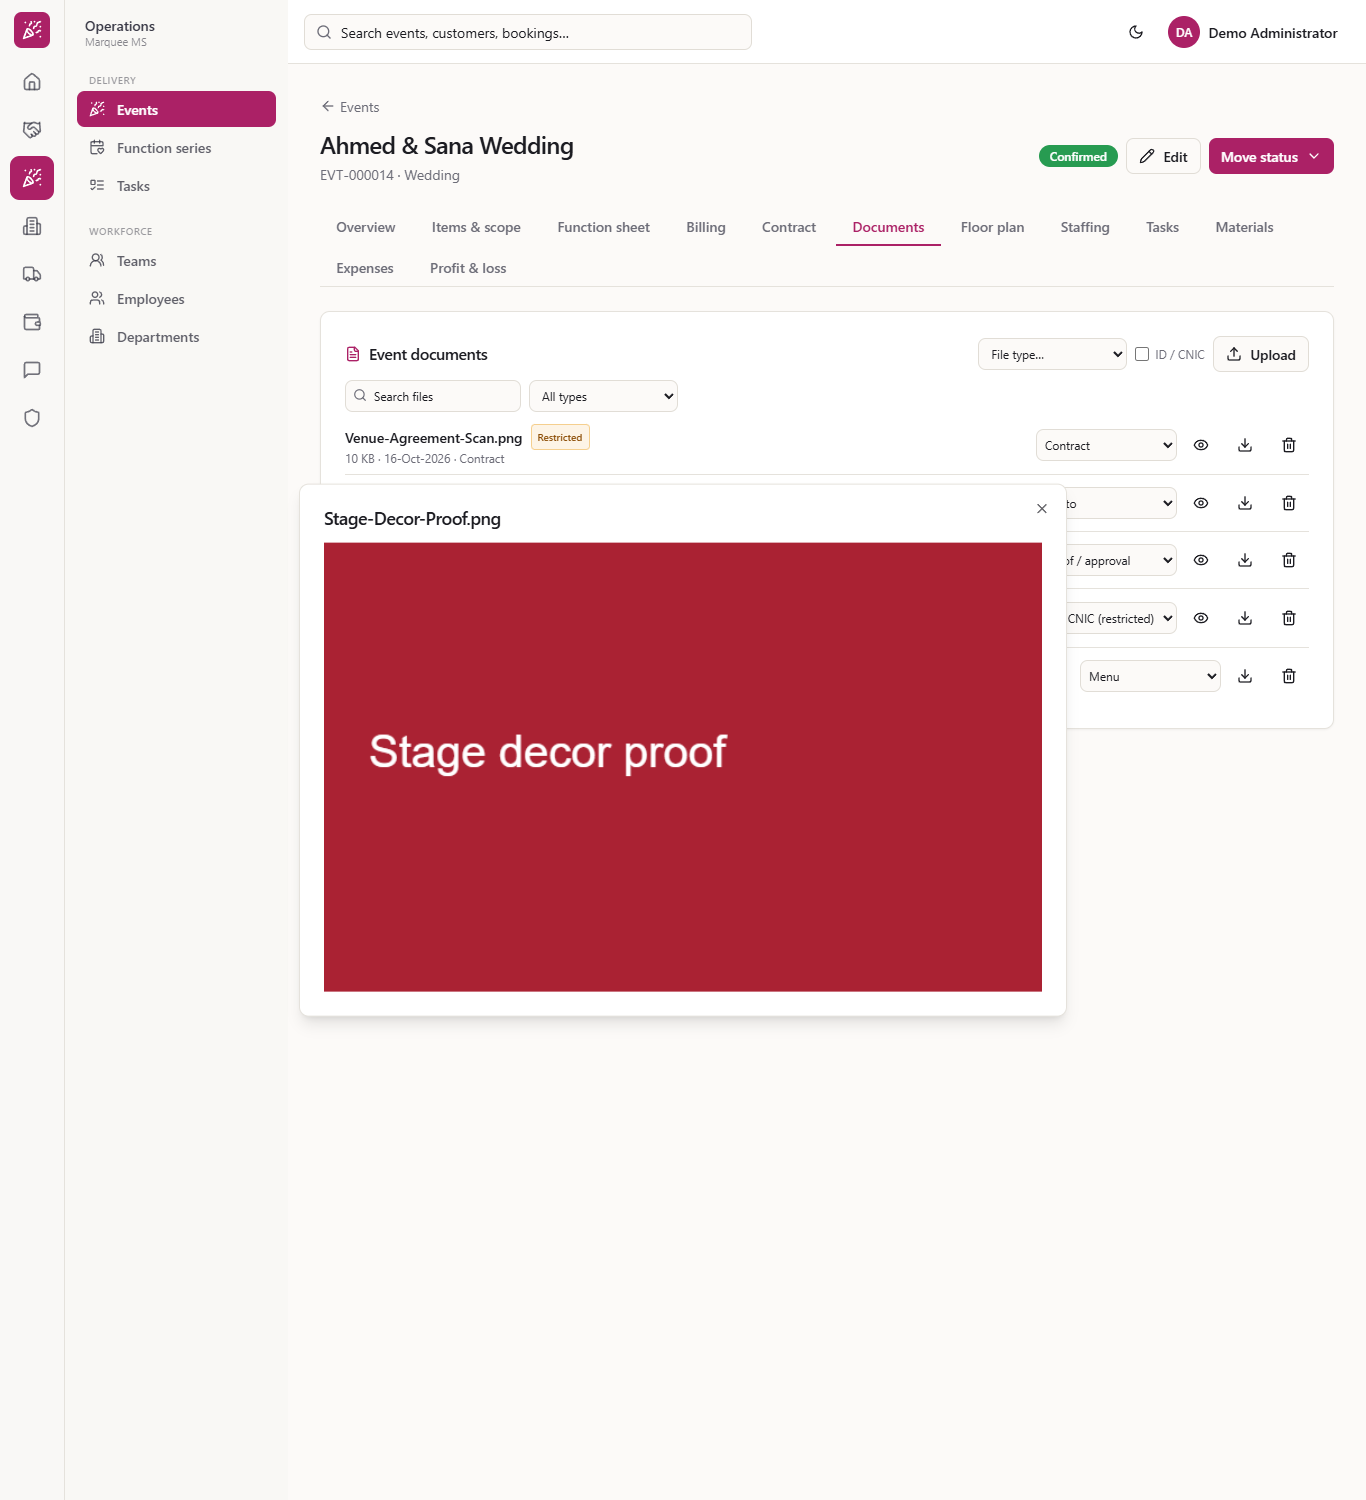
Preview an image
Press the eye icon on an image such as Stage-Decor-Proof.png. A window titled with the file name shows the picture, so you can check a proof without downloading it. Press Close when you are done. The eye is shown for images only, not for a PDF.
An image previewed in a window
13
Delete a file you no longer need
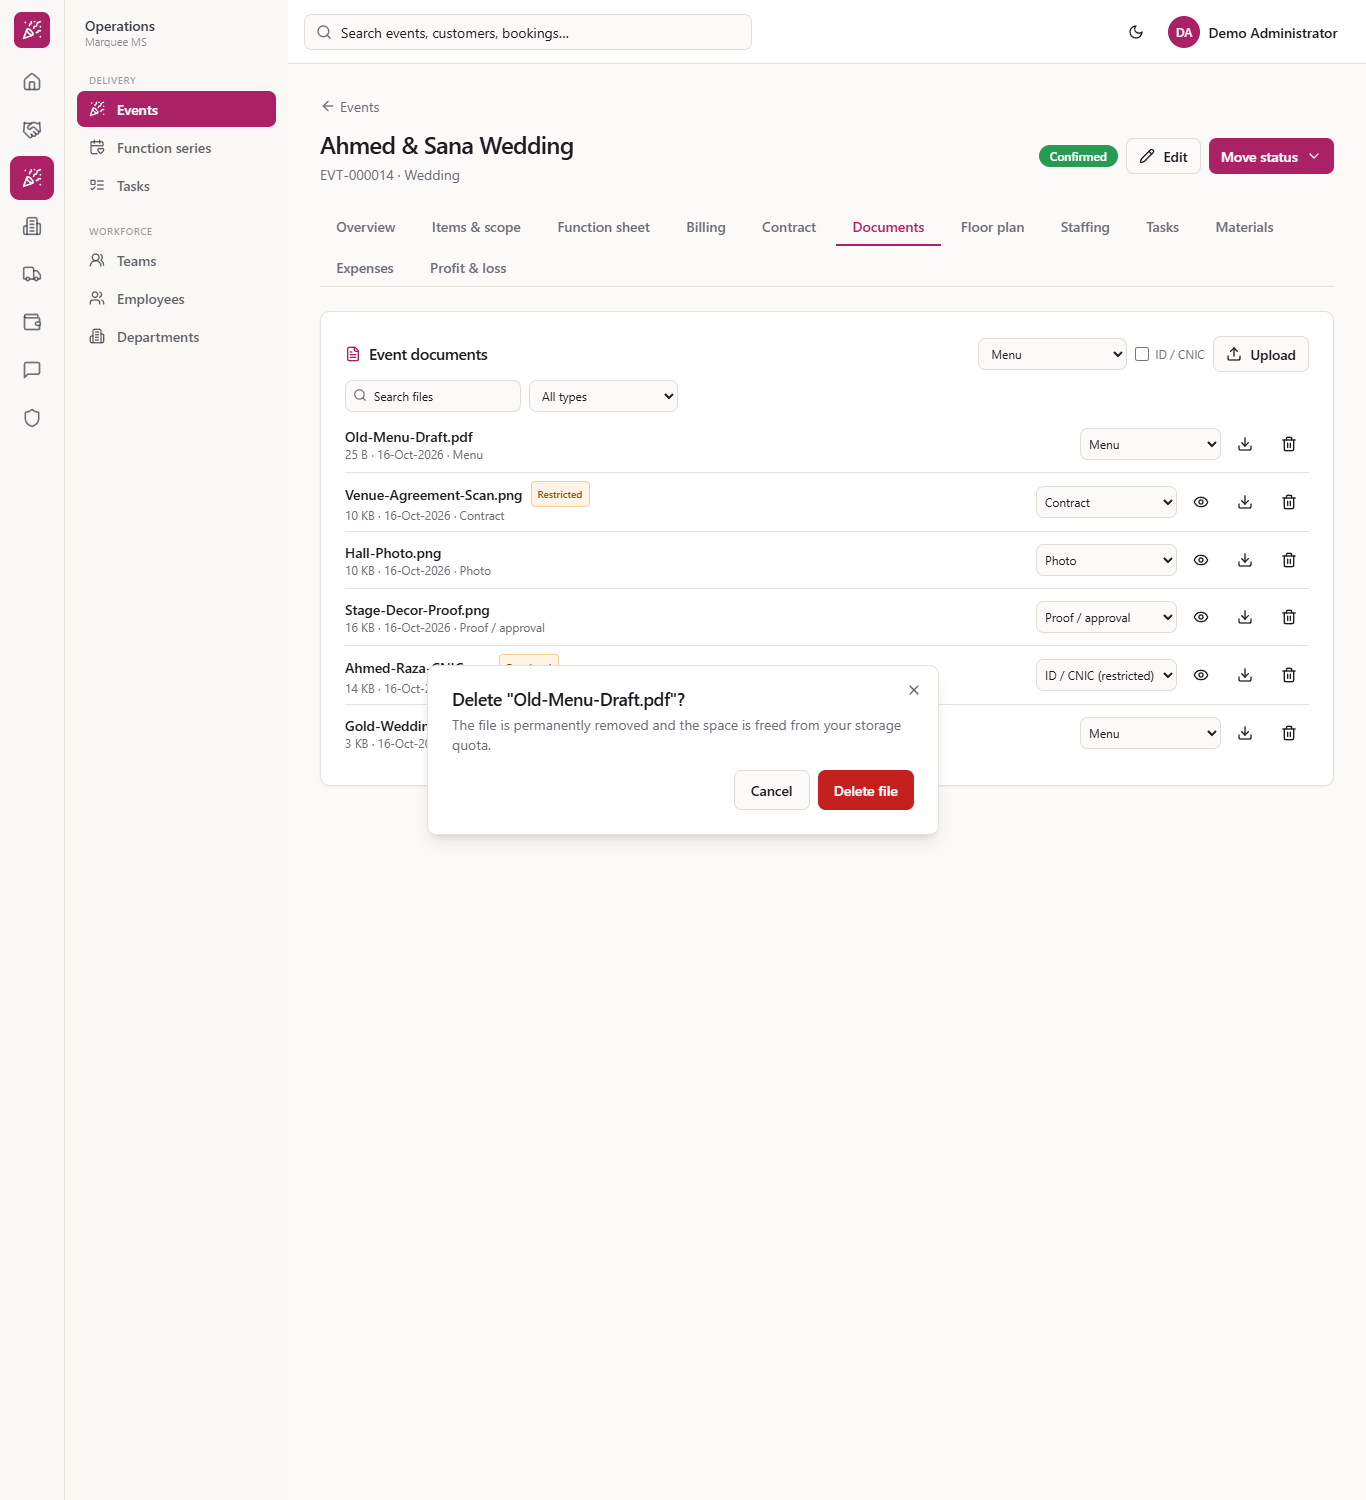
Press the bin on the row. The dialog says Delete "Old-Menu-Draft.pdf"? and "The file is permanently removed and the space is freed from your storage quota." Press Delete file.
Delete file confirmation
14
Check the list
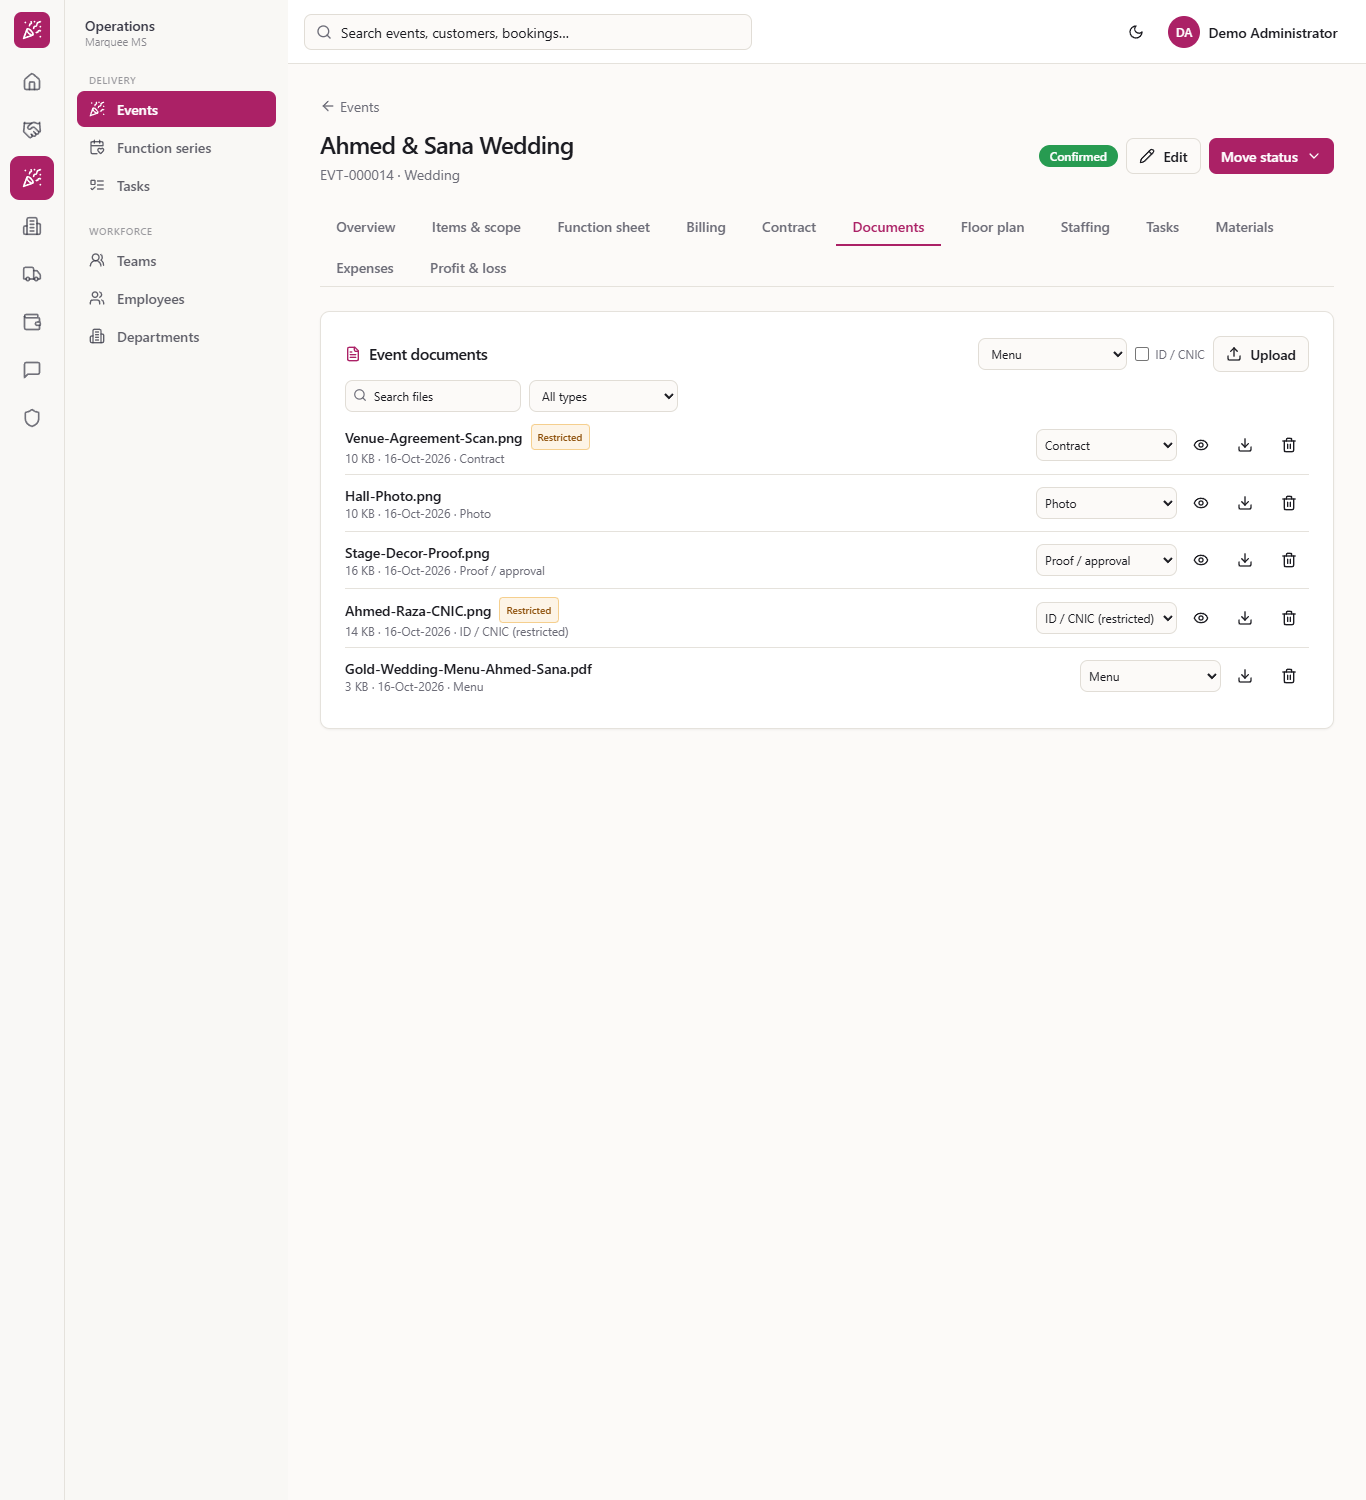
The deleted file is gone and the others remain, restricted ones included.
Document list after the delete
Check it worked
The file is in the list with its size, date and type, and ID scans carry the Restricted badge.
A deleted file no longer appears.
Common mistakes
Mistake
What you see
Fix
Uploading an ID scan with the wrong type and no tick
The file has no Restricted badge
Delete it and upload again as ID / CNIC (restricted), or with the box ticked
Uploading an empty file
The message "The file is empty"
Check the file and try again
Uploading a file over 25 MB
The message "File too large"
Reduce the file size
Expecting a new type to remove Restricted
The badge stays
A restricted file stays restricted
Quick reference
Item
Meaning / rule
ID / CNIC type
Always restricted
ID / CNIC box
Restricts the next upload, whatever its type
Restricted
Amber badge; needs the sensitive-documents permission
Size limit
25 MB per file; an empty file is refused
Search and filter
Search matches file names; the filter picks one type
Delete
Permanent; frees storage
Frequently asked questions
Who can see a restricted file? Only people whose role includes the sensitive-documents permission may view, download or delete it.
How big can a file be? Up to 25 MB per file; an empty file is refused.
Does deleting a file free storage? Yes. The confirmation says the space is freed from your storage quota.