How to register your company and finish the first-day setup
You will create your operator account, pick the country you operate in, save your company branding and add your first vehicle, and watch the Welcome to FMS checklist tick off each step, so that you are ready to add drivers and your first booking.
Who it is forTaxi or fleet operator ownerTime10 minutesProductFMSLevelBeginner
Before you start
Steps
1
Open the register page
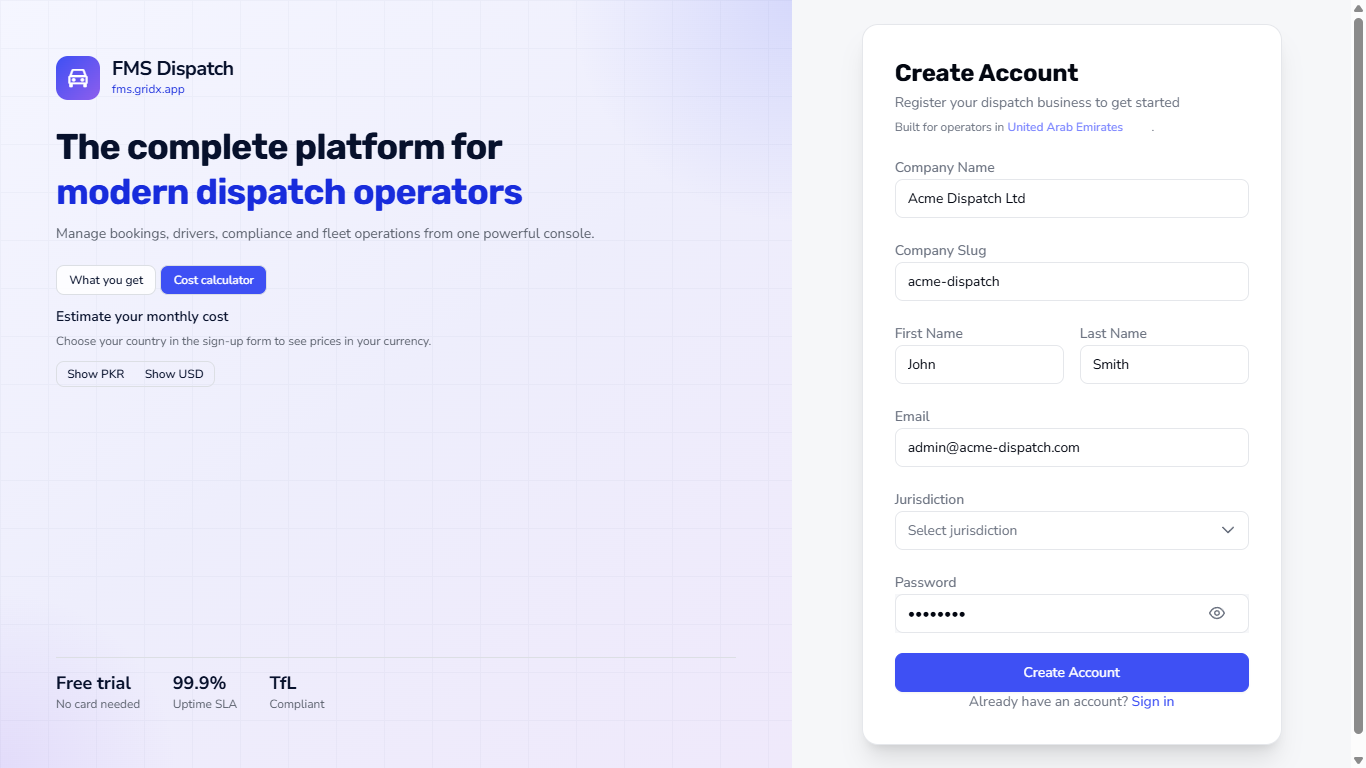
Open the FMS sign-up page. On the left you see what you get and a Cost calculator. Until you choose a country it asks you to choose your country in the sign-up form, so the prices come in your own currency. On the right is the Create Account form.
Register page before a country is chosen, asking for your country to show prices
2
Fill in your company and your details
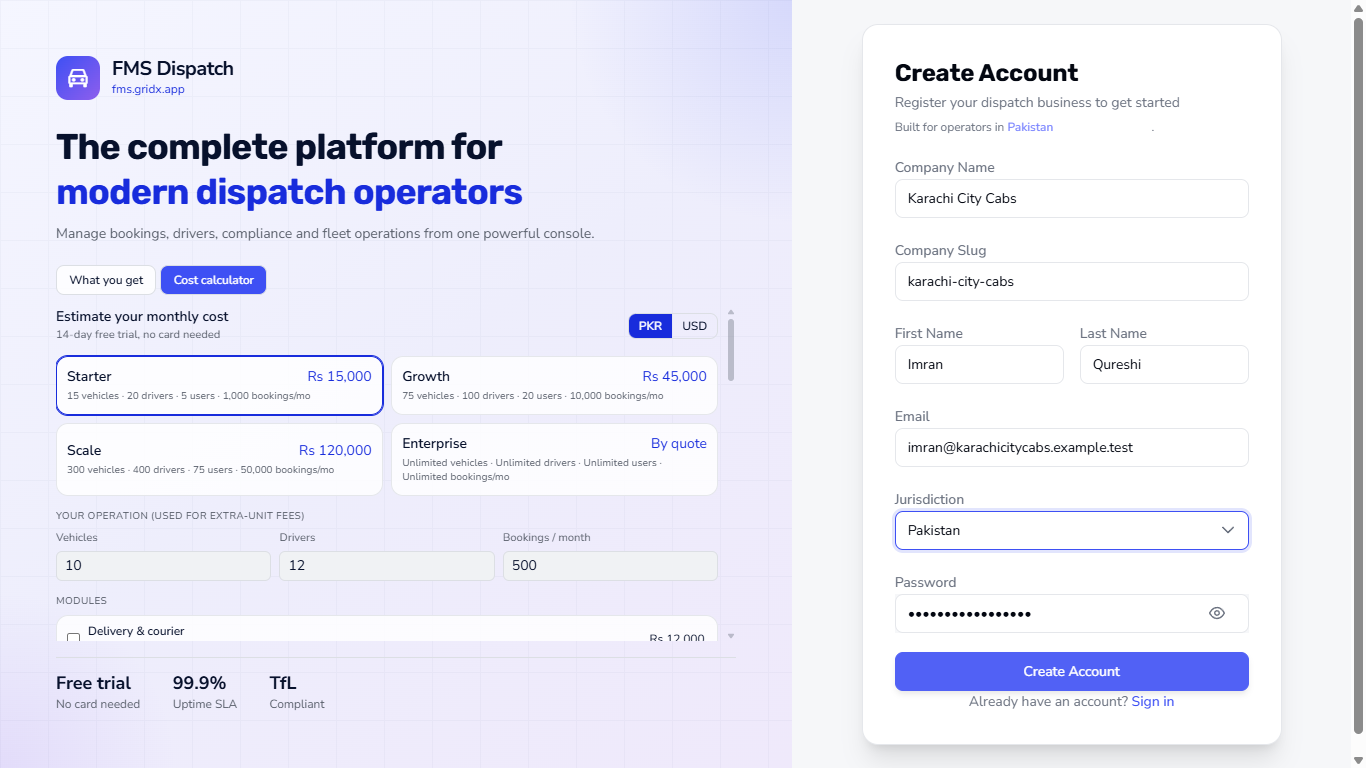
Type the Company Name. The Company Slug fills itself in (lowercase letters, numbers and hyphens, at least 3 characters). Then enter First Name, Last Name, Email and a Password of at least 8 characters.
Create Account form filled in for Karachi City Cabs with Pakistan chosen and prices in rupees
3
Choose your jurisdiction
Open Jurisdiction and pick your country, for example Pakistan. Choices are United Kingdom (London, National, PSV/Coach), United States (New York City), United Arab Emirates, Germany, Australia, Saudi Arabia, Pakistan and India. The cost calculator now shows the plans in rupees (Starter Rs 15,000, Growth Rs 45,000, Scale Rs 120,000) with a 14-day free trial and no card needed.
4
Create the account
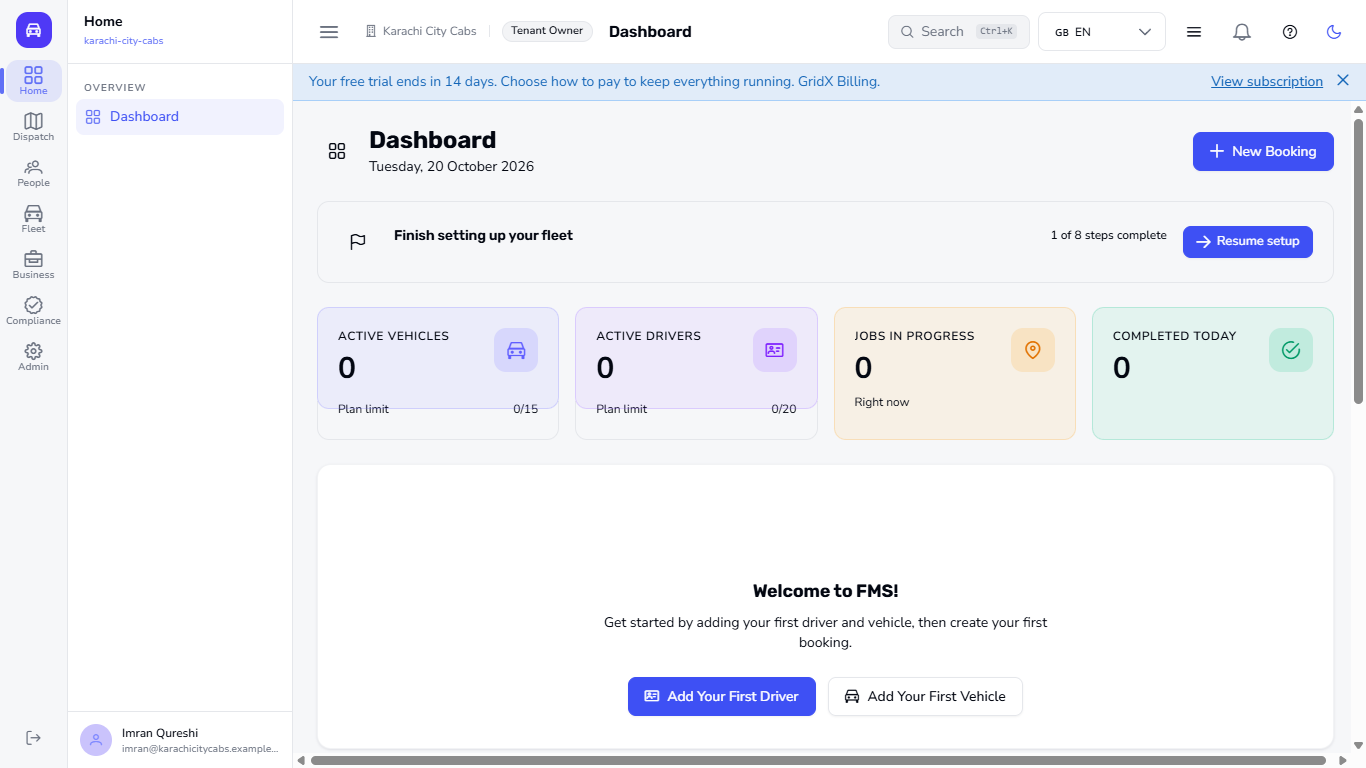
Click Create Account. You land on your own Dashboard as the tenant owner. It is empty: 0 active vehicles, 0 active drivers, and a banner shows the days left in your free trial. The setup card already reads 1 of 8 steps, because you chose your jurisdiction.
Empty dashboard of Karachi City Cabs with the setup card showing 1 of 8 steps
5
Open the Welcome to FMS checklist
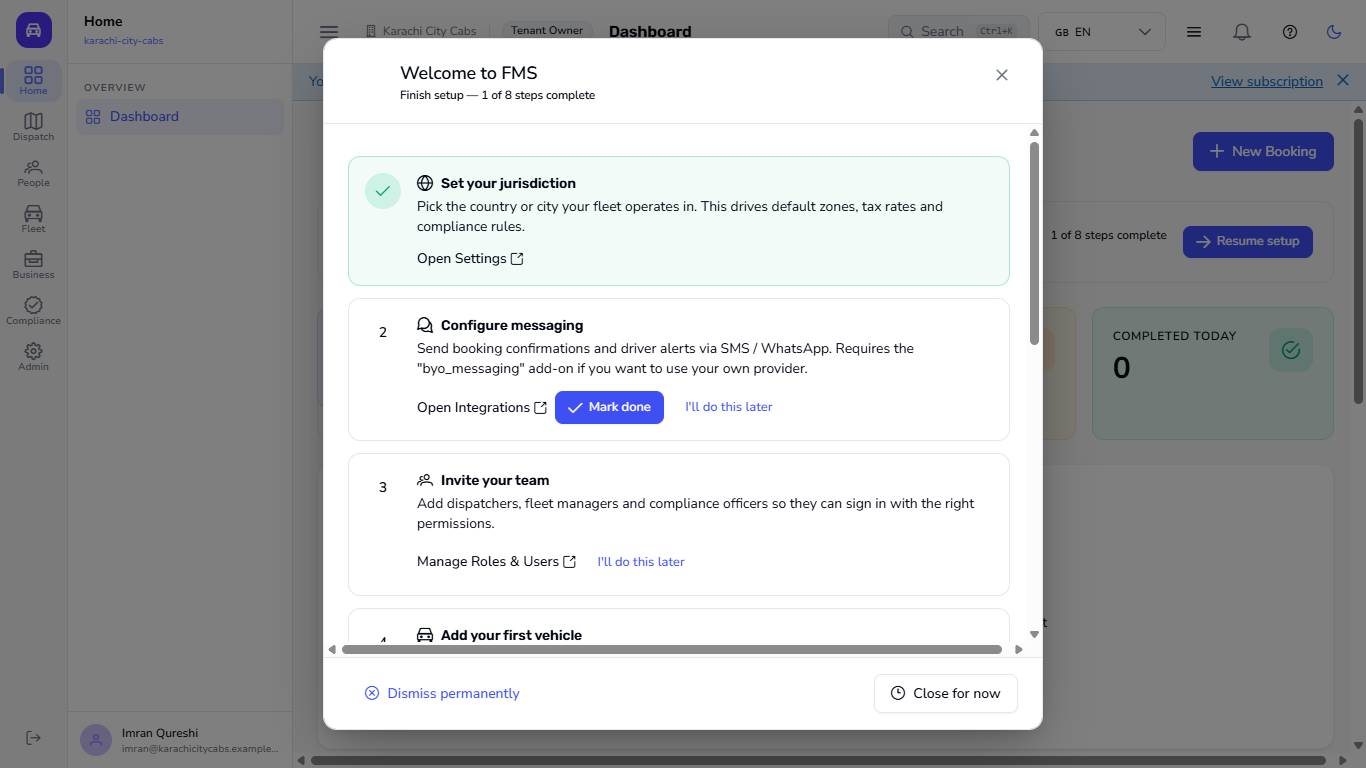
Click Resume setup. The Welcome to FMS window lists eight steps: set your jurisdiction, configure messaging, invite your team, add your first vehicle, connect the API or the driver app, add your branding, create your first rate card and add your first driver. Each step has a link to the right screen. For steps the system cannot detect, such as messaging, click Mark done when you finish; use I'll do this later or Close for now to come back later.
Welcome to FMS checklist with step one, Set your jurisdiction, already ticked
6
Check your jurisdiction in Settings
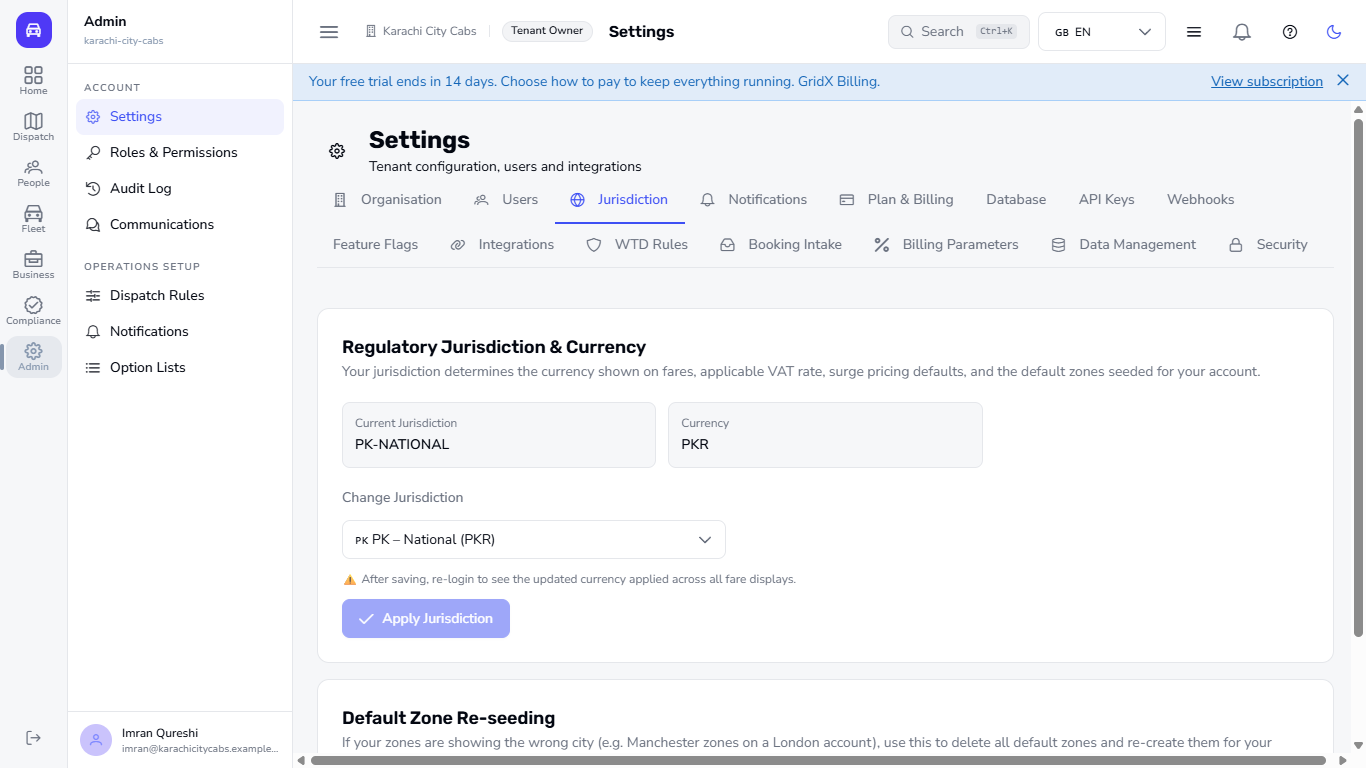
Go to Admin > Settings > Jurisdiction. You see your Current Jurisdiction (PK-NATIONAL) and Currency (PKR). Your city zones are created for your country.
Settings Jurisdiction tab showing PK-NATIONAL and PKR
7
Check your company details and time zone
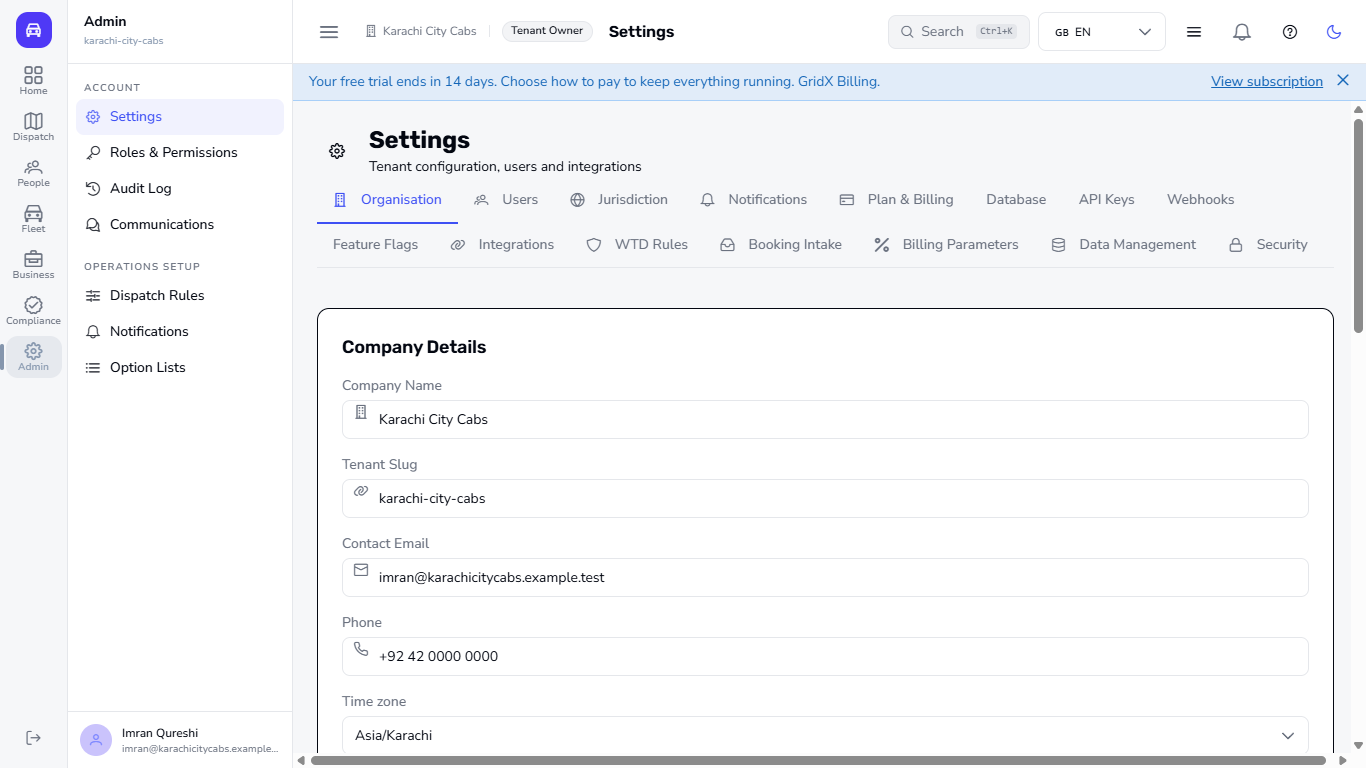
Open the Organisation tab. Your Company Name, Tenant Slug and Contact Email are filled in, the Phone example starts with +92, and the Time zone is already Asia/Karachi, taken from your country.
Settings Organisation tab with the time zone Asia/Karachi and the phone example
8
Save your branding
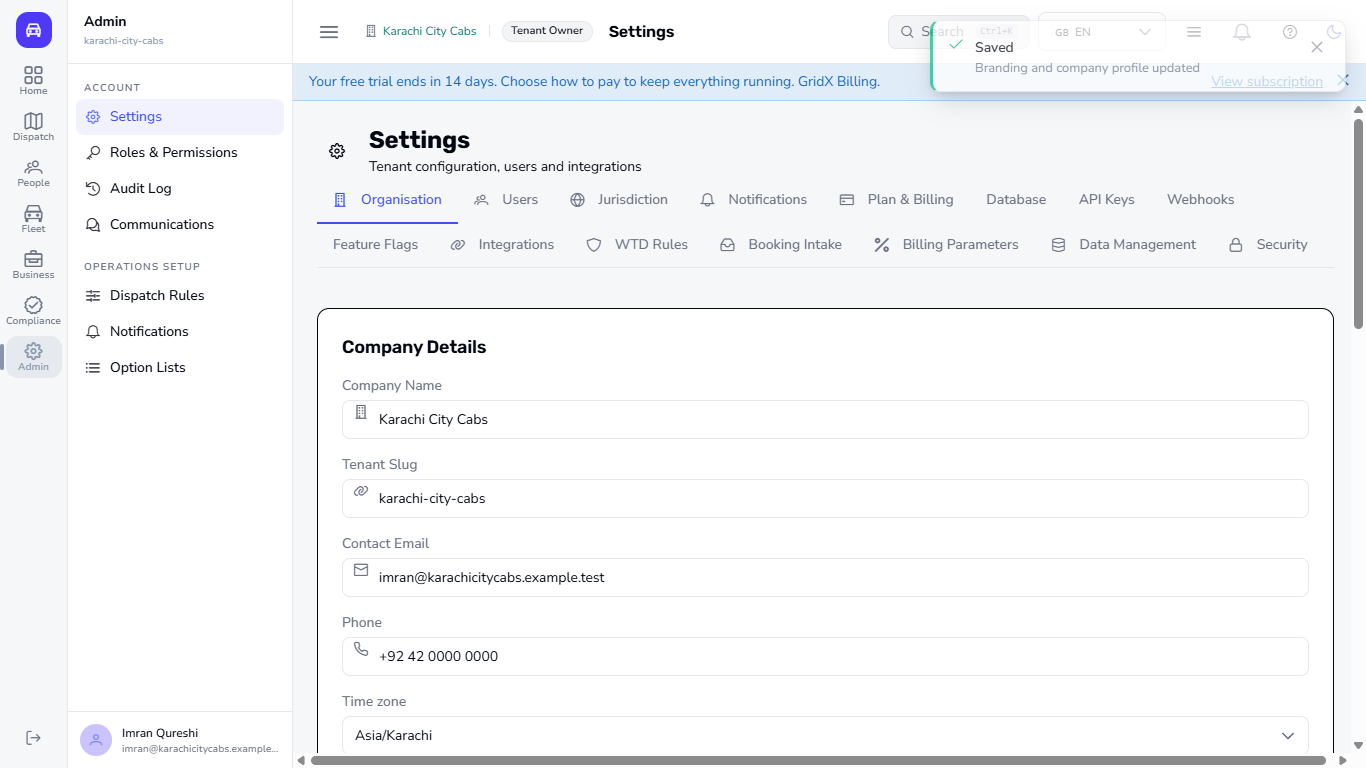
Scroll to Branding & company profile. Set the Brand colour, type your Tax / VAT registration number and your Address (two lines, city, postcode, country), then click Save branding. You see "Saved - Branding and company profile updated" and your company name in the header takes the brand colour.
Settings saved message and the company name in the brand colour in the header
9
Add your first vehicle and watch the checklist tick
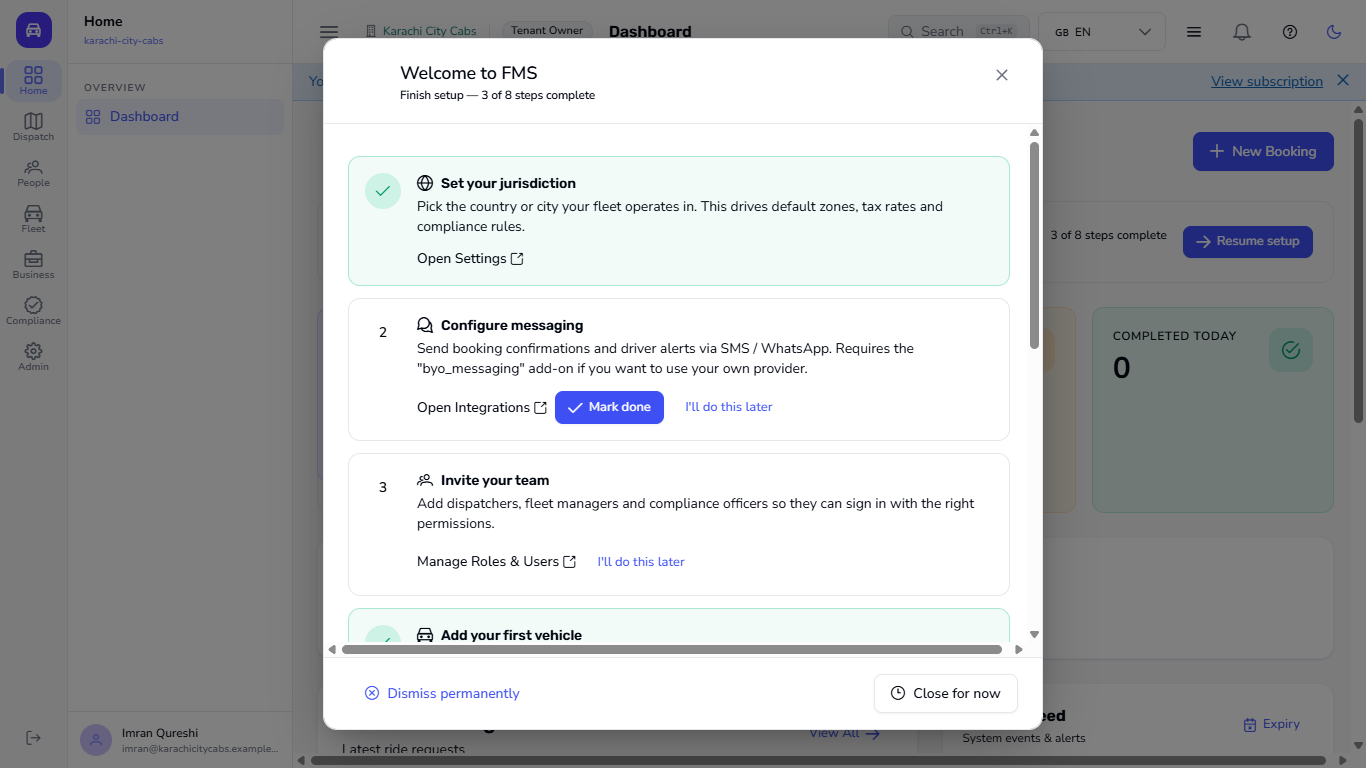
Go to Fleet > Vehicles, click Add Vehicle, fill in Registration, Make, Model, Year, Category and Fuel Type, and click Create Vehicle. Back on the Dashboard click Resume setup: the checklist now reads 3 of 8, and the branding and first vehicle steps are green without you pressing Mark done, because the system checks your real data.
Welcome to FMS checklist reading 3 of 8 steps complete after branding and the first vehicle
Check it worked
The dashboard shows your company name and the badge Tenant Owner.
Settings > Jurisdiction shows PK-NATIONAL and PKR for a Pakistan account, and Settings > Organisation shows Asia/Karachi.
The checklist count rises as you save your branding and add your vehicle (3 of 8 in this example).
Common mistakes
Mistake
What you see
Fix
Slug already used
"Slug already taken"
Choose another slug
Email already registered
"Email already registered"
Sign in instead, or use another email
Password too short
A message under the password
Use 8 or more characters
Wrong country picked
Wrong currency in Settings
Change it in Settings > Jurisdiction and sign in again
Quick reference
Item
Meaning / rule
Free trial
14 days, no card needed
Company slug
Lowercase letters, numbers, hyphens; at least 3 characters; reserved words are refused
Jurisdiction
Sets currency, time zone, default zones and compliance rules
Checklist
8 steps: jurisdiction, messaging, team, first vehicle, API or driver app, branding, first rate card, first driver
Frequently asked questions
Can I change my country later? Yes. Settings > Jurisdiction has a Change Jurisdiction list and an Apply Jurisdiction button; sign in again to see the new currency everywhere.
Can I hide the setup checklist? Yes. Use Close for now to hide it until you come back, or Dismiss permanently to remove it.
Do I have to tick the steps myself? No for most of them. The checklist looks at your real data, so a saved branding or a first vehicle ticks by itself; use Mark done only for steps such as messaging.