How to set up your company profile, jurisdiction, currency and tax rules
You will set your company details and branding, confirm the country rules and currency your fares use, review the taxes and levies on your fares, add your own tax and see the result on a real fare quote and on the saved booking.
Who it is forTaxi or fleet operator ownerTime10 minutesProductFMSLevelBeginner
Before you start
Steps
1
Check your company details
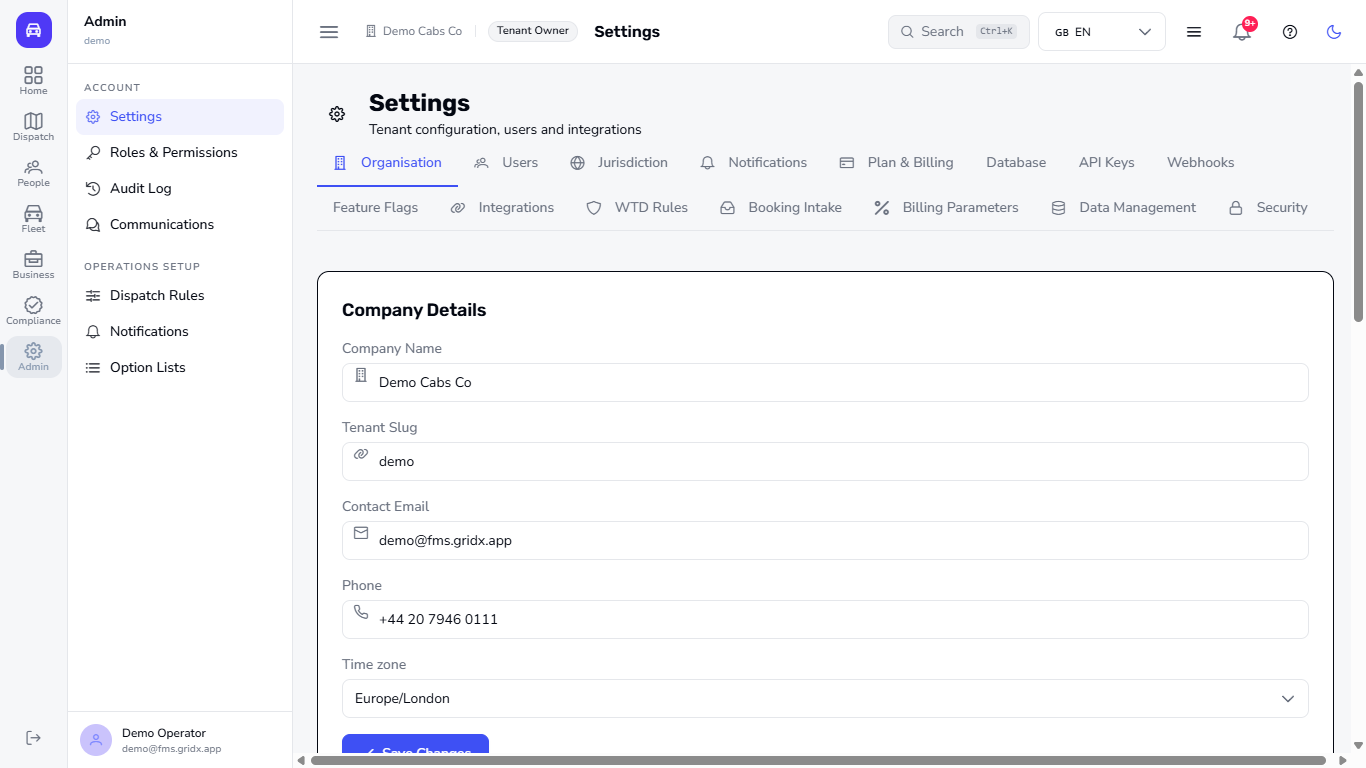
Go to Admin > Settings. The Organisation tab holds the Company Name, the Tenant Slug, the Contact Email, the Phone and the Time zone. Change what is wrong and click Save Changes. The time zone you save is still there after you reload the page.
Settings Organisation tab with company name, slug, email, phone and time zone
2
Add your branding and company profile
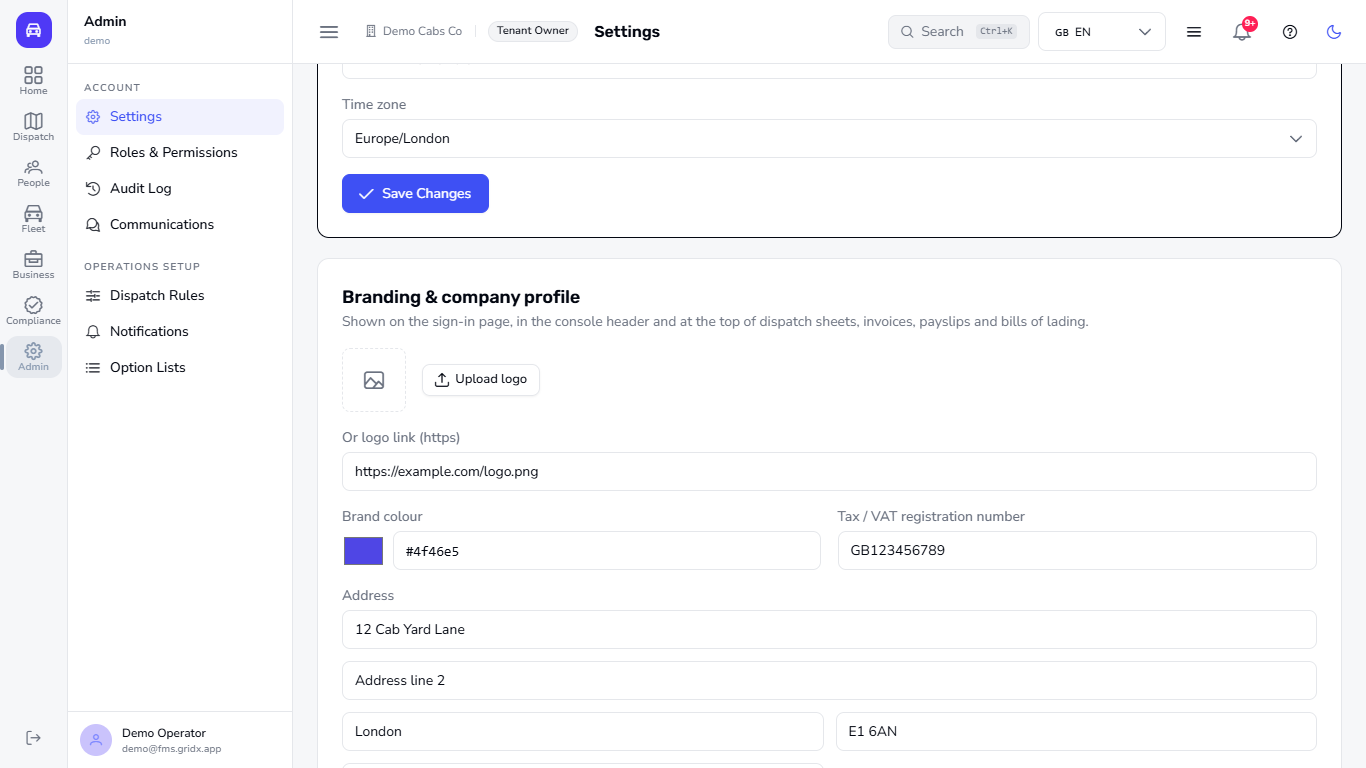
Scroll down to Branding & company profile. Click Upload logo or paste a link in Or logo link (https), pick your Brand colour, type your Tax / VAT registration number and your address (lines 1 and 2, city, postcode, country), then click Save branding. The card says these details are shown on the sign-in page, in the console header and at the top of dispatch sheets, invoices, payslips and bills of lading.
Branding and company profile card with logo, colour, tax number and address
3
Confirm your jurisdiction and currency
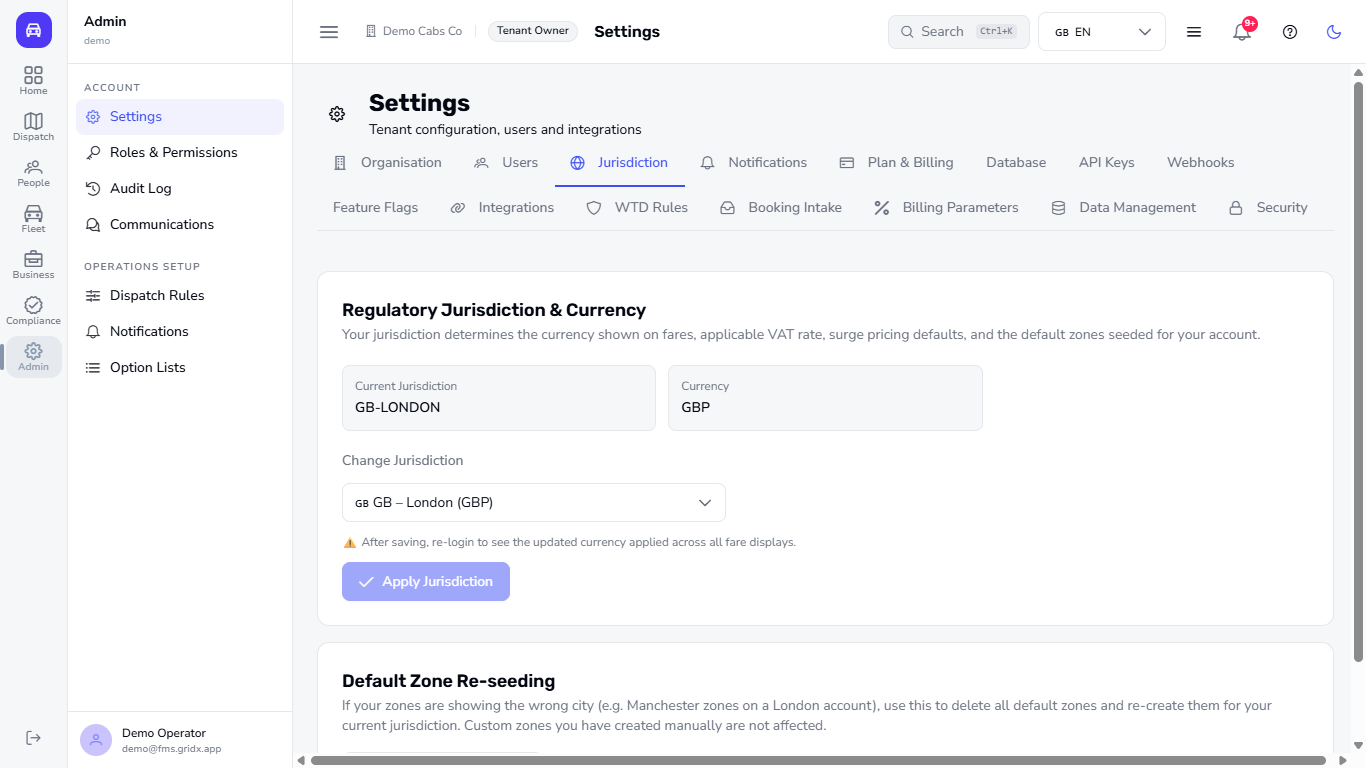
Open the Jurisdiction tab. Current Jurisdiction and Currency show the rules your fares use, for example GB-LONDON and GBP. To switch country pick another entry in Change Jurisdiction (ten are available, from London to Pakistan and India) and click Apply Jurisdiction.
Jurisdiction tab showing GB-LONDON and GBP
4
Review your tax rules
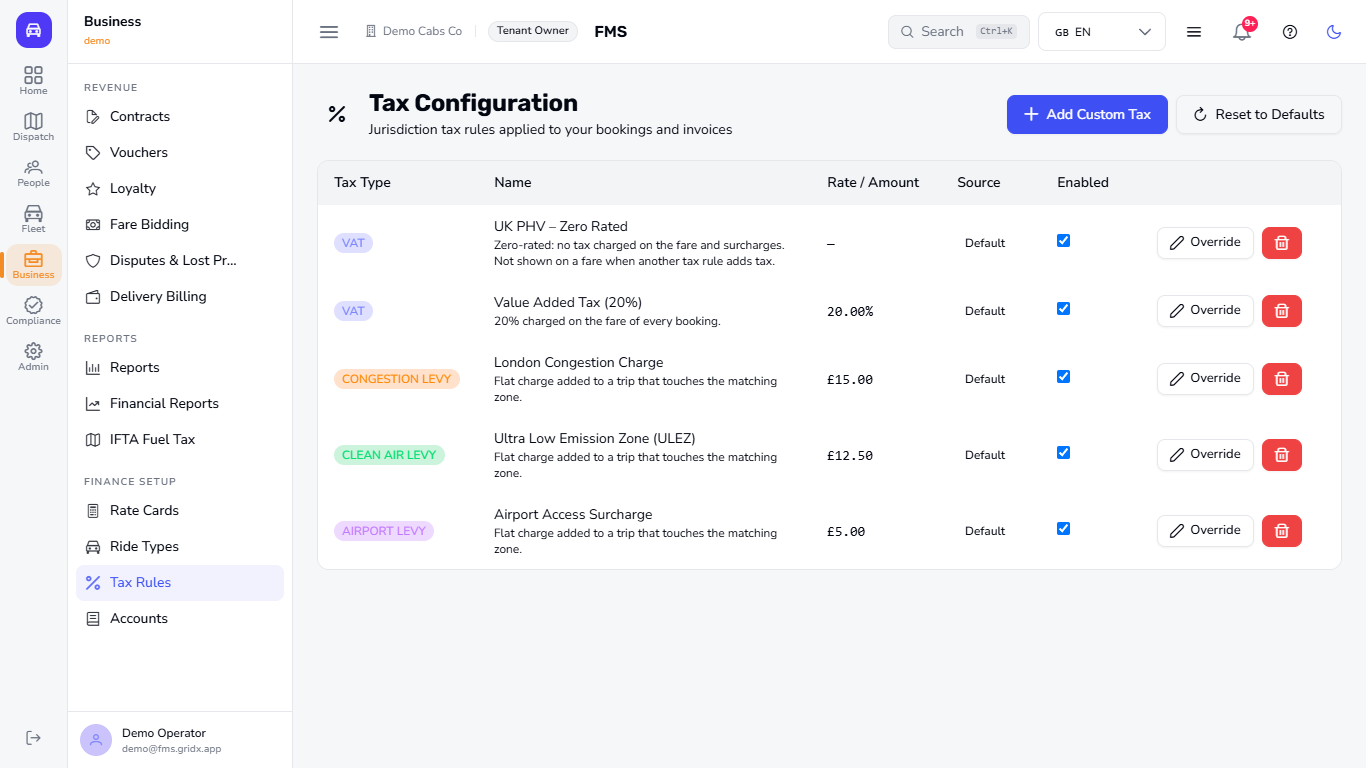
Open Business > Finance setup > Tax Rules. The table lists each tax or levy of your jurisdiction with its Rate / Amount: for London that is VAT at 20.00%, the London Congestion Charge at 15.00, the Ultra Low Emission Zone at 12.50 and the Airport Access Surcharge at 5.00, plus a zero-rated VAT line for private hire. A short description under each name says what the rule does. The Enabled box shows whether a rule is in use. Untick it to switch a rule off (the row stays in the list) and tick it again to switch it back on.
Tax Configuration table with VAT and three levies, all enabled
5
Add your own tax
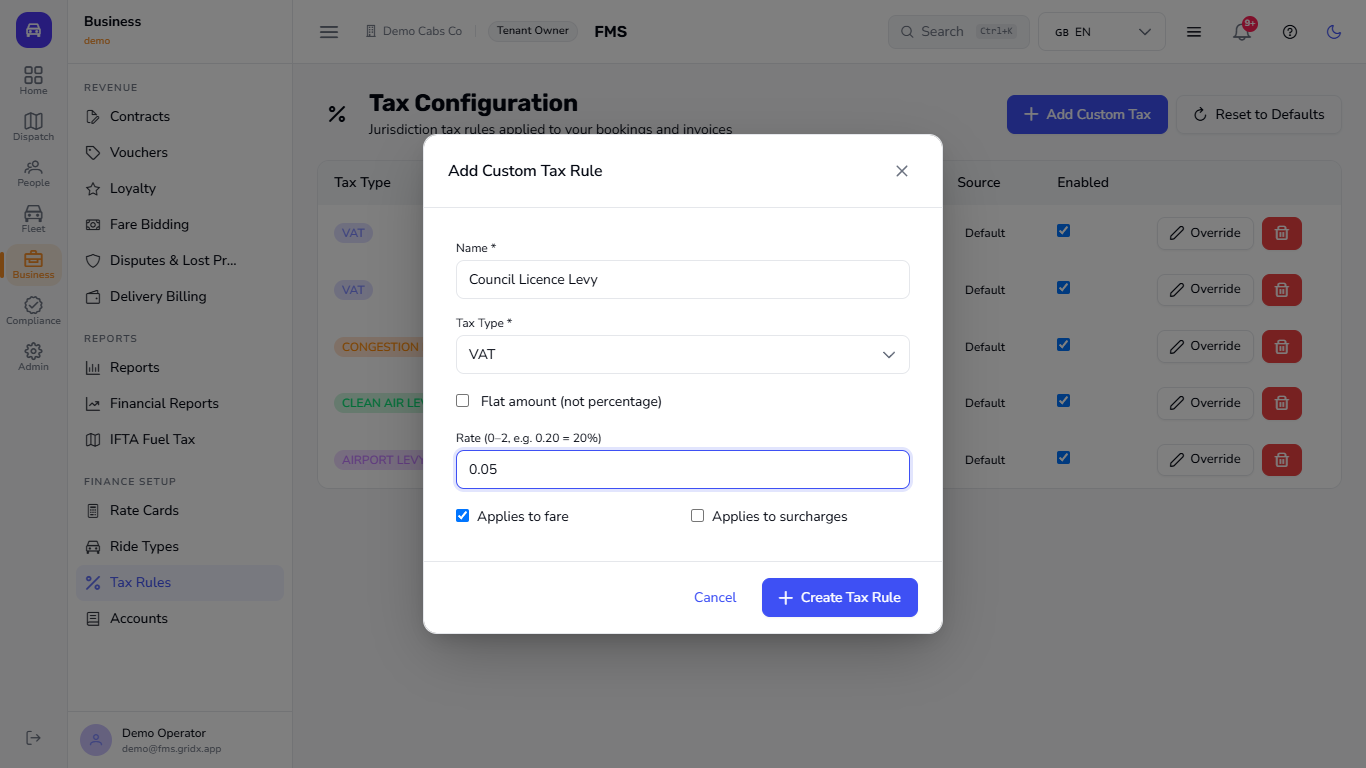
Click Add Custom Tax. Type a Name (for example Council Licence Levy), choose the Tax Type, and either enter a Rate (0.20 means 20%, 0.05 means 5%) or tick Flat amount for a fixed sum. Tick Applies to fare, Applies to surcharges or both, then click Create Tax Rule.
Add Custom Tax Rule dialog
6
Override a default rule
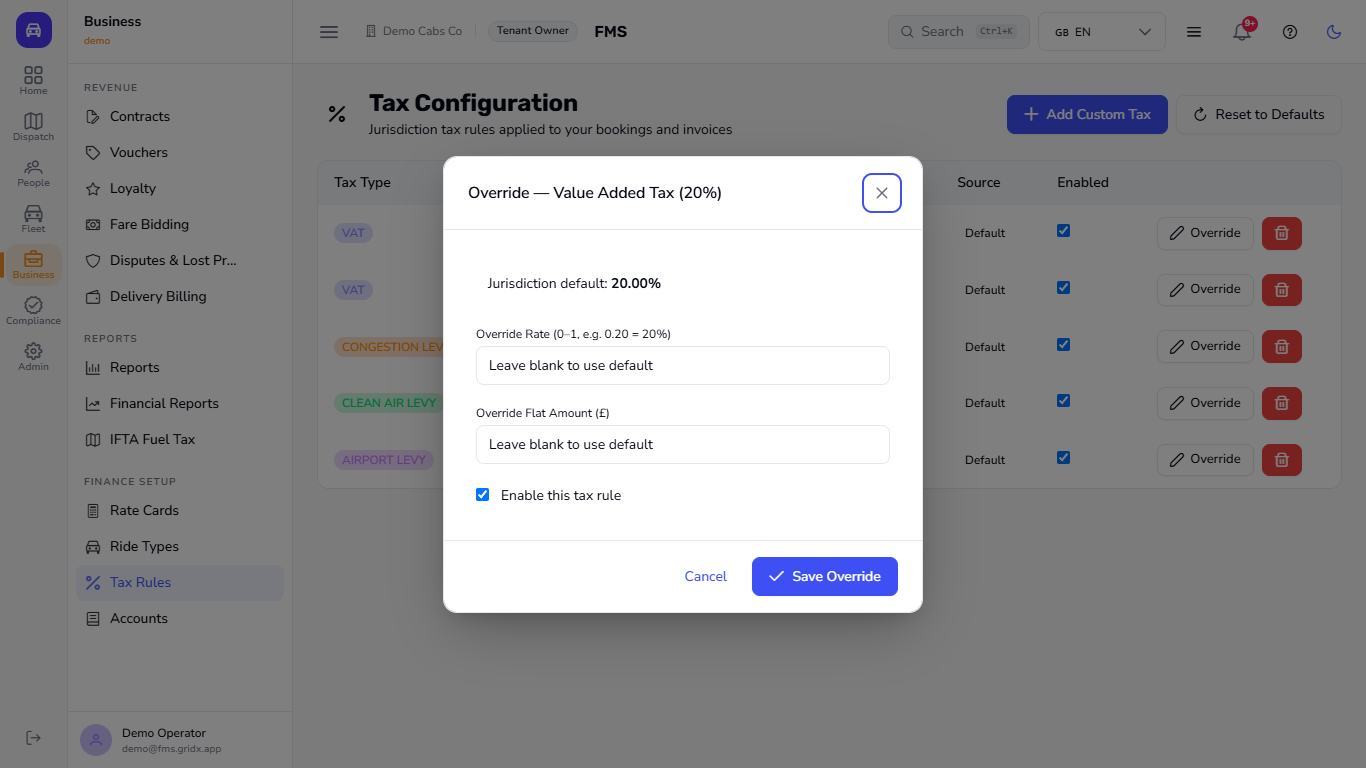
Click Override on a row. The dialog shows the jurisdiction default. Enter your own Override Rate or Override Flat Amount, or leave them blank to keep the default, and click Save Override. Enable this tax rule controls whether the rule is used.
Override dialog for Value Added Tax
7
See the tax on a fare quote
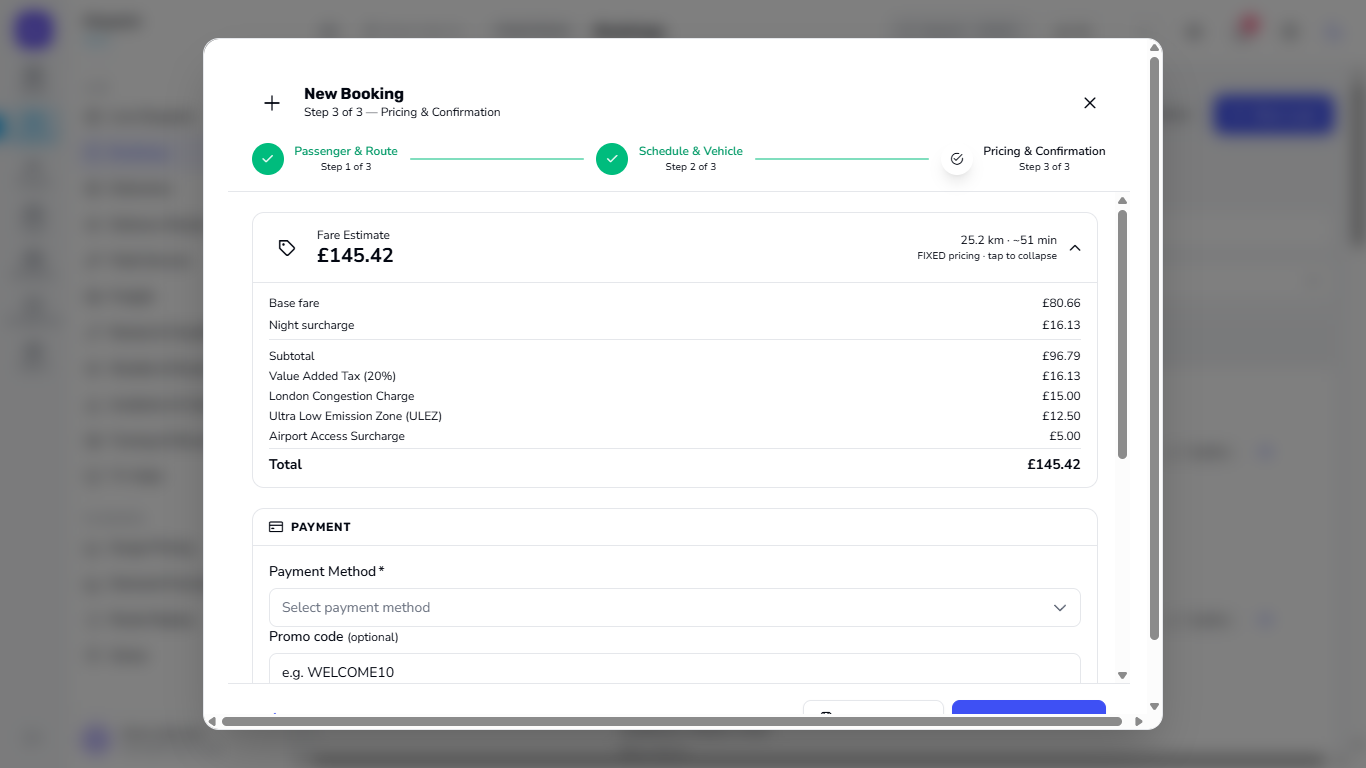
Go to Dispatch > Bookings and create a booking: passenger name and phone, a pickup and a drop-off, a date and time from the calendar, a vehicle, then Pricing & Confirmation. The Fare Estimate lists the base fare, any night surcharge, the VAT (once, at 20%), each levy that applies to this trip and the total, with the distance and time.
Fare estimate with base fare, night surcharge, VAT, levies and total
8
Check the saved booking
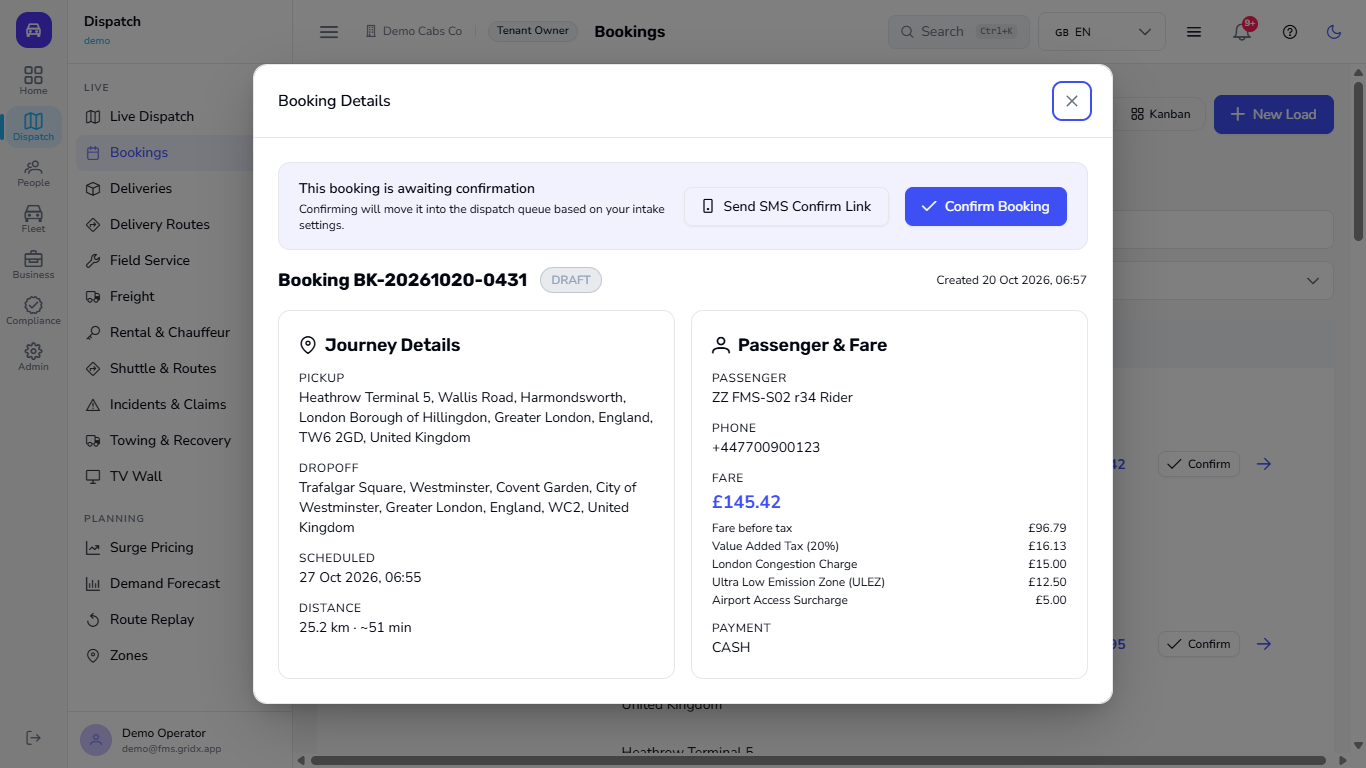
Choose a payment method and click Create Booking. A message says the booking was saved as a draft and must be confirmed to dispatch. Open the new booking from the list: in Booking Details the Passenger & Fare panel shows the Fare, the Fare before tax, each tax line and the payment method. The total is the same as the estimate you saw in step 7. New bookings start as drafts until you click Confirm Booking.
Booking details with the fare and its tax lines
Check it worked
Settings > Jurisdiction shows your country code and currency.
Tax Rules lists the taxes you expect, plus any custom tax you added.
A new booking shows a fare in your currency, and its tax lines add up to the same total as the estimate.
Branding & company profile shows your tax number and address after you reload.
Common mistakes
Mistake
What you see
Fix
Custom tax without a name
"Name required"
Type a name and save again
Changed the jurisdiction but still see the old currency
Old currency on fares
Sign out and in again
Wrong rate format
Rate is a fraction, 0.20 means 20%
Enter 0.05 for 5%
Expected a levy on every trip
A short trip has no airport or congestion line
Levies apply only when the pickup or drop-off is in the zone
Quick reference
Item
Meaning / rule
Jurisdiction
Sets currency, default zones, VAT default and surge defaults
Tax rule rate
A fraction (0.20 = 20%) or a flat amount
Applies to fare / surcharges
Which part of the price the tax is charged on
Override
Your own rate or amount in place of the jurisdiction default
Enabled box
Switches a rule off or on for new quotes without deleting it
Branding & company profile
Logo, colour, tax number and address shown on your sign-in page and documents
Frequently asked questions
Can I use more than one tax? Yes. Each rule in the table is a separate line, and you can add custom ones.
Can I go back to the standard rules? Yes. Use Reset to Defaults on the Tax Rules page.