Open Programs
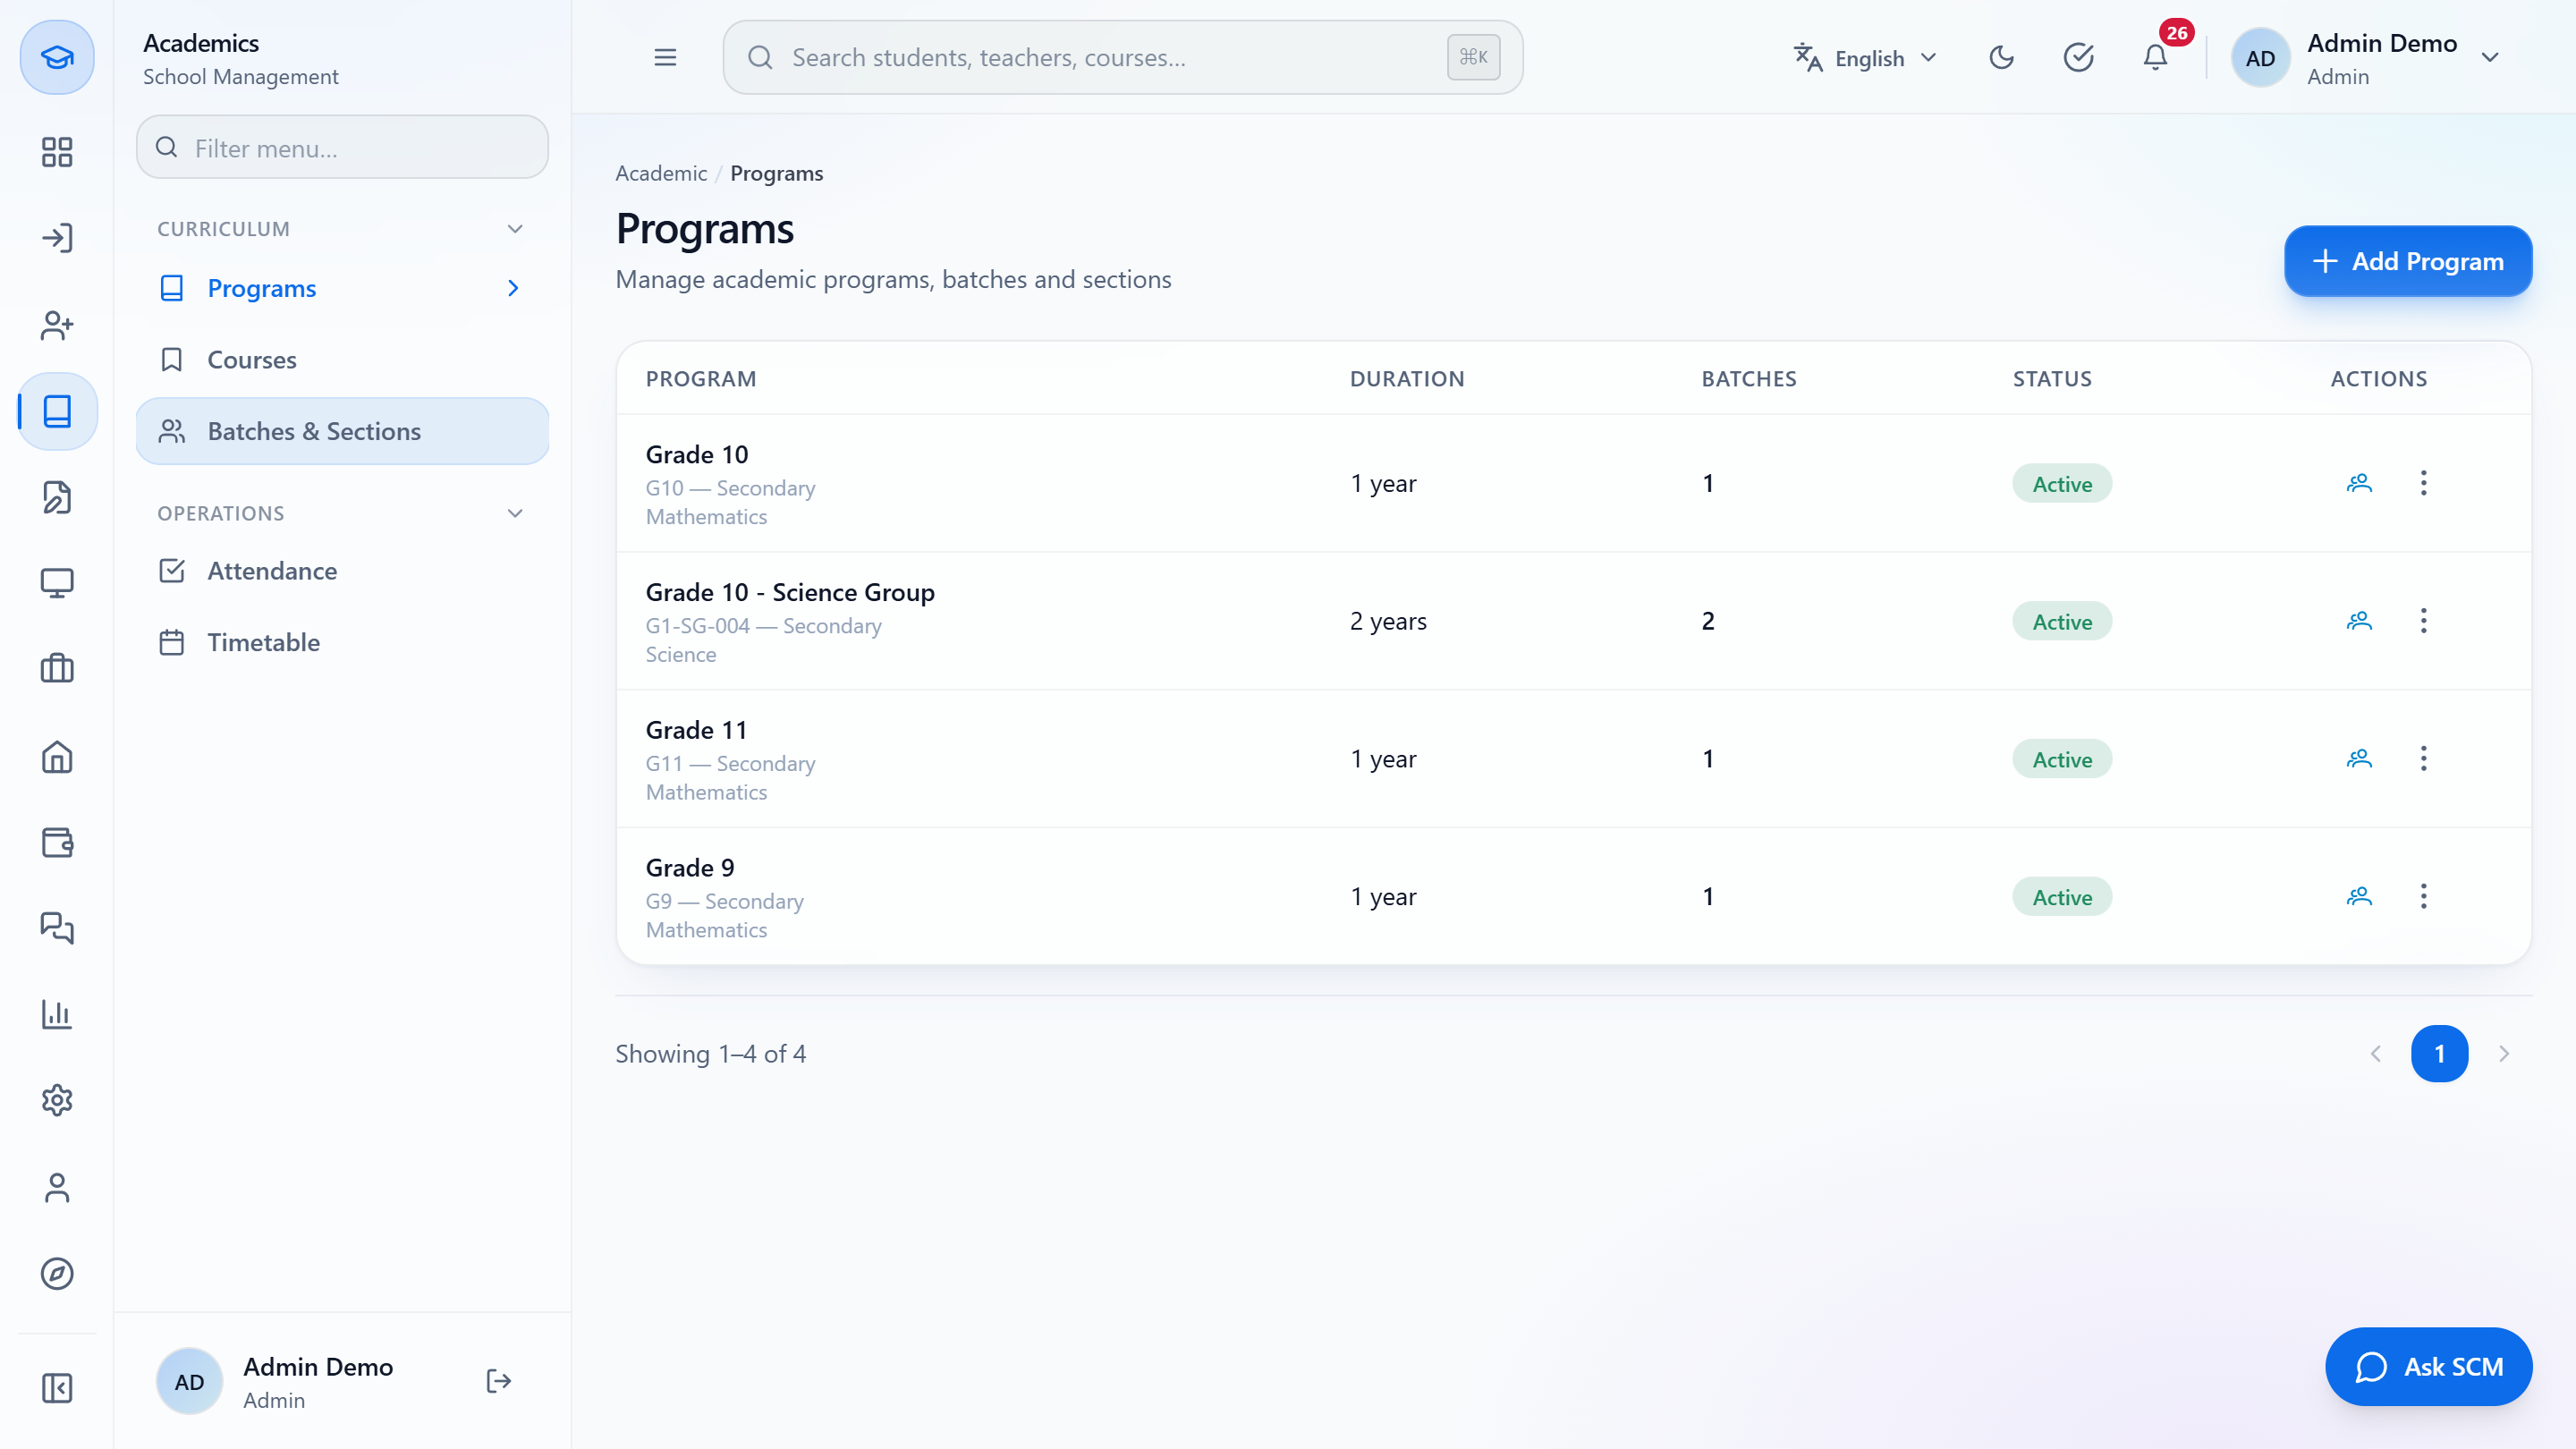
Click Academics › Curriculum › Programs. The list shows each program with its code, type and department, then Duration, Batches and Status. Each row has a View Batches icon and a menu with Courses & requirements, Edit and Delete.
Everything a school teaches is defined here. Programs say who studies, courses say what is taught, and the syllabus lists the topics. Teachers' timetables, exam papers and each student's degree progress all read from this setup.
Click Academics › Curriculum › Programs. The list shows each program with its code, type and department, then Duration, Batches and Status. Each row has a View Batches icon and a menu with Courses & requirements, Edit and Delete.
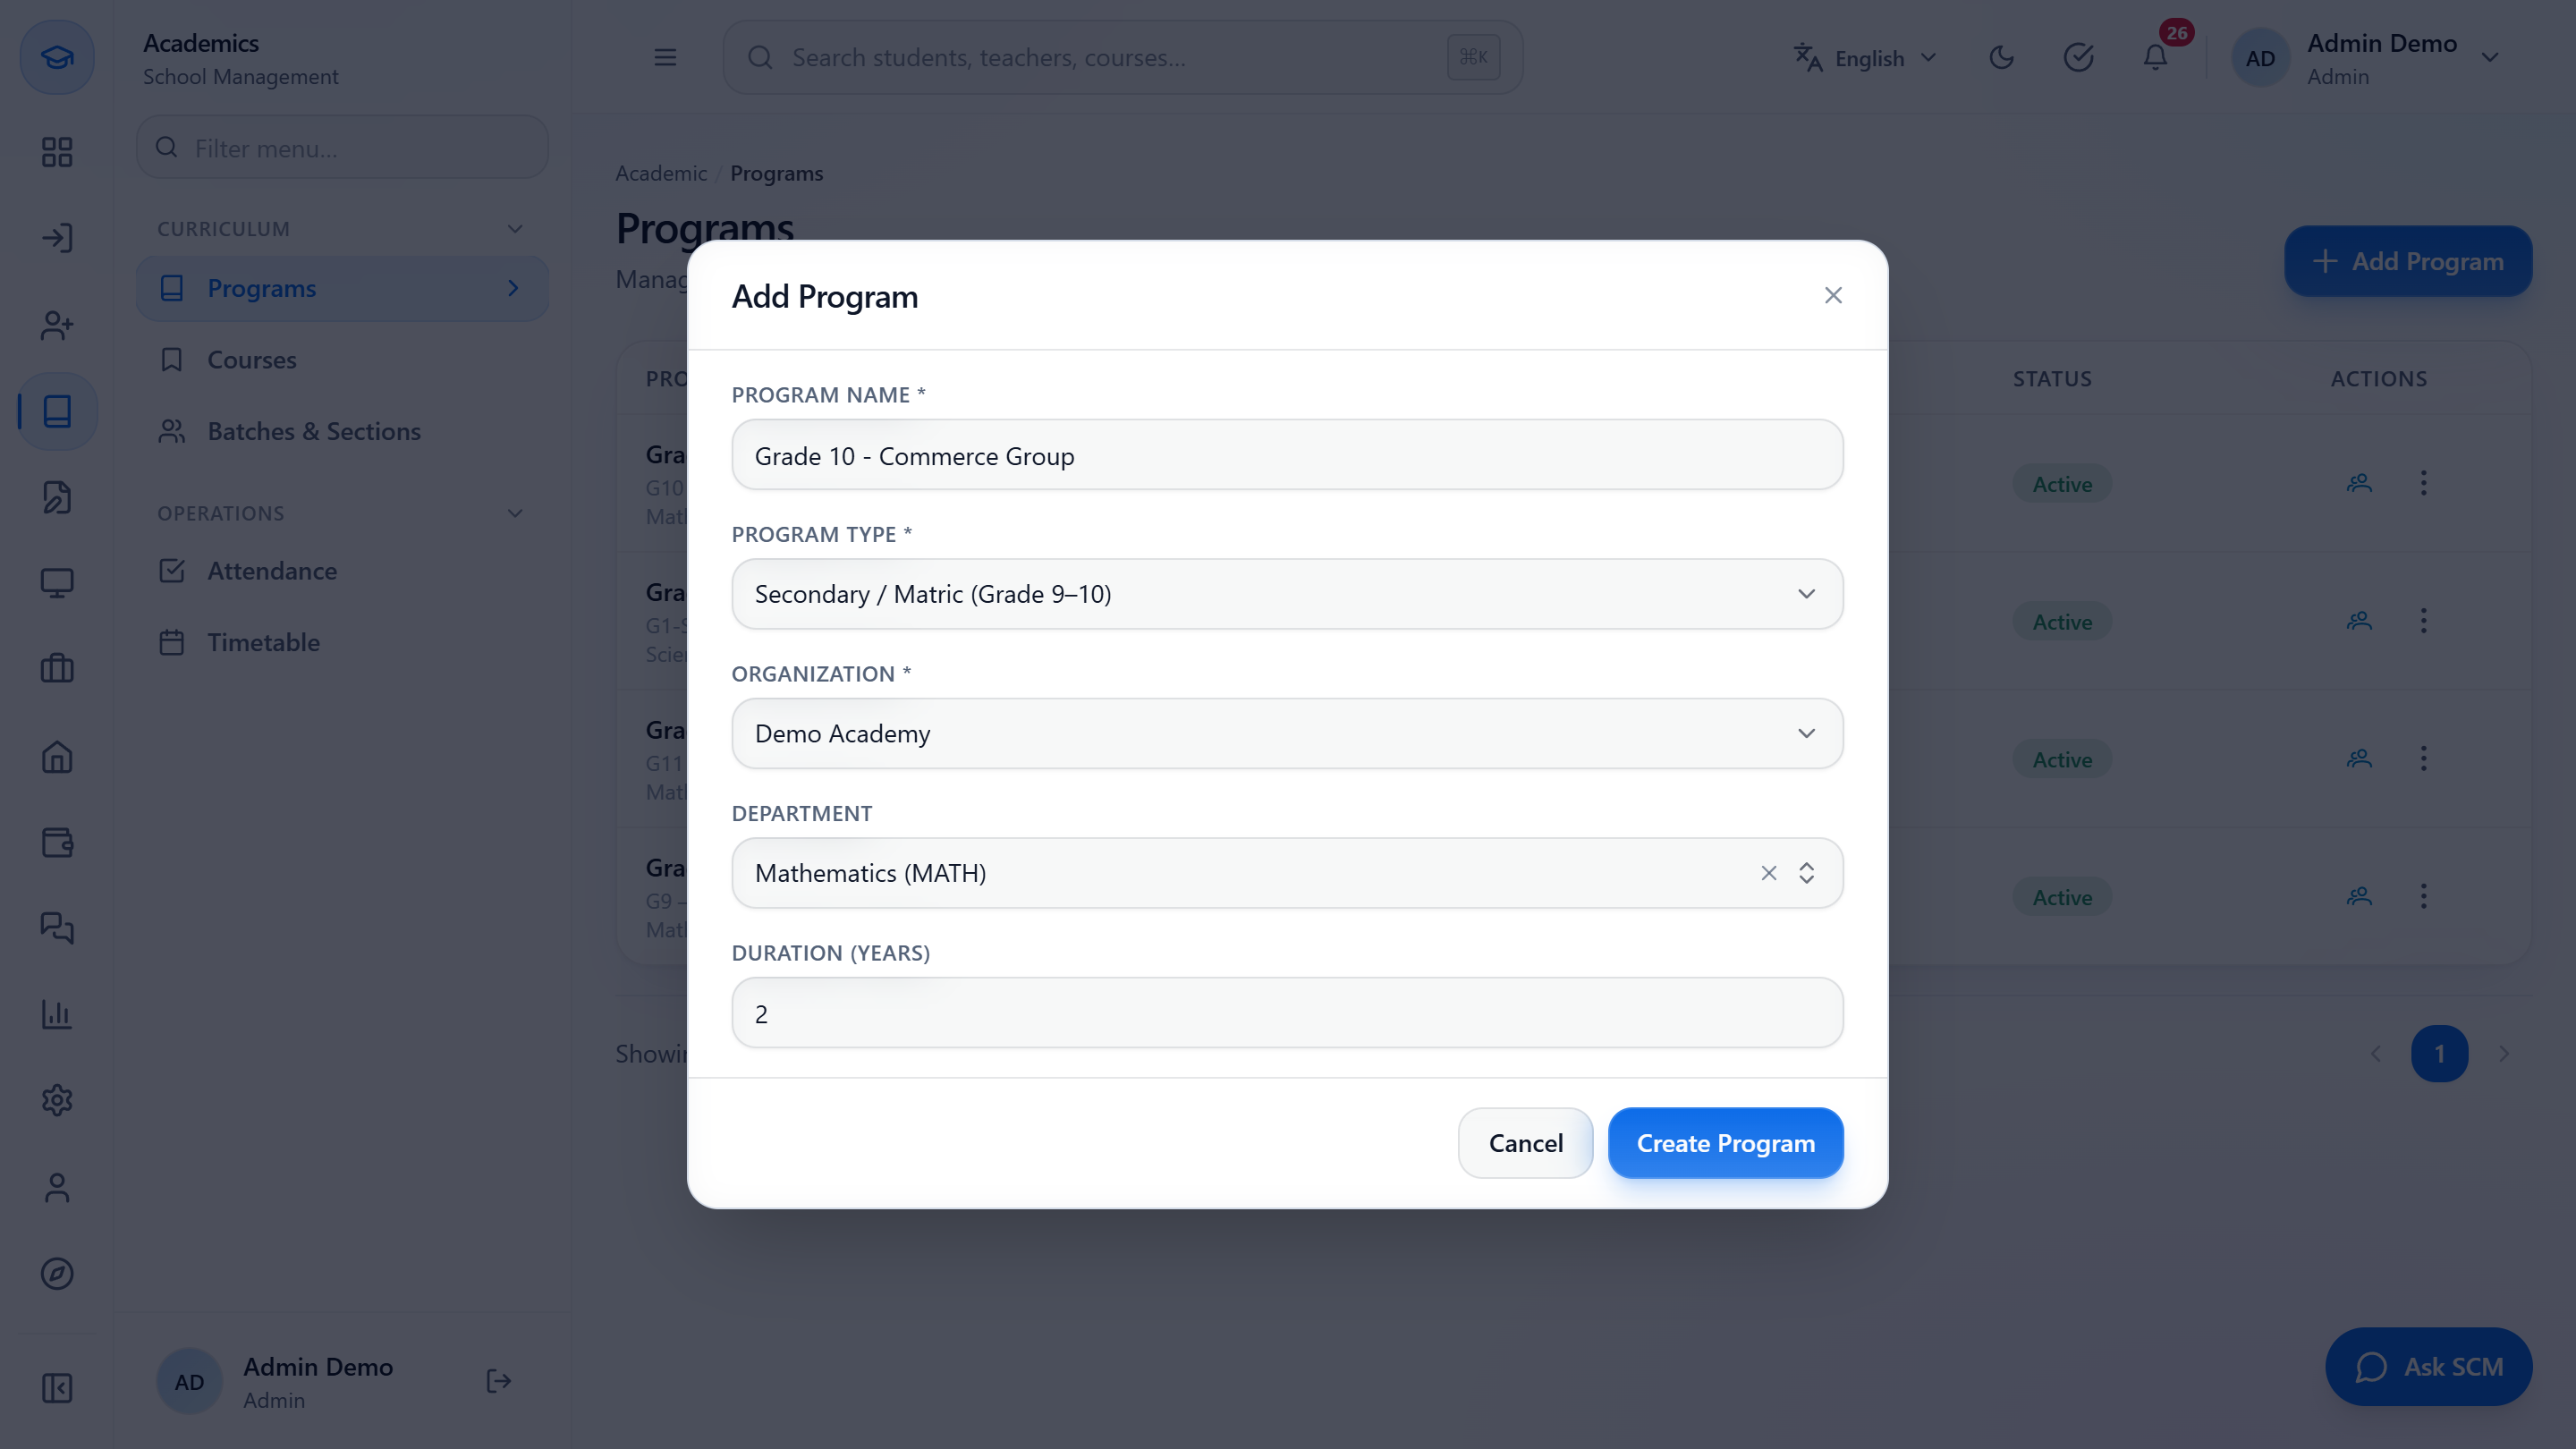
Press Add Program. Type the Program Name (Grade 10 - Science Group), choose the Program Type (Secondary / Matric (Grade 9-10)), the Organization (Demo Academy) and optionally the Department (Science). Duration (Years) fills in for you (2 for Secondary). Create Program stays grey until the name, type and organization are set.
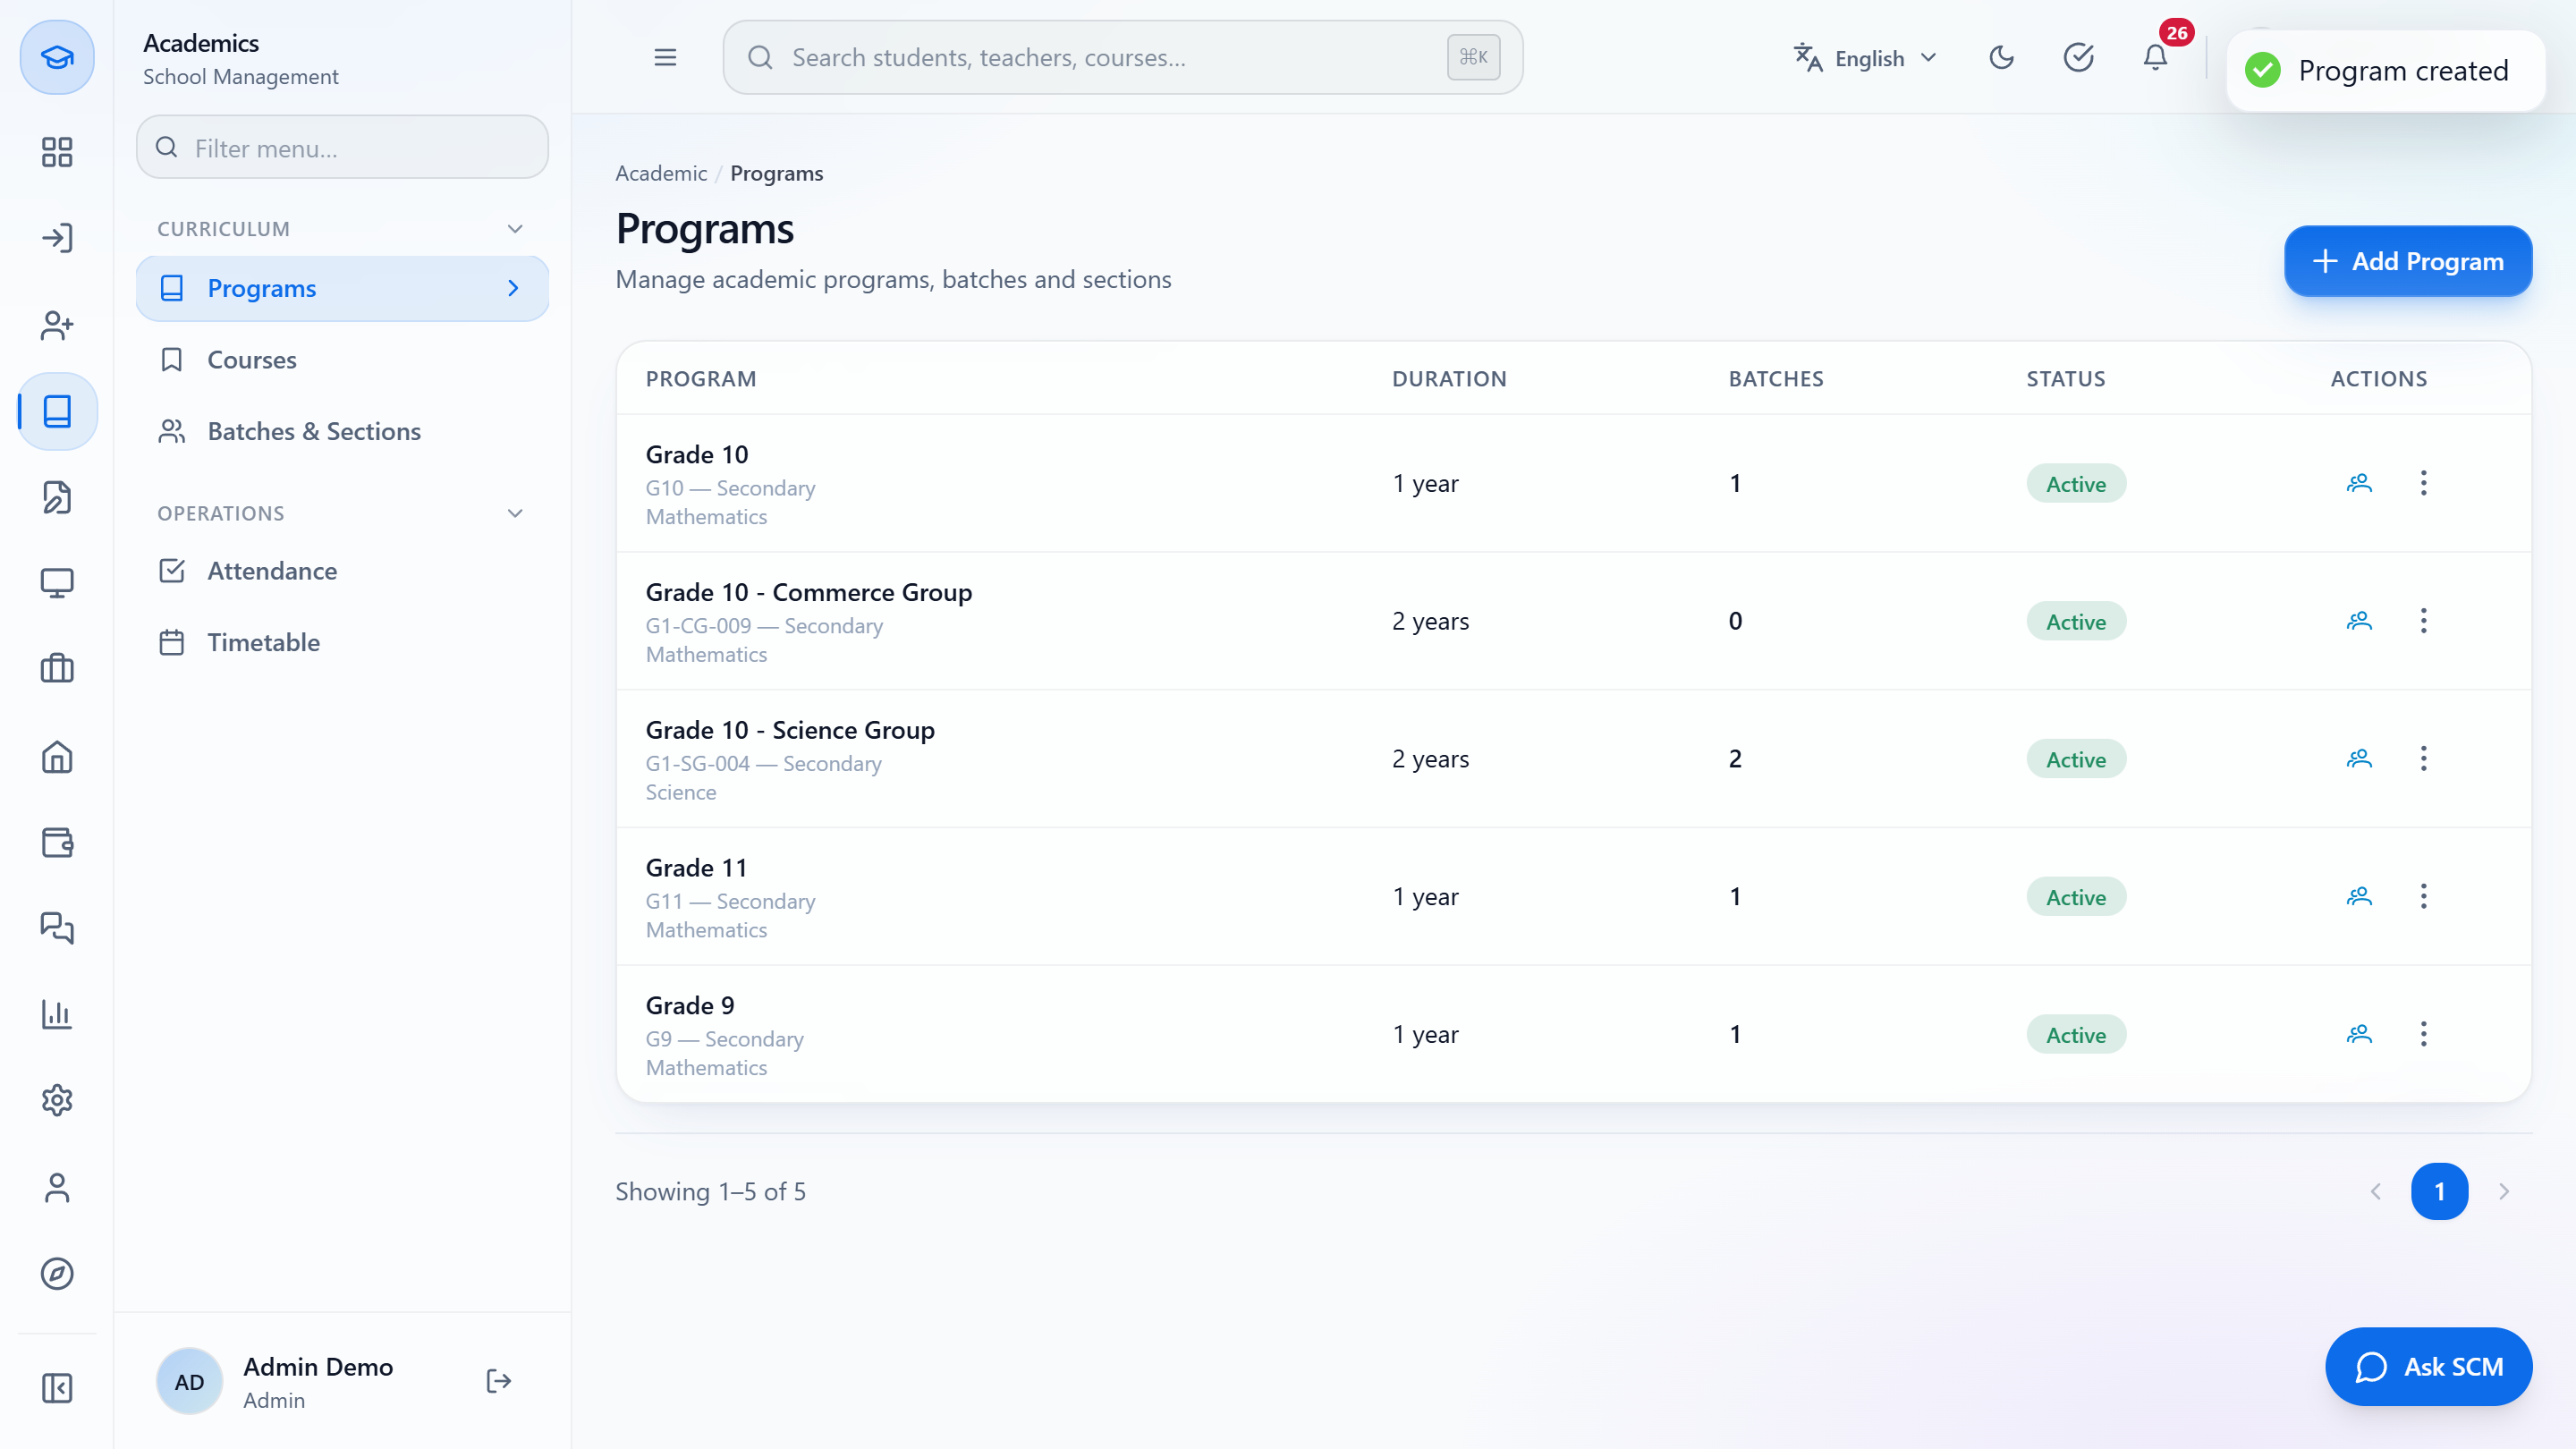
The toast says Program created. The new row shows a generated code (G1-SG-004), type Secondary, department Science, 2 years, 0 batches and Active.
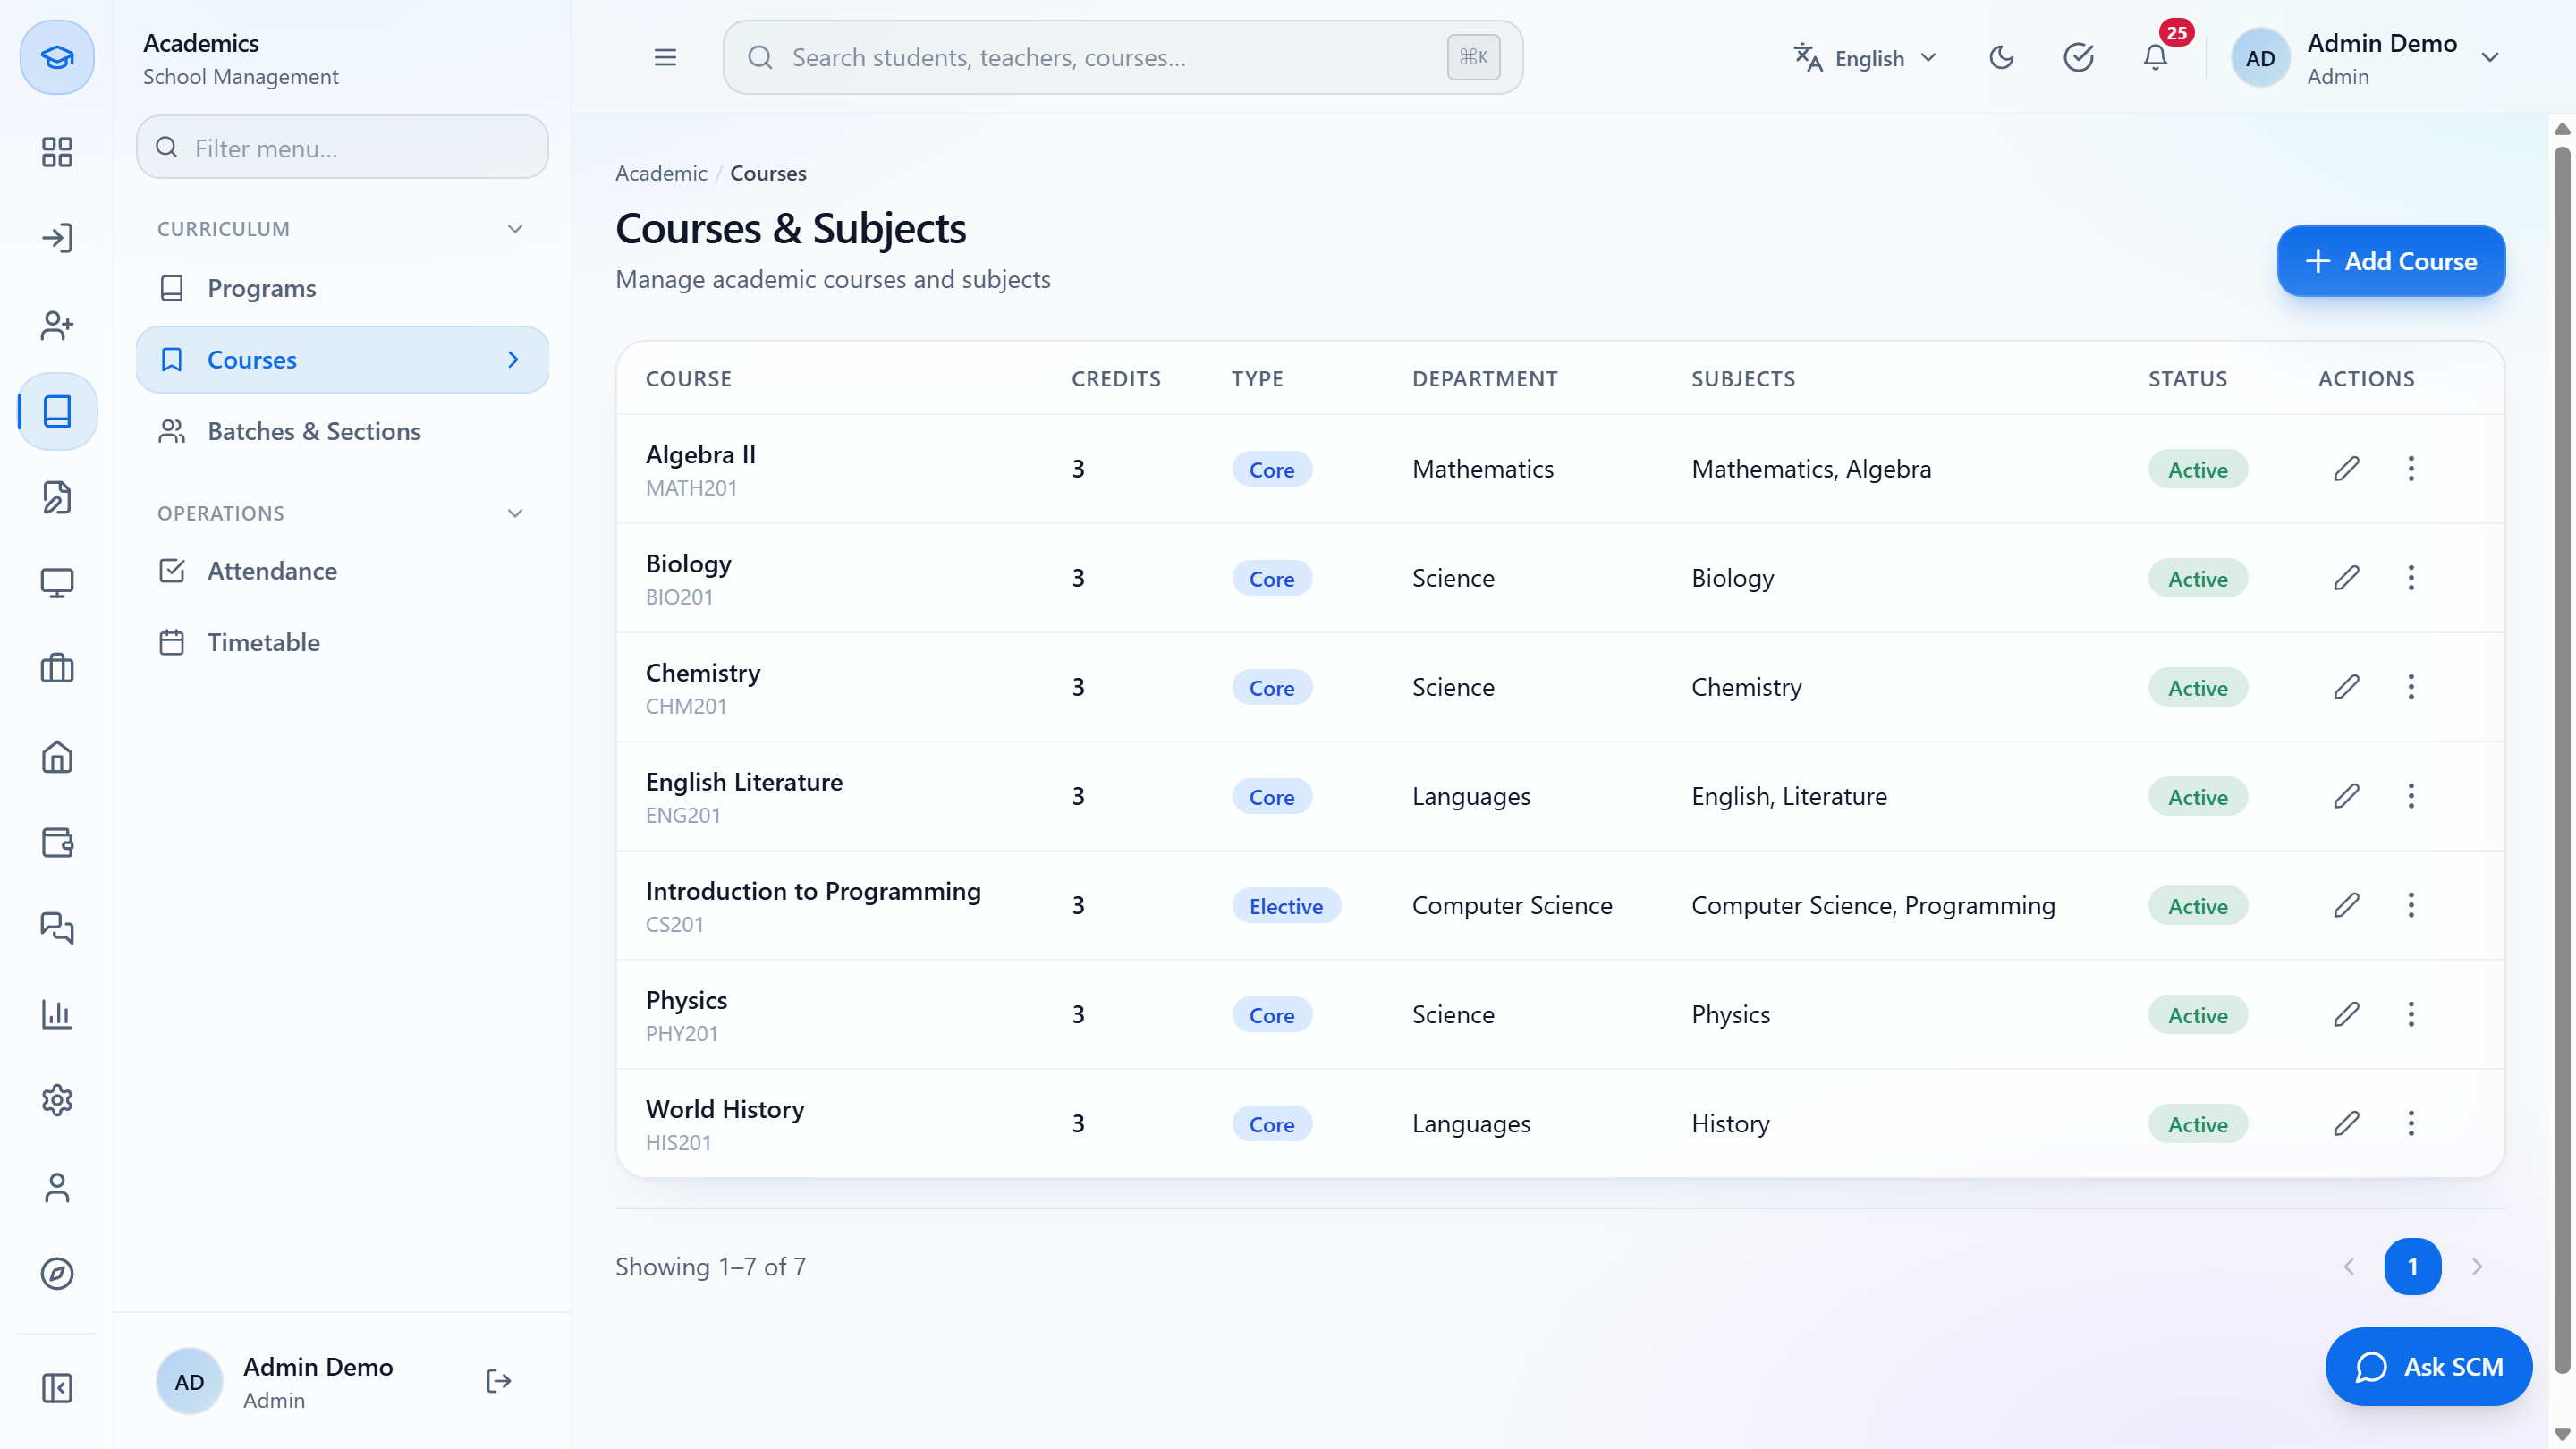
Click Academics › Curriculum › Courses. Courses & Subjects lists Course (name and code), Credits, Type, Department, Subjects and Status. A pencil edits a row and its menu holds Syllabus and Delete.
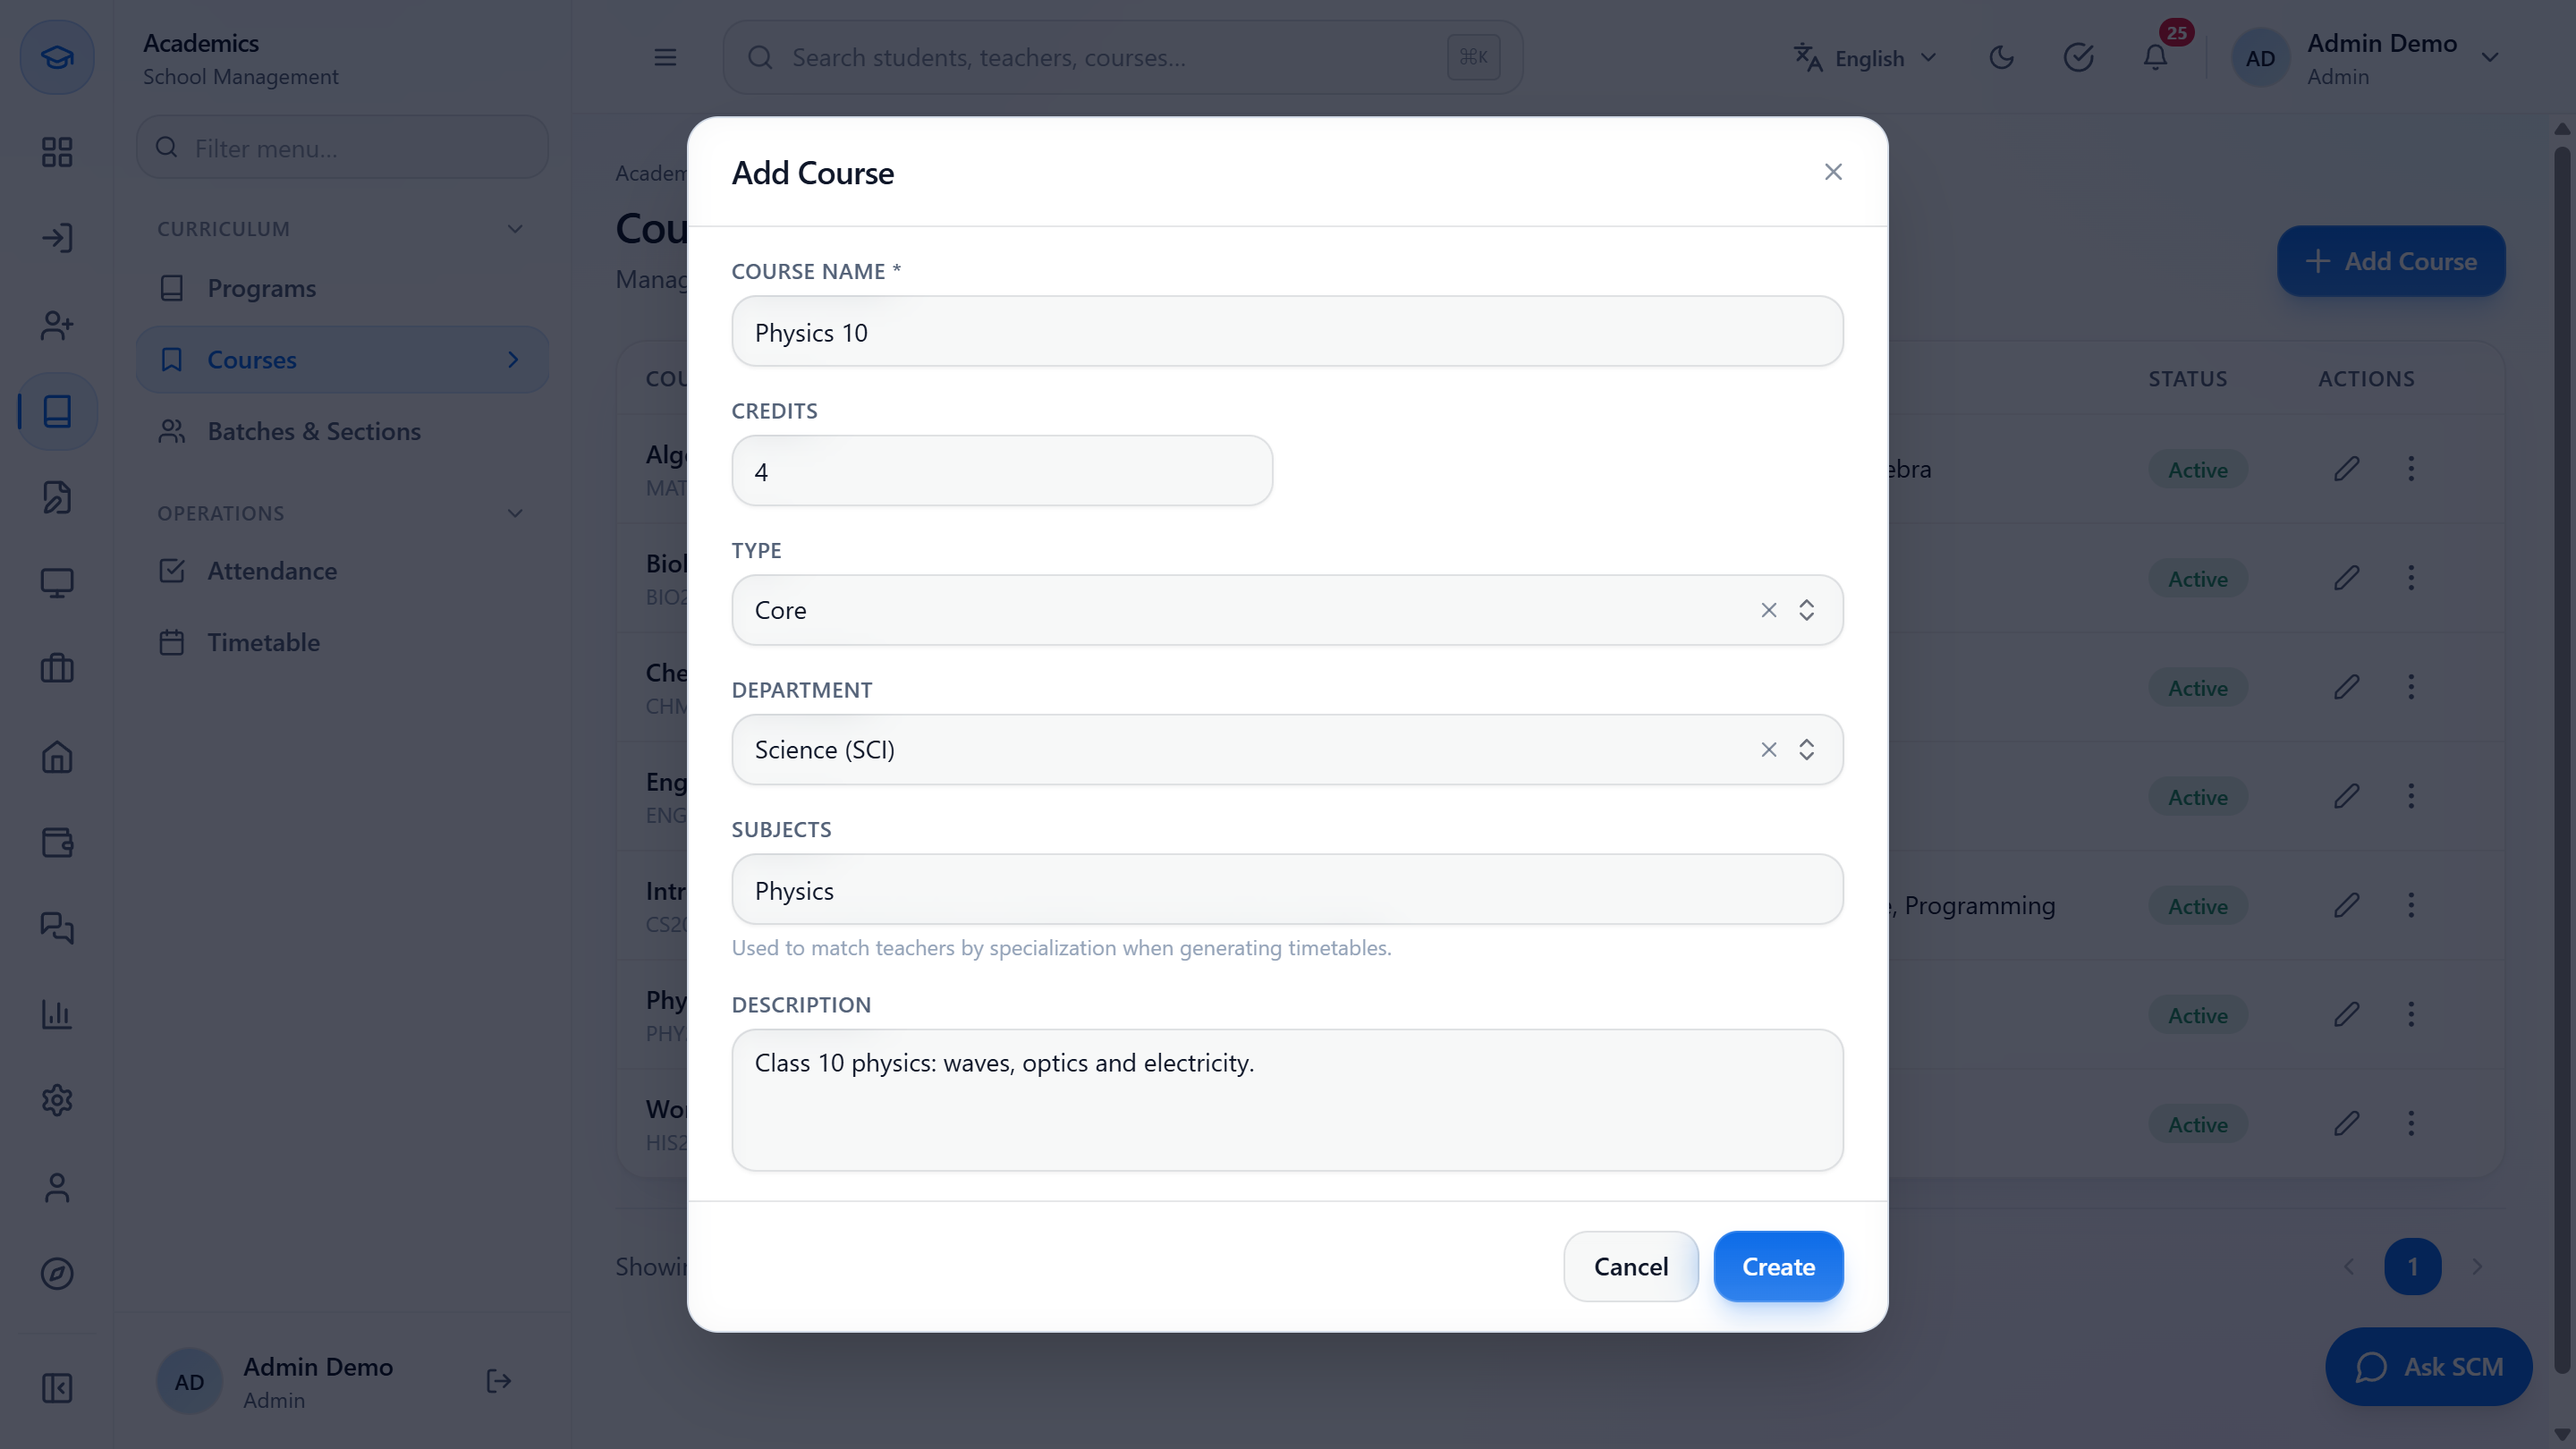
Press Add Course. Only Course Name is required (Physics 10). Set Credits (4), Type (Core, Elective, Lab or Seminar), Department (Science) and Subjects (Physics). The toast is Course created and the course gets a code such as P1-008.
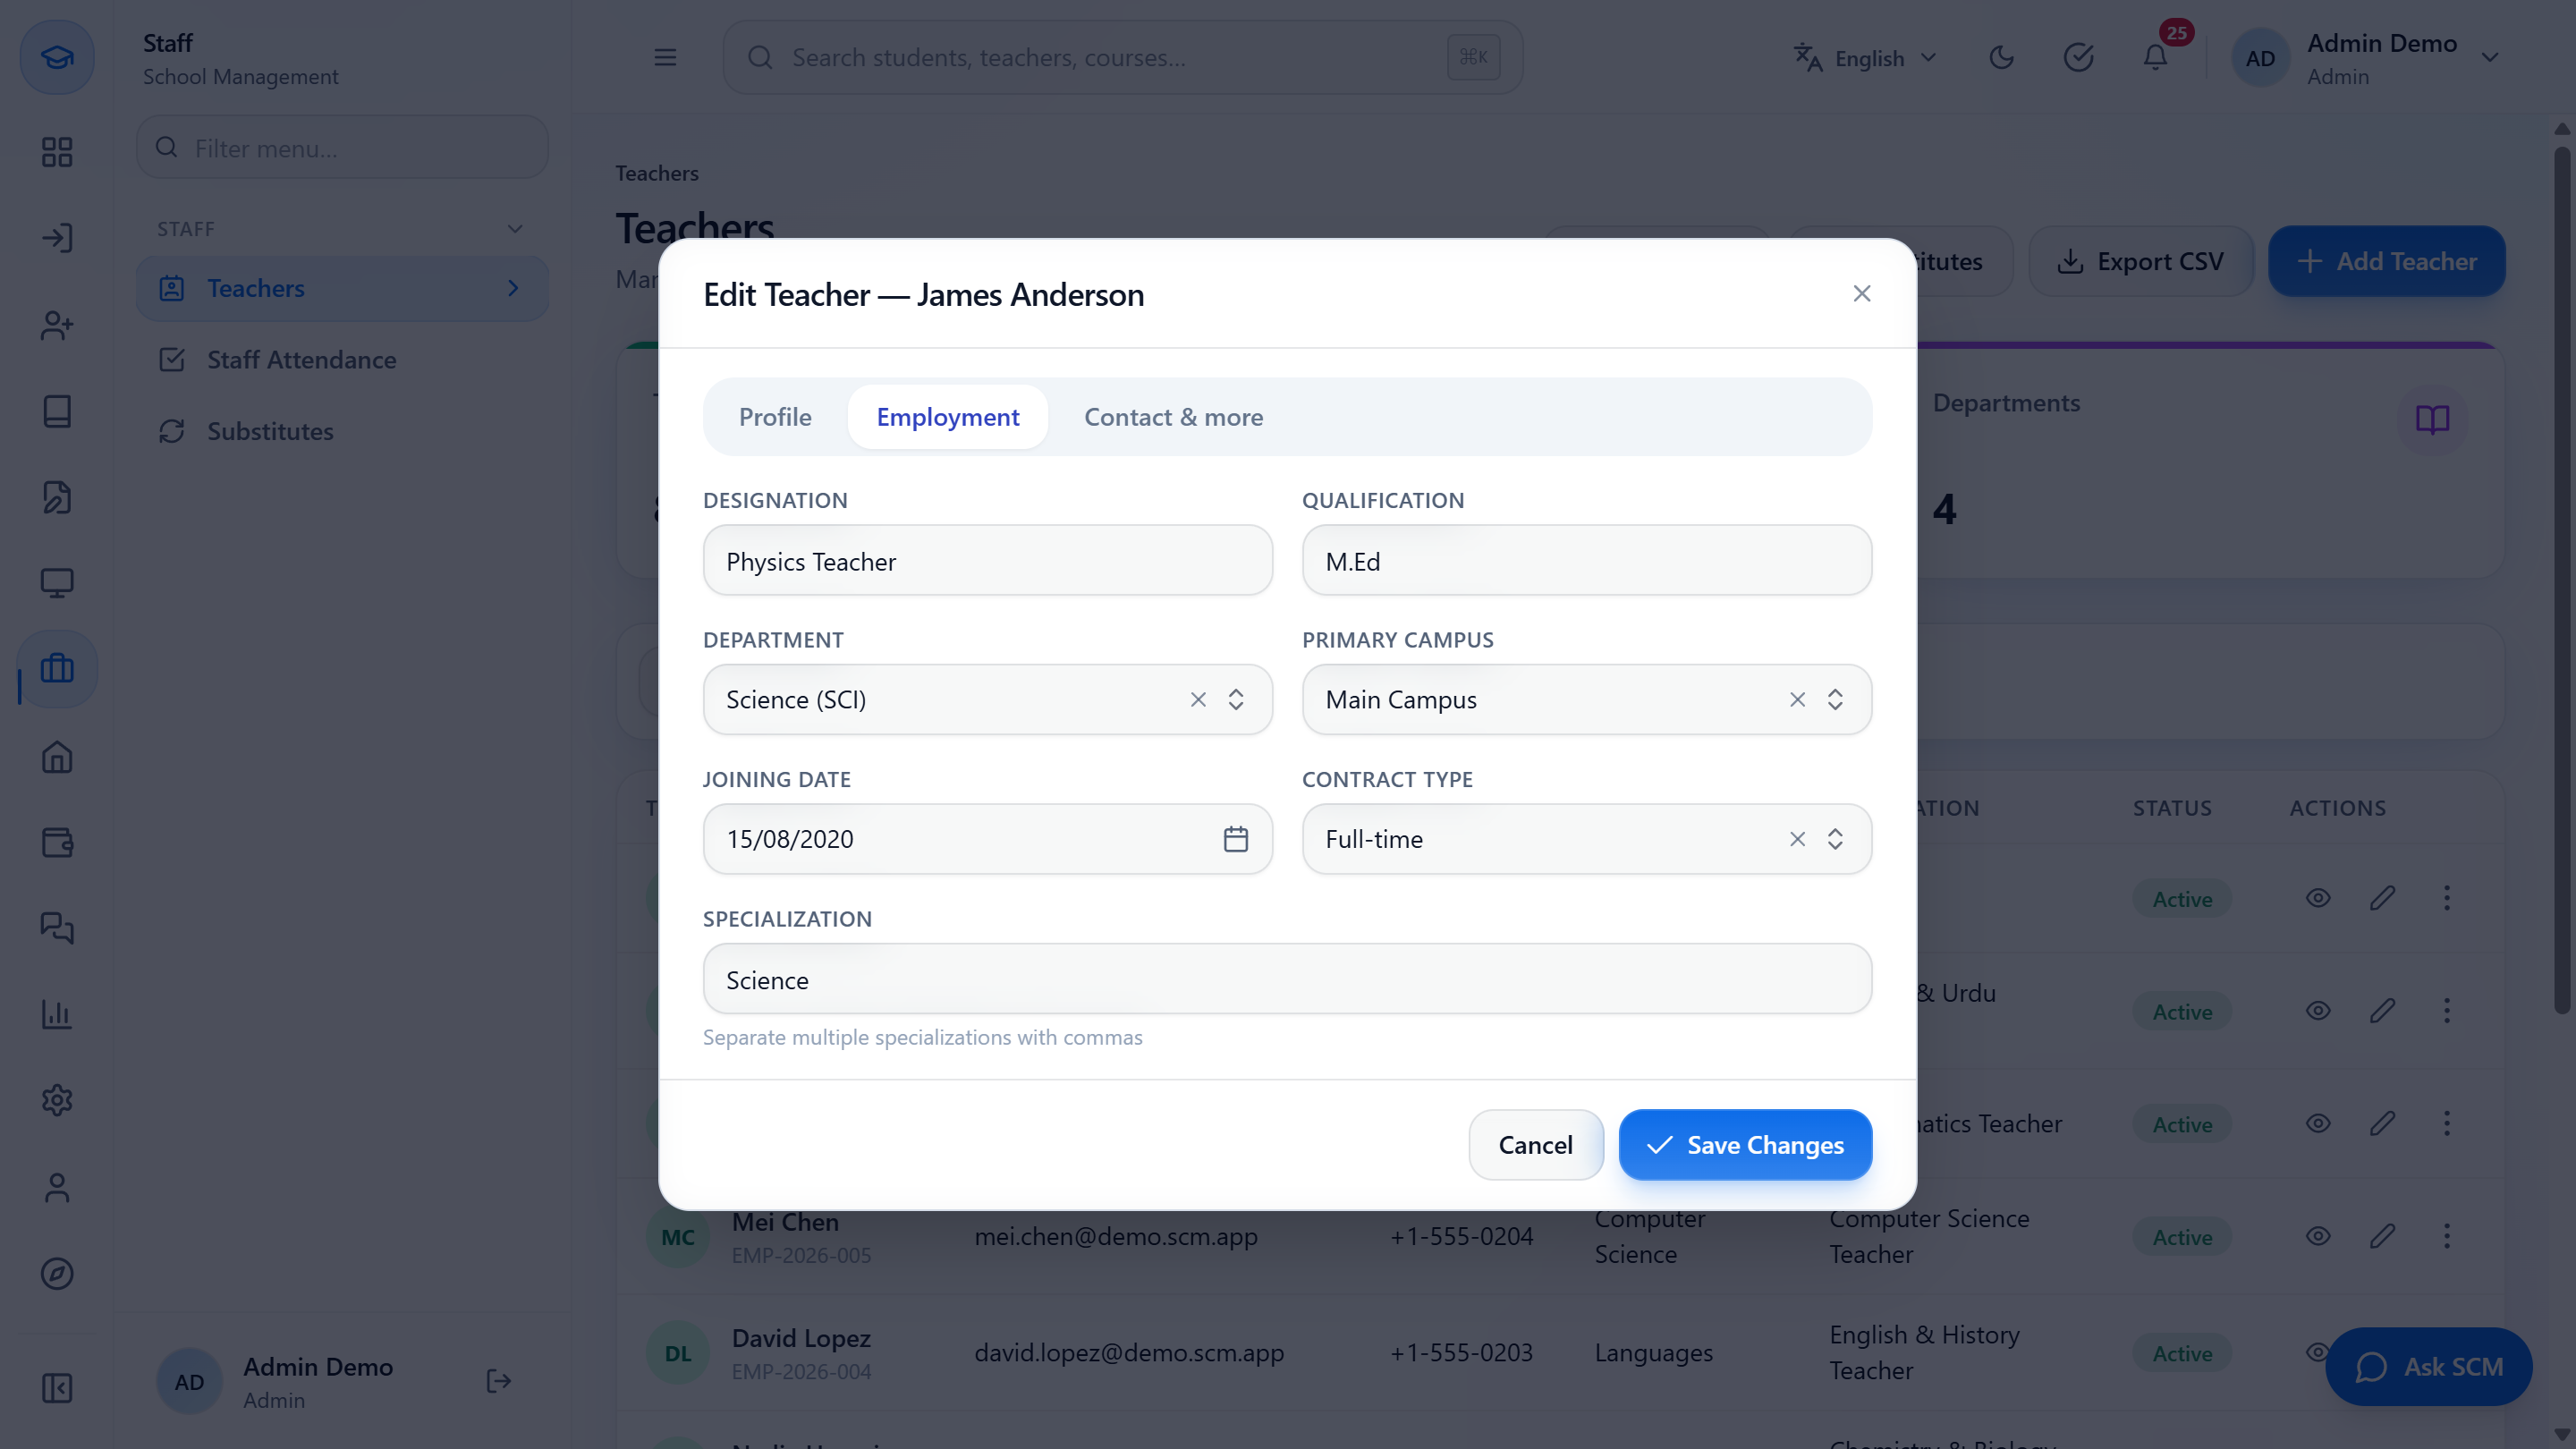
On a teacher's record the Specialization field holds the same kind of words (for example Science). The timetable generator matches courses and teachers through them, so keep both tidy.
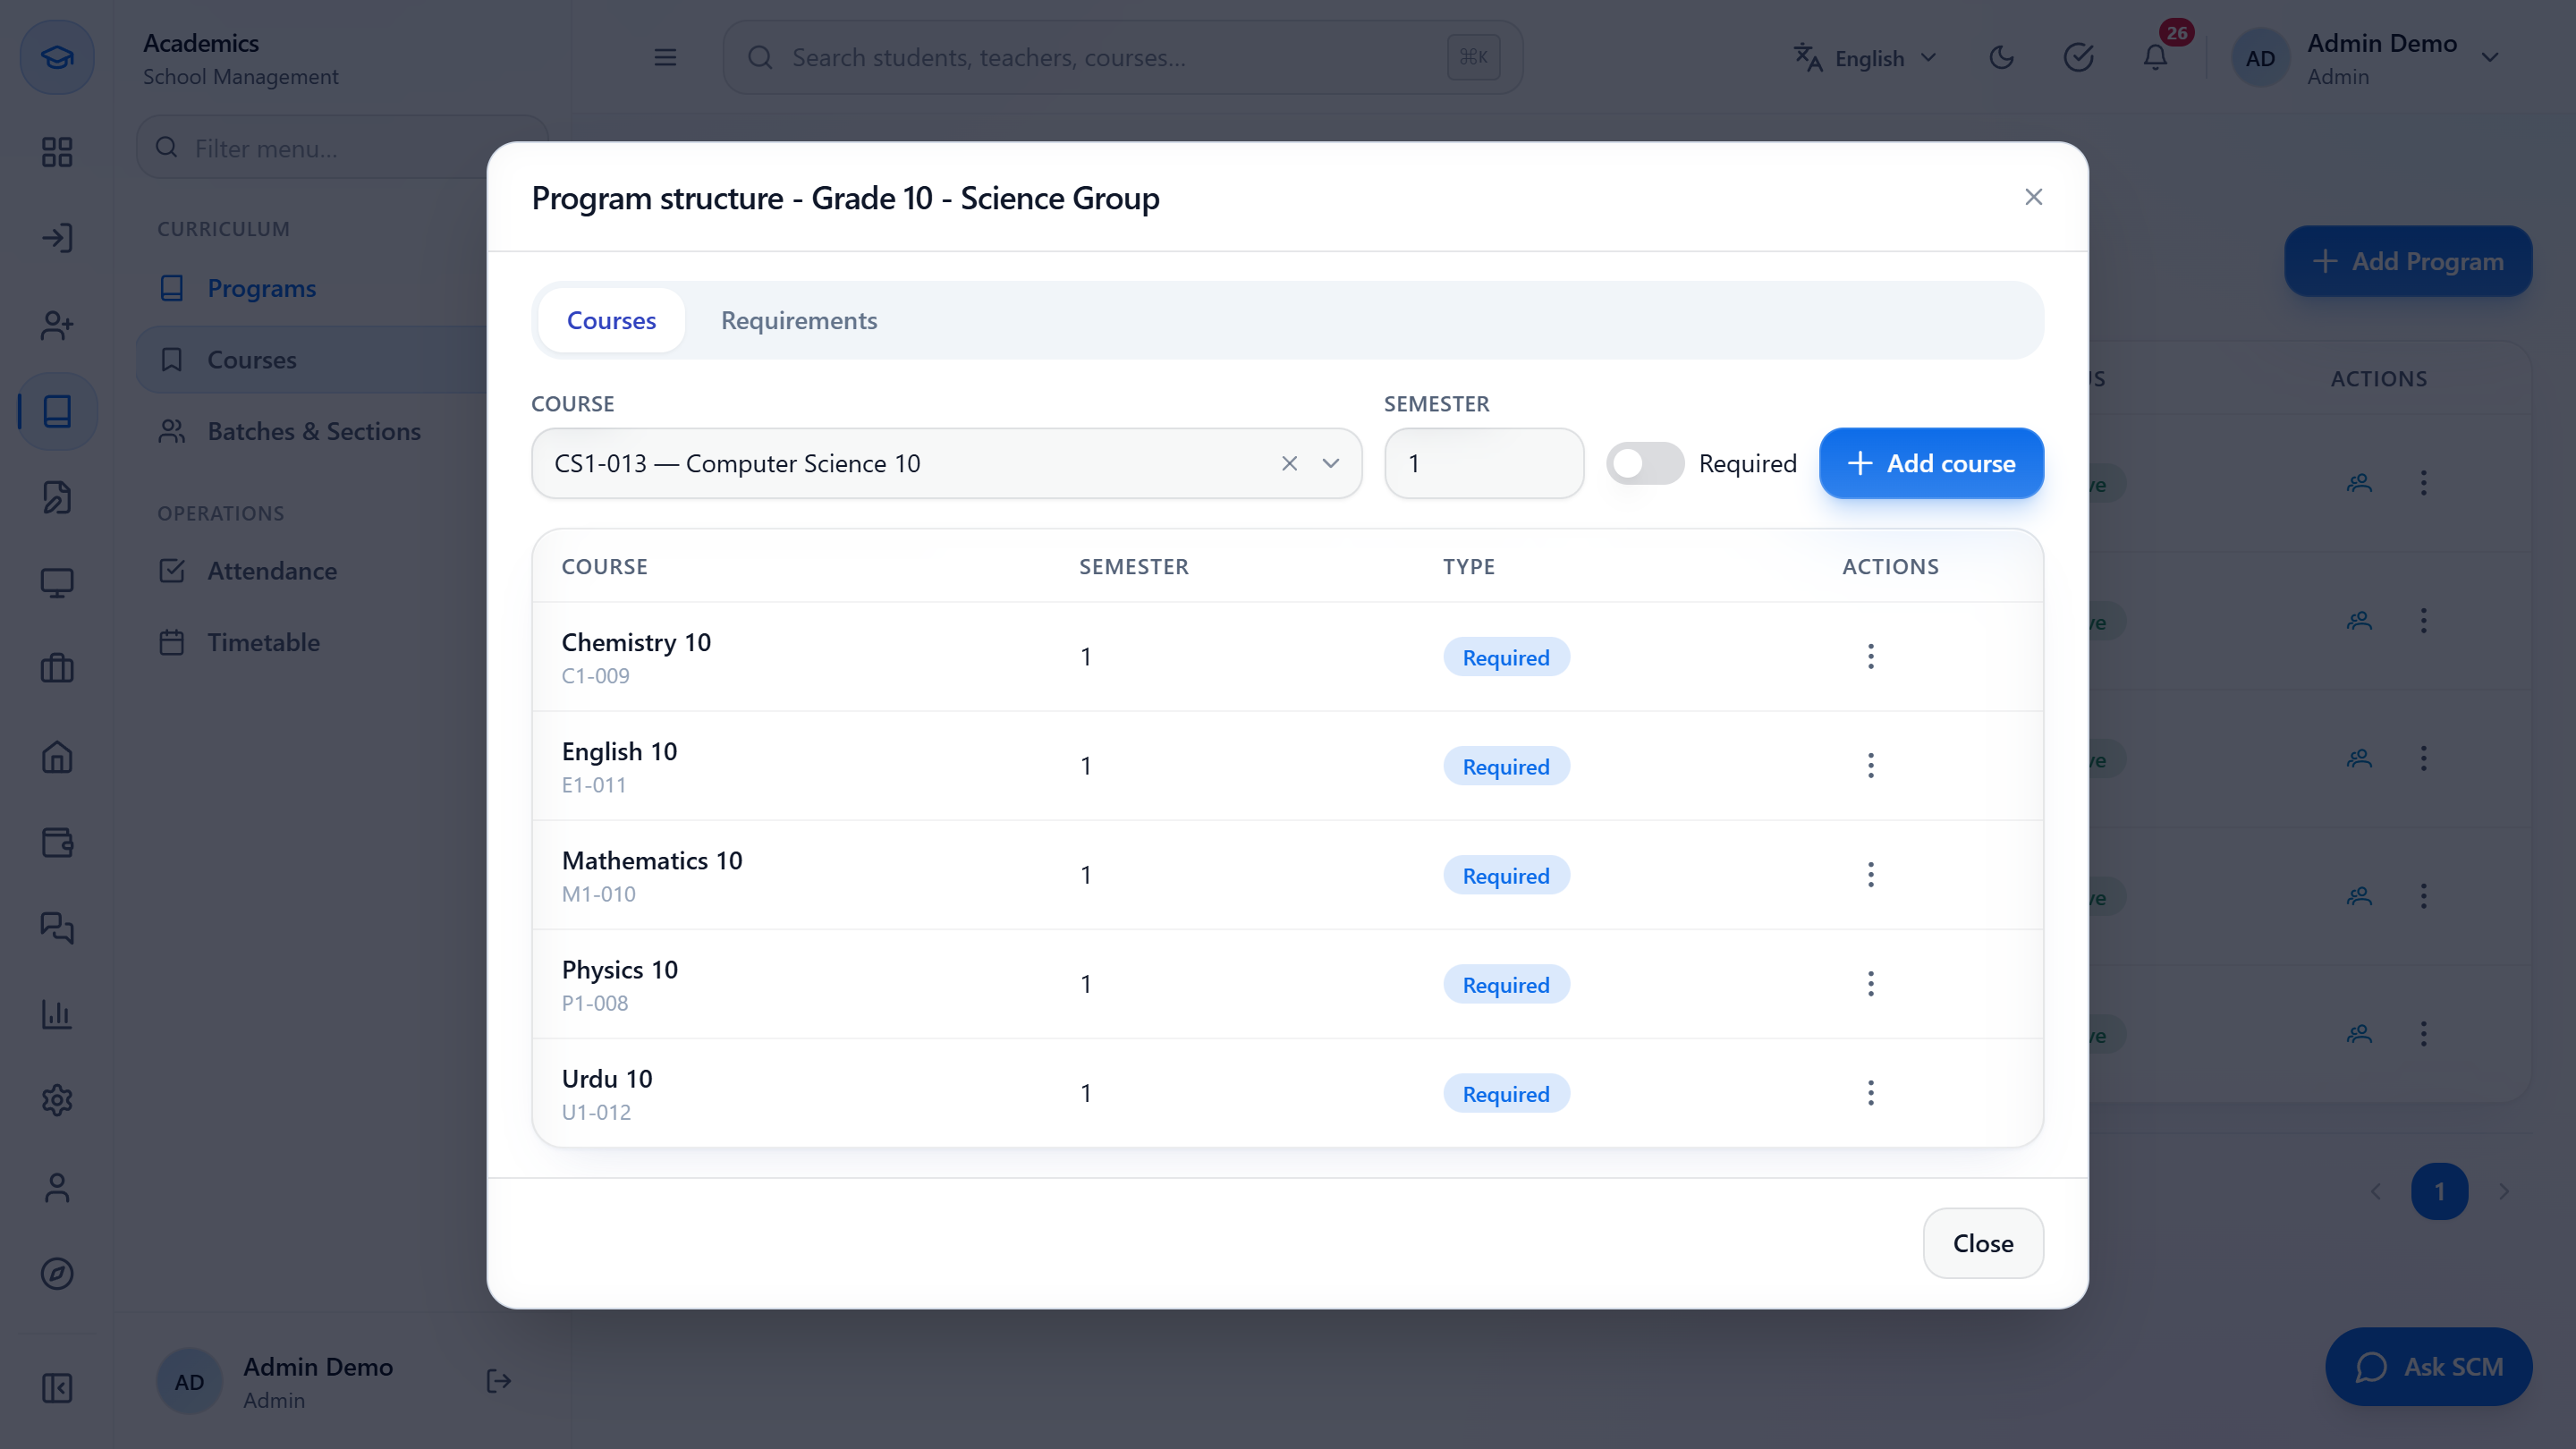
On the program row open the menu and choose Courses & requirements. In Program structure on the Courses tab search a Course by name or code, set the Semester (default 1), leave Required on or switch it off for an optional course, and press Add course. The toast is Course saved on program. In this guide all six courses are in semester 1 and Computer Science 10 is Optional.
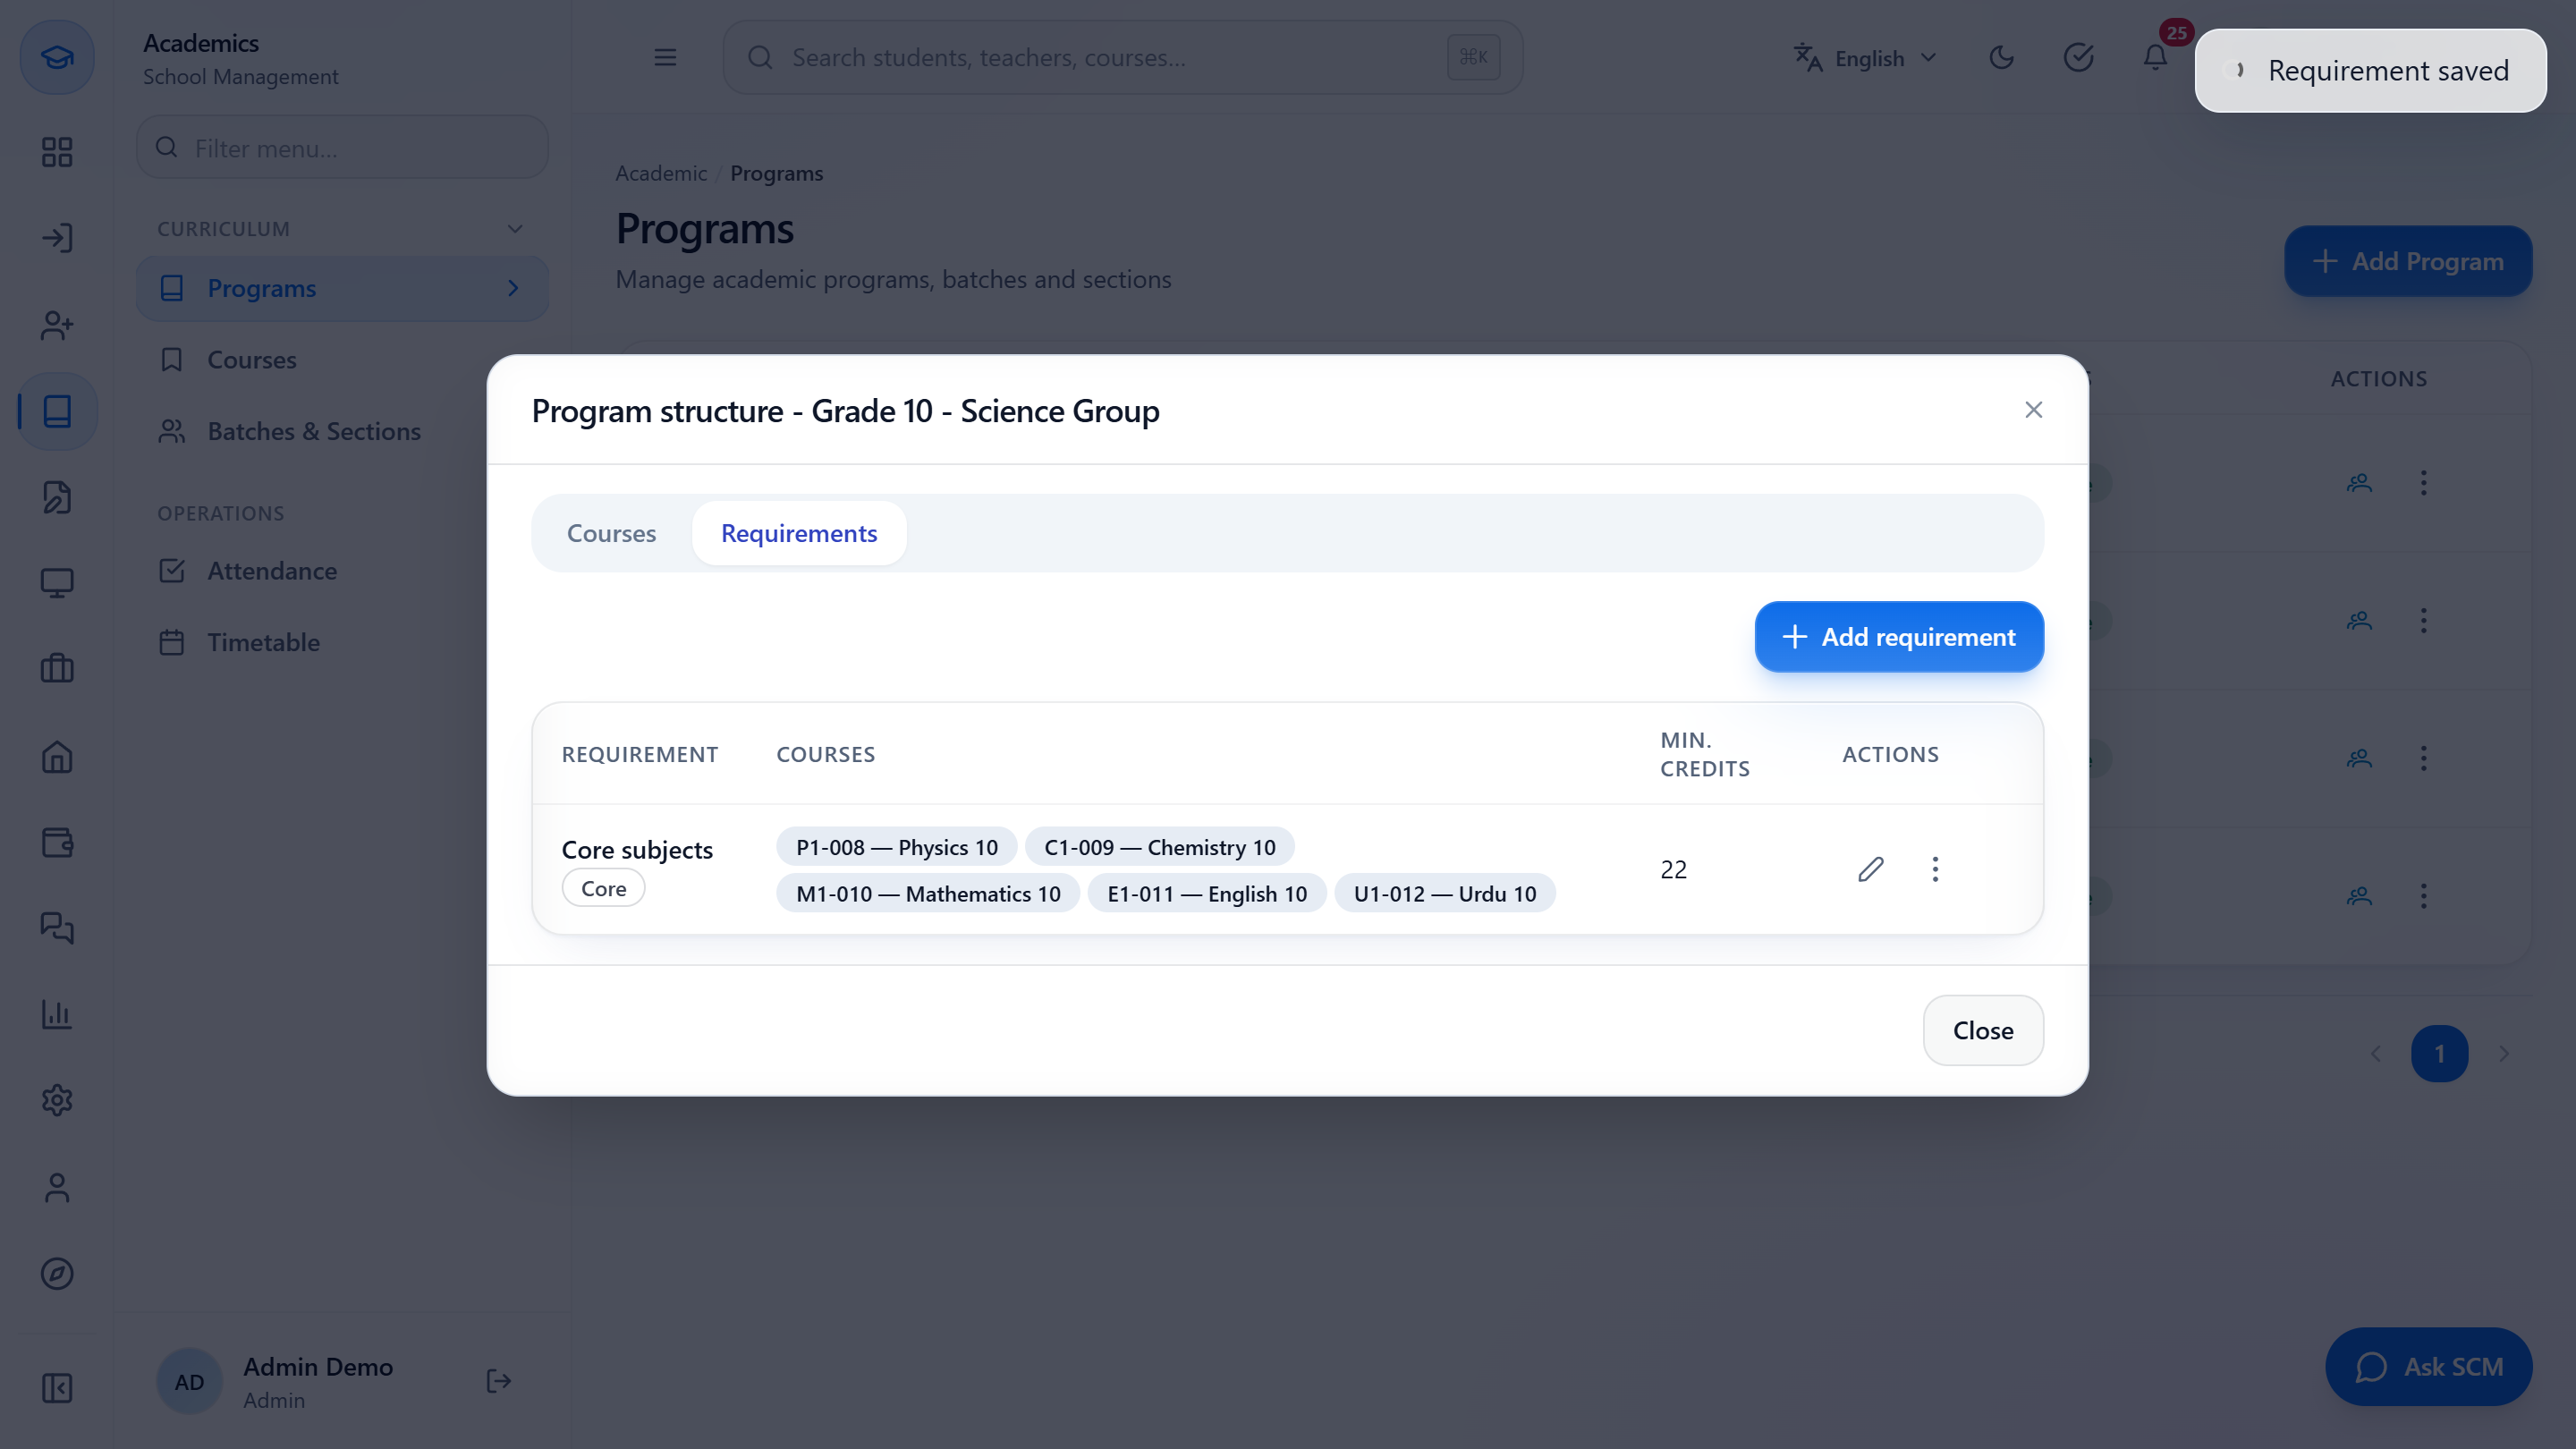
Open the Requirements tab. Enter a Requirement name (Core subjects), the Type (Core, Elective or General), the Min. credits (22) and add the courses that satisfy it. Press Save; the toast is Requirement saved.
On the course row open the menu and choose Syllabus. On the Outline tab press Add topic and give each topic a title and Hours (for example Sound 6 h, Geometrical Optics 10 h). Use the arrows to move a topic, indent to make it a sub-topic and the bin to remove it. At the bottom you see "Total planned: 44 h · 4 credits (about 60 h at 15 h per credit)". Objectives and Prerequisites are on their own tabs. Press Save syllabus; the toast is Syllabus saved.
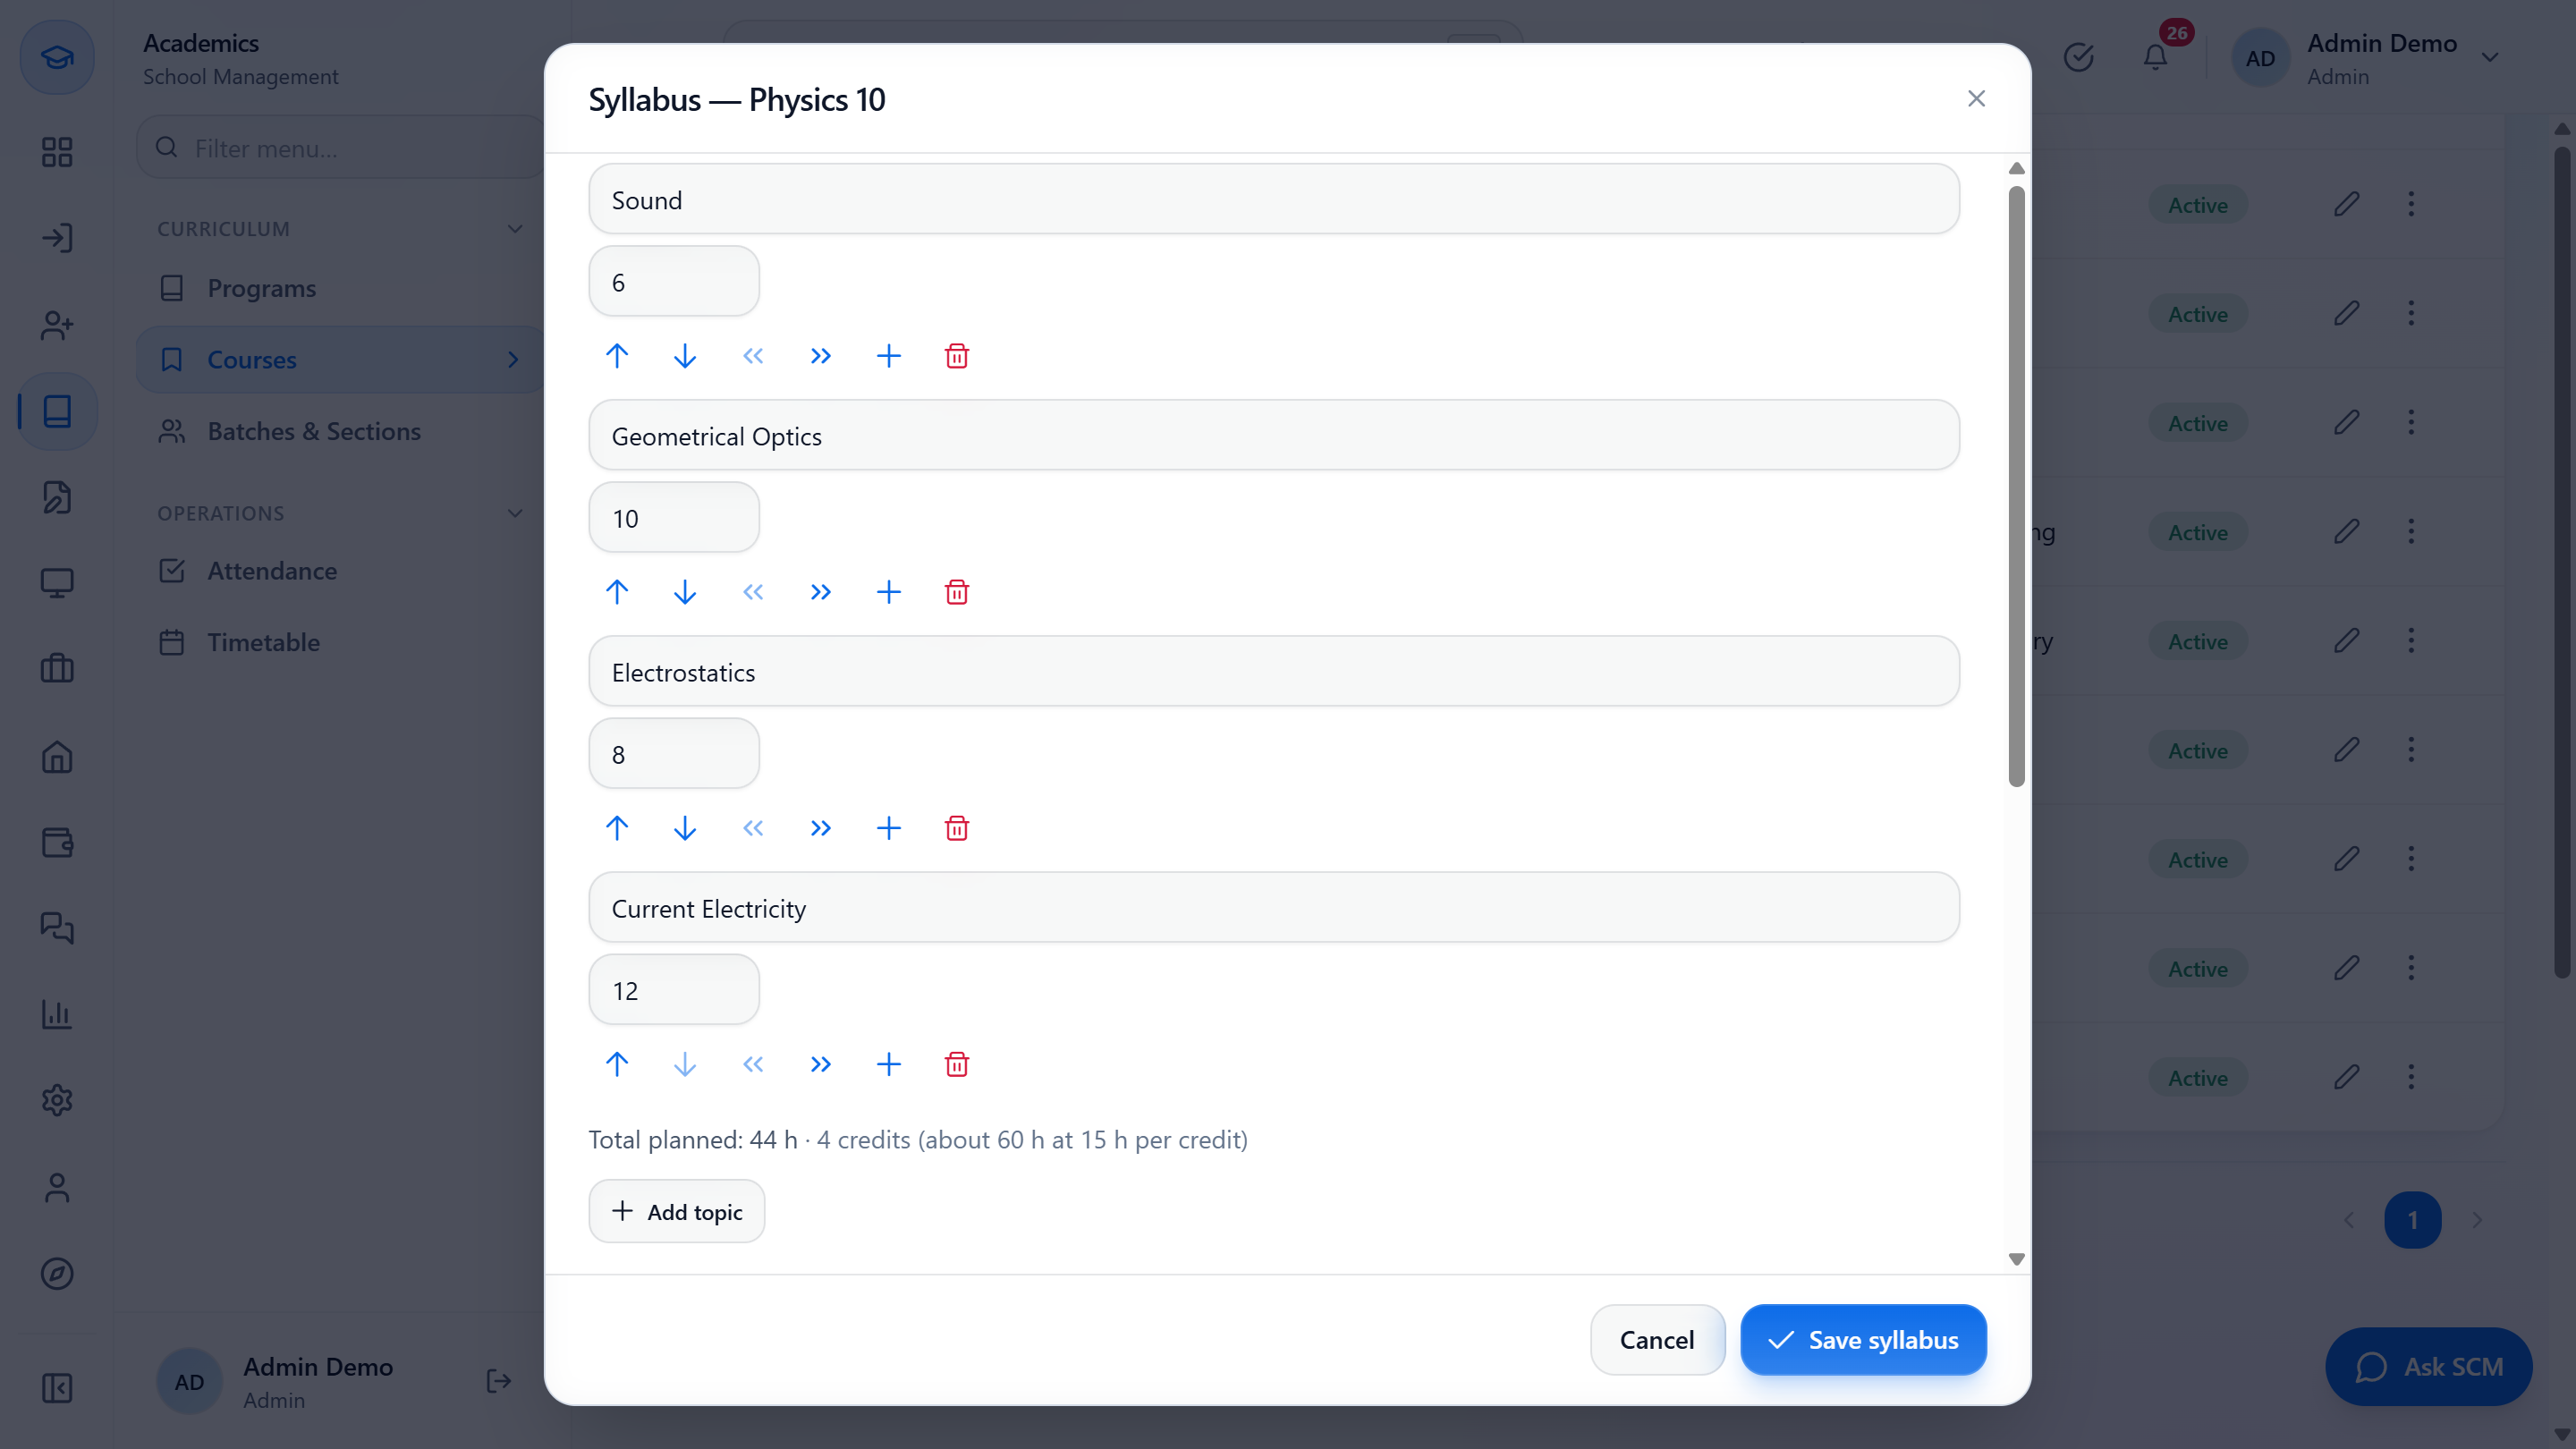
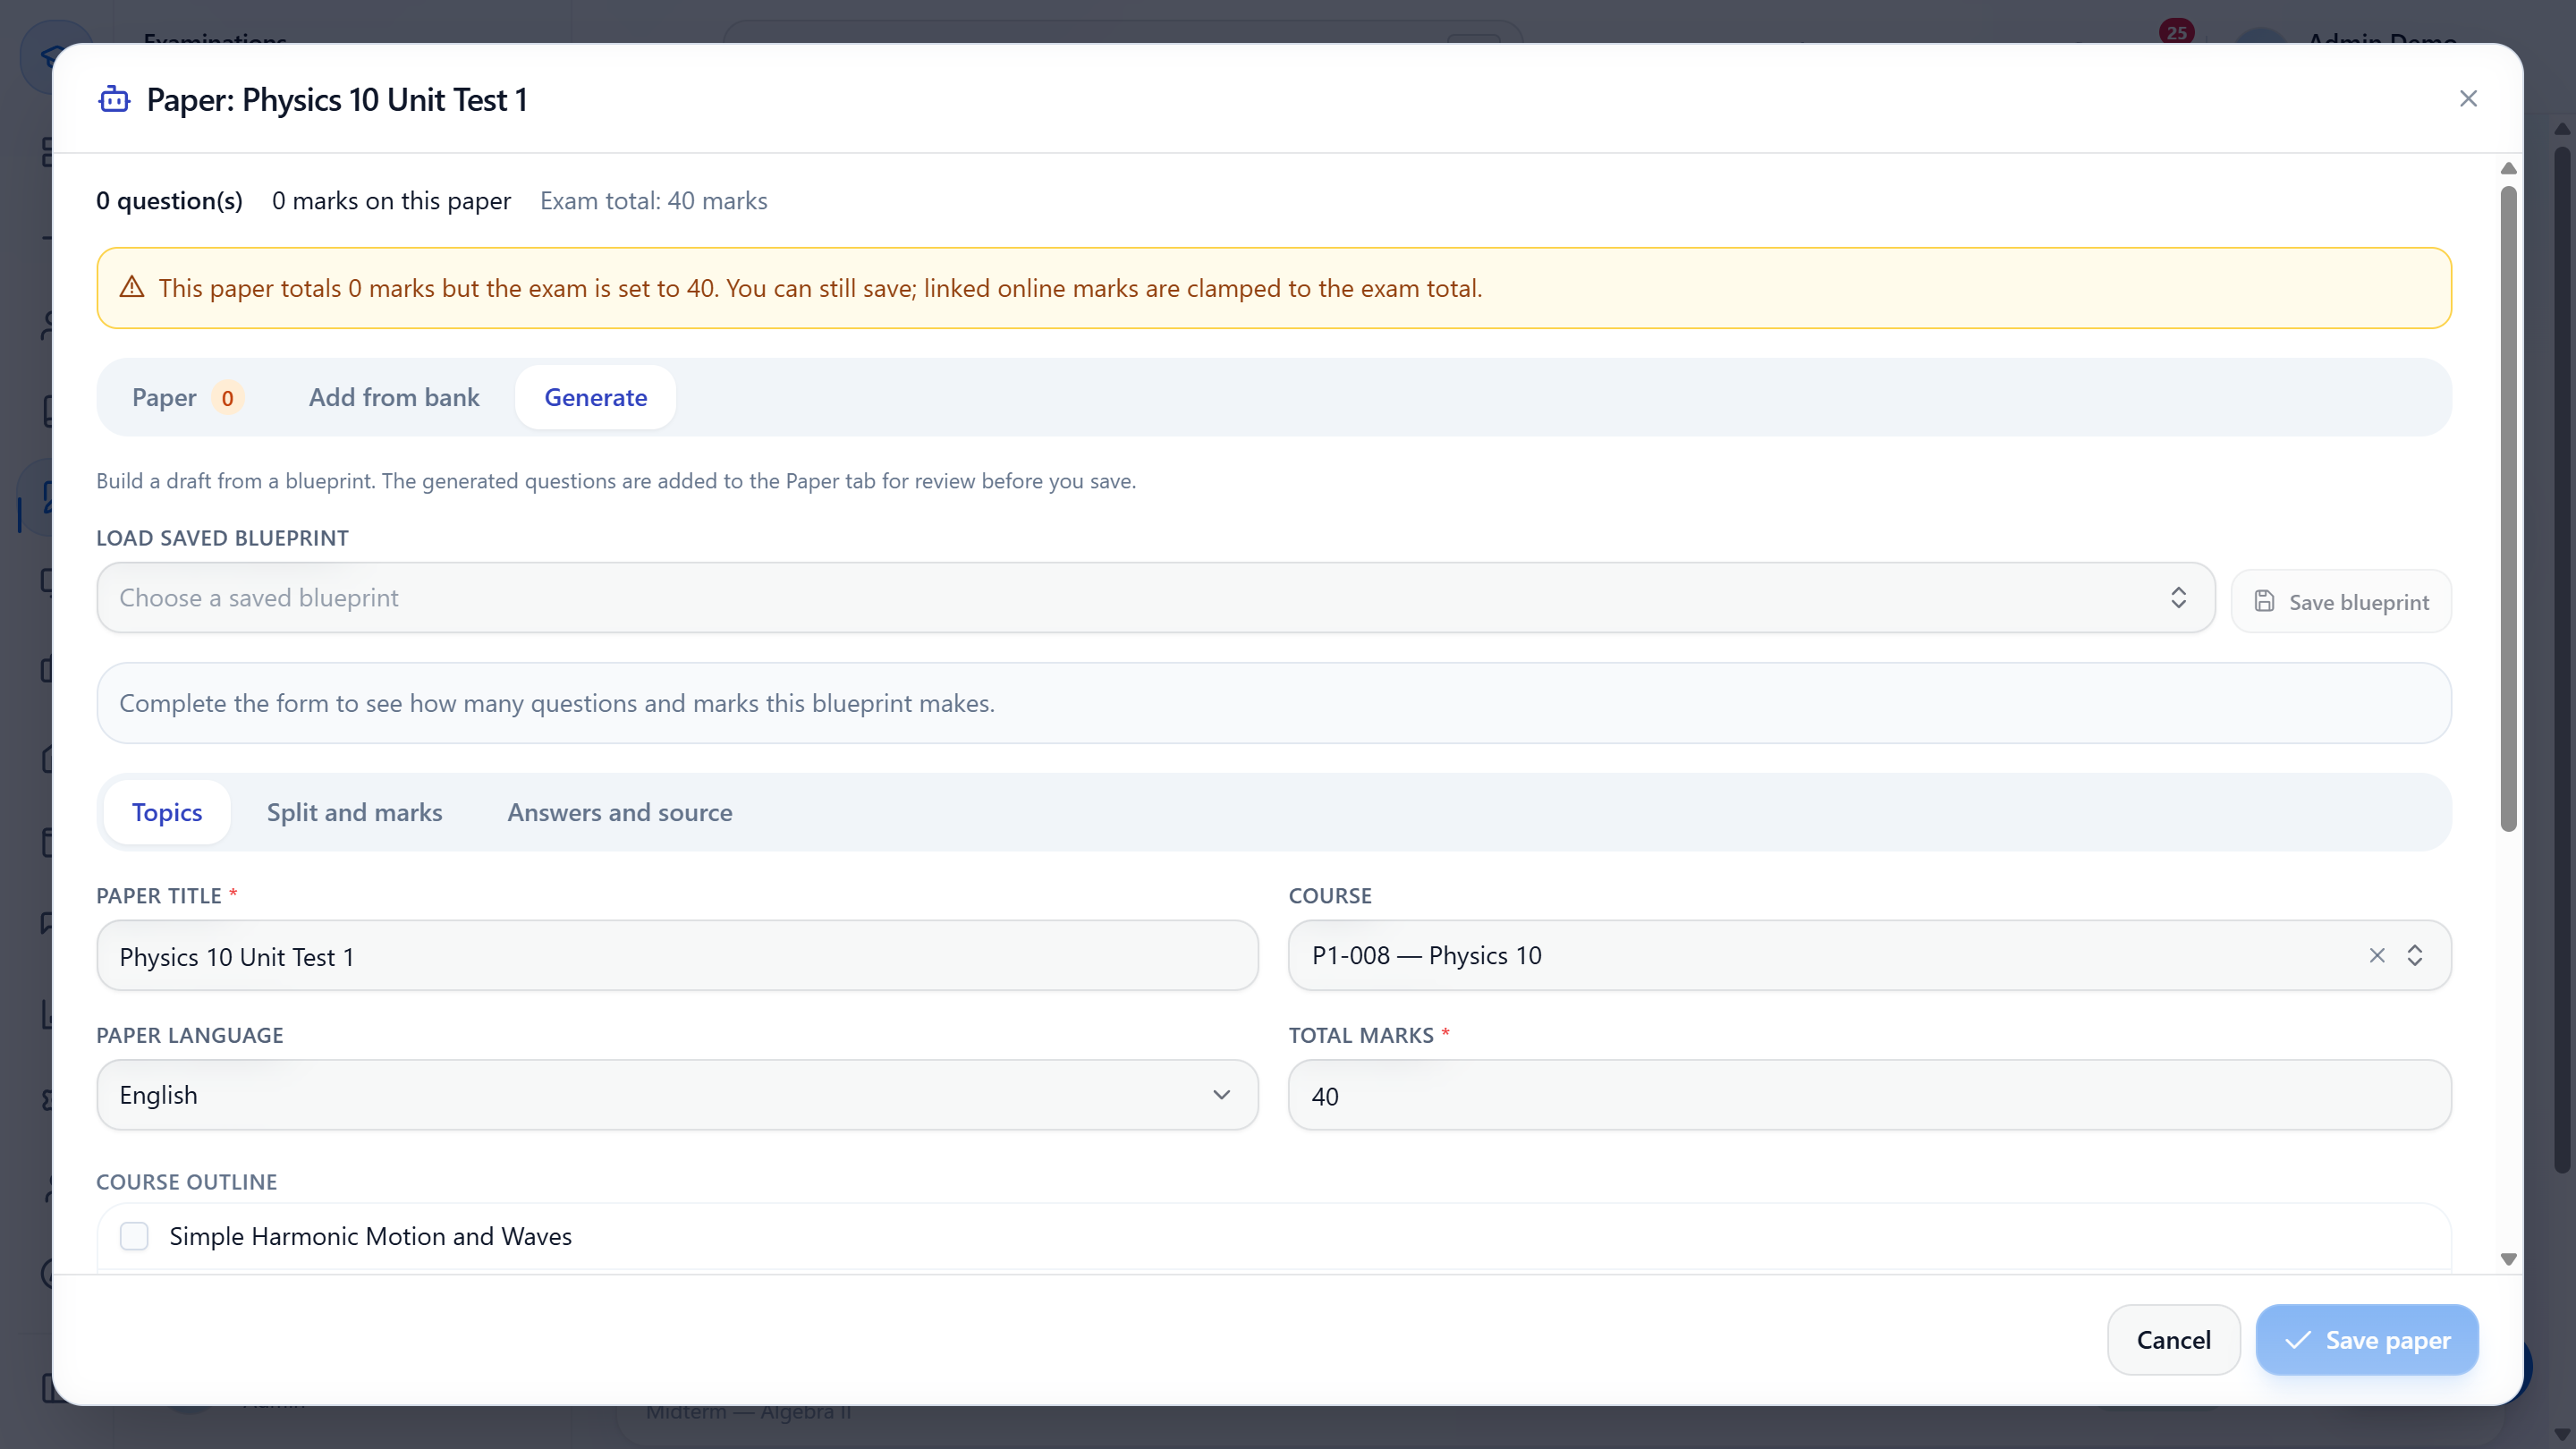
When a teacher generates an exam paper, the topic picker lists your course outline, with sub-topics shown as a path, plus custom topics.
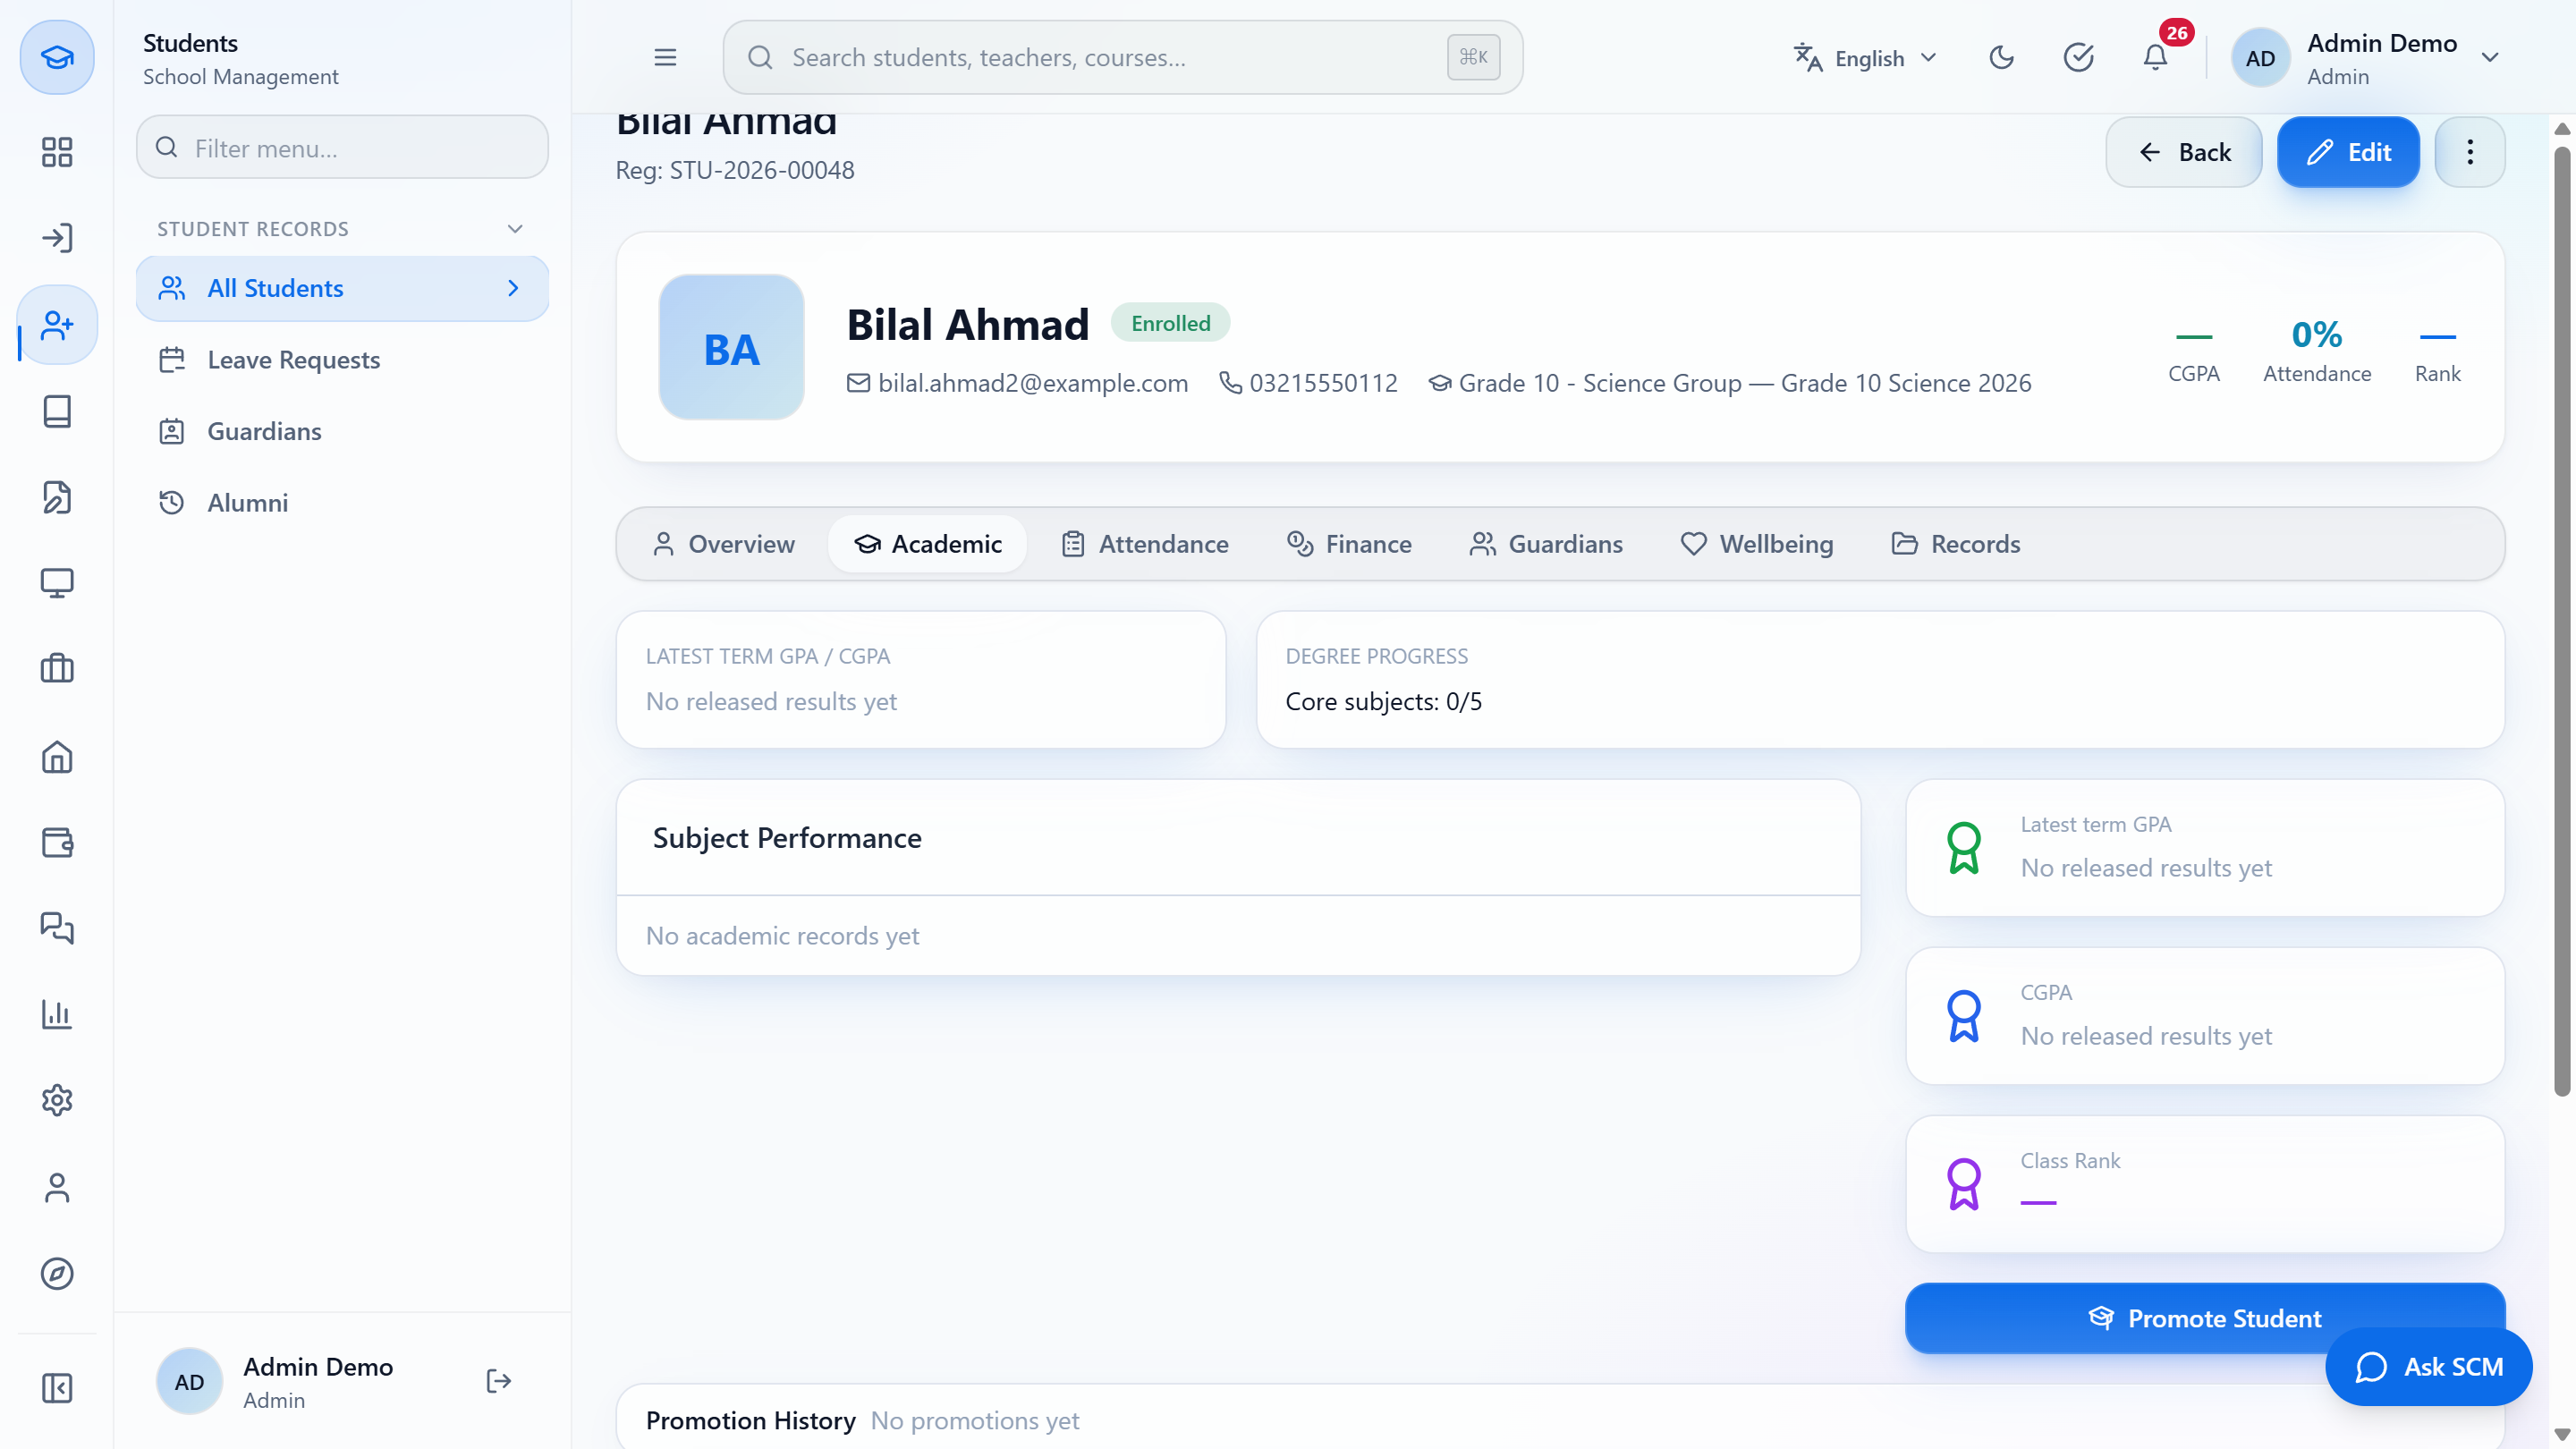
Open a student of the Science Group, Bilal Ahmad, and the Academic tab. Degree progress shows Core subjects: 0/5 from the requirement you set. A Grade 9 student without requirements shows "No program requirements configured yet."
| Mistake | What you see | Fix |
|---|---|---|
| Deleting a course that is in a program | A message that it is used in a program | Remove it from the program plan first |
| Deleting a program with active batches | A message that it still has active batches | Deactivate the batches and move the students first |
| Saving a topic without a title | Every topic needs a title | Type a title |
| Item | Meaning / rule |
|---|---|
| Program | A class level or stream, such as Grade 10 - Science Group |
| Course | A subject with credits and a type |
| Subjects | Words used to match teachers to courses |
| Requirement | Minimum credits from a named group of courses |
Why can I not delete a course? A course that is still in a program is refused with a message that it is used in a program. Remove it from the program plan first, then delete it.
What does removing a course from a program do? It takes the course out of that program's plan only. The course stays in Courses and can be added to the plan again.
What are the Subjects words on a course for? They are matched against each teacher's Specialization when the timetable is generated, so keep both lists in step.
Why is a syllabus topic refused when I save? Every topic needs a title. Type a title for the blank topic and press Save syllabus again.
GridX SCM runs this whole workflow. See what GridX SCM does and what it costs, or browse all step-by-step guides.