How to set your dispatch rules: offer timeout, radius and driver scoring
You will open the Dispatch Settings page, learn what each setting controls when a job is offered to a driver, and see the effect of the radius and the offer timeout on a real job. You need this when you start taking bookings, or when drivers complain that offers expire too fast or reach the wrong people.
Who it is forTaxi or fleet operator owner or dispatch managerTime12 minutesProductFMSLevelBeginner
Before you start
Steps
1
Open Dispatch Settings
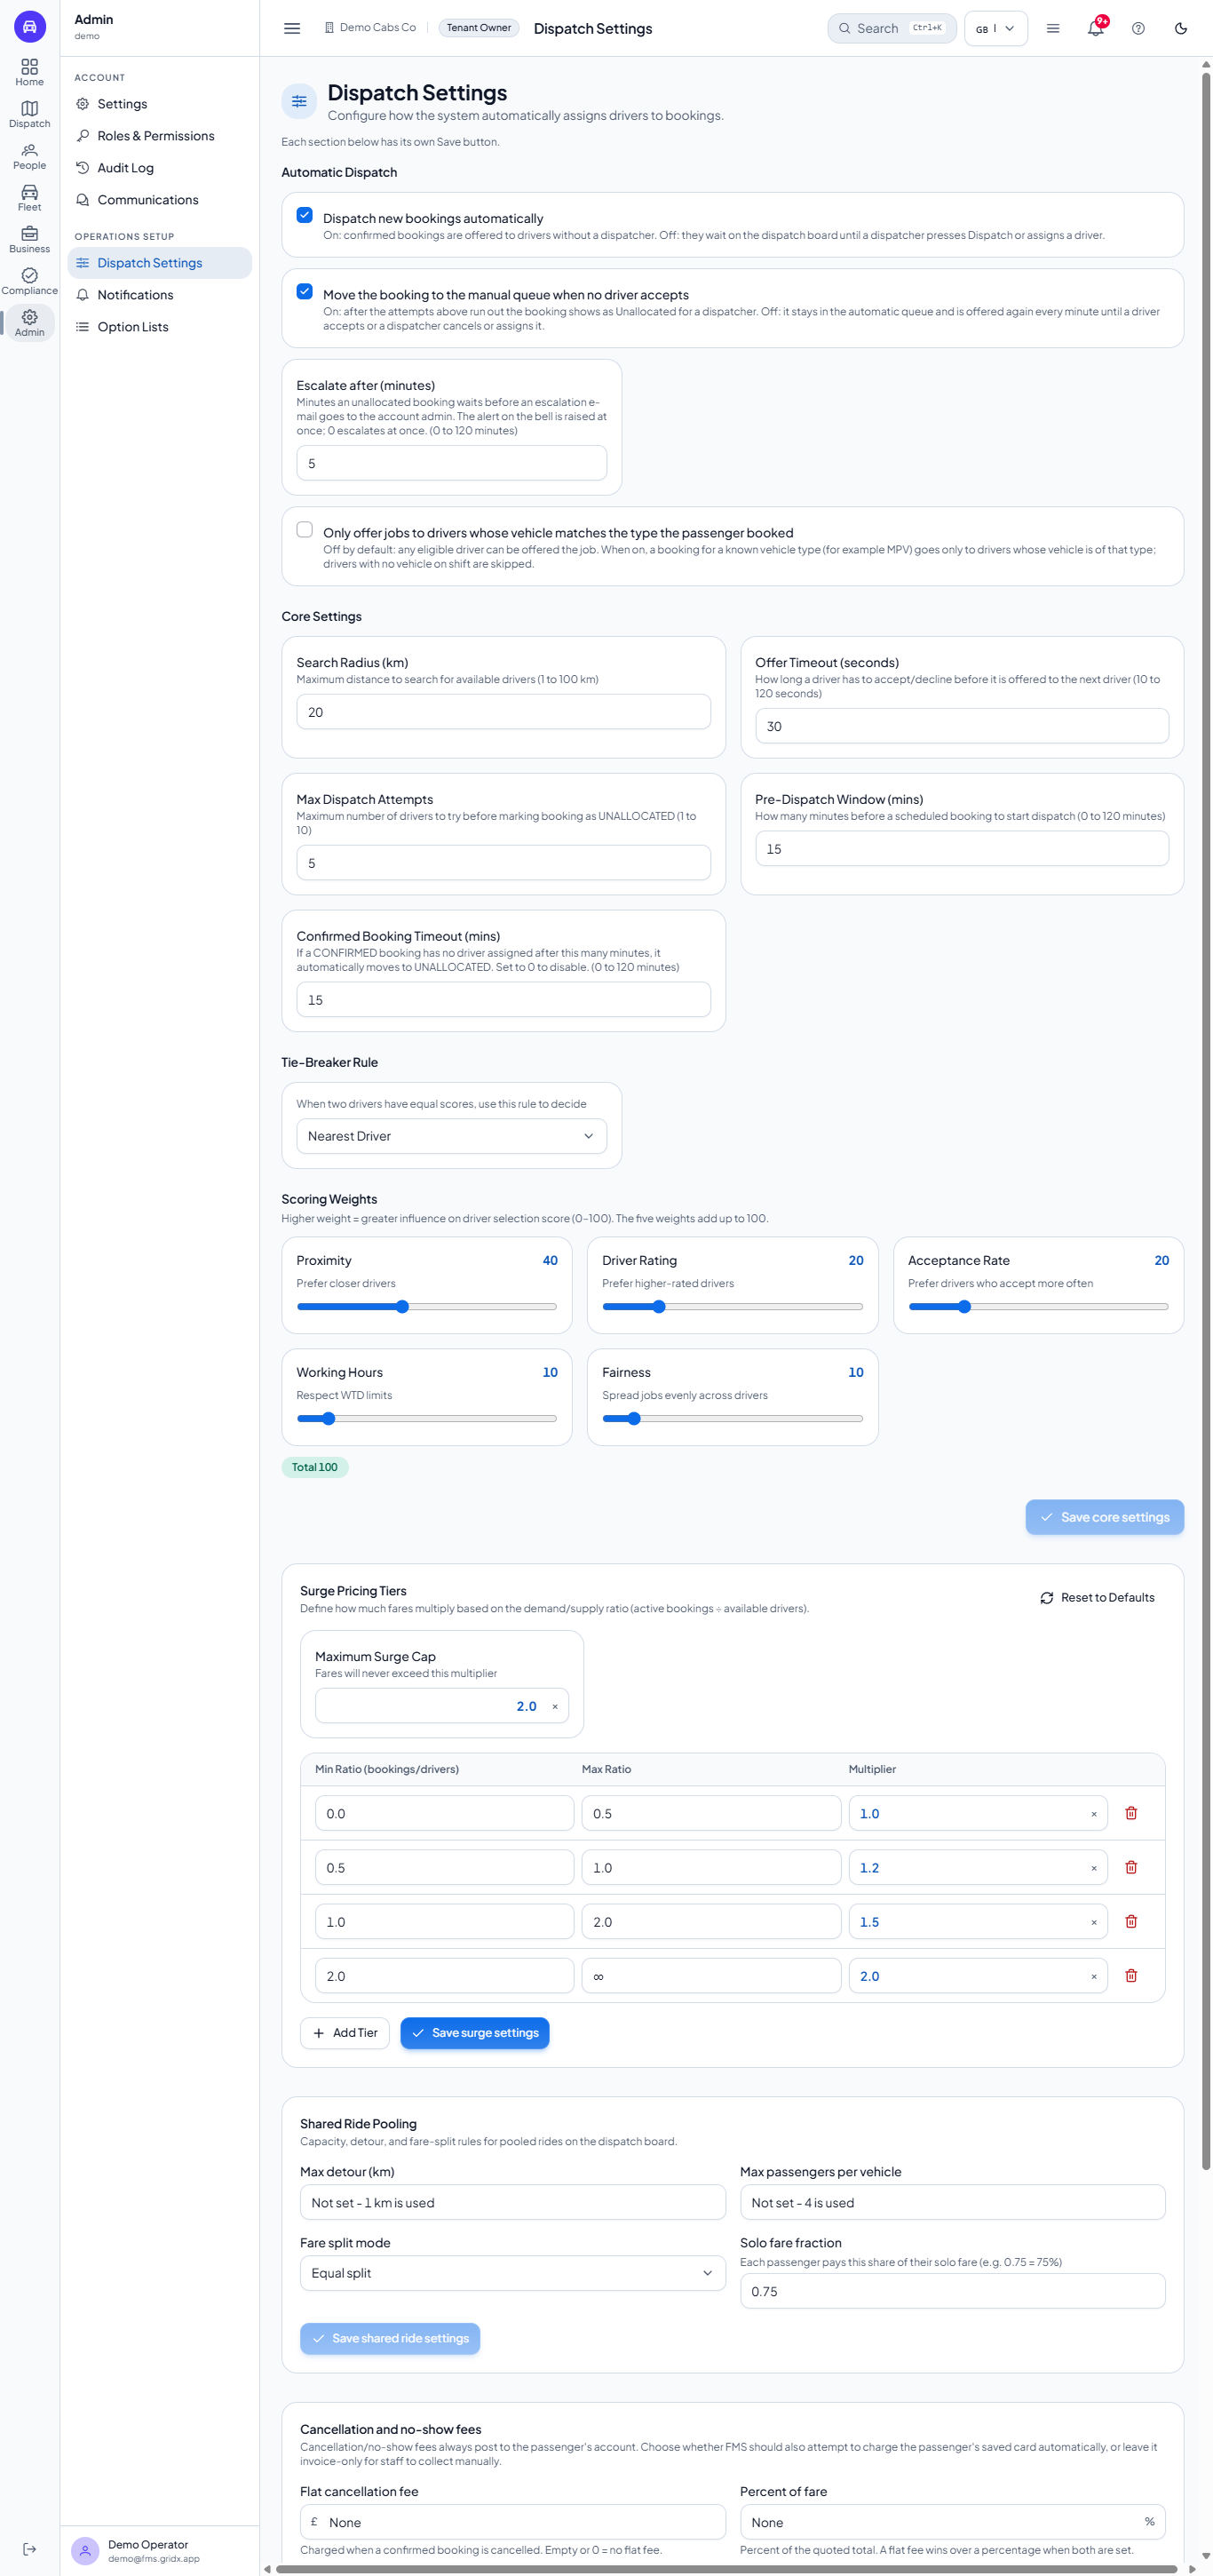
Go to Admin > Dispatch Settings. The page is one long column of sections: Automatic Dispatch, Core Settings, Tie-Breaker Rule, Scoring Weights, Surge Pricing Tiers, Shared Ride Pooling, Cancellation and no-show fees and Demand-Responsive Transport (DRT).
Dispatch Settings page with automatic dispatch, core settings, tie-breaker, scoring weights, surge tiers, shared rides, fees and DRT sections
2
Set automatic dispatch and read the core settings
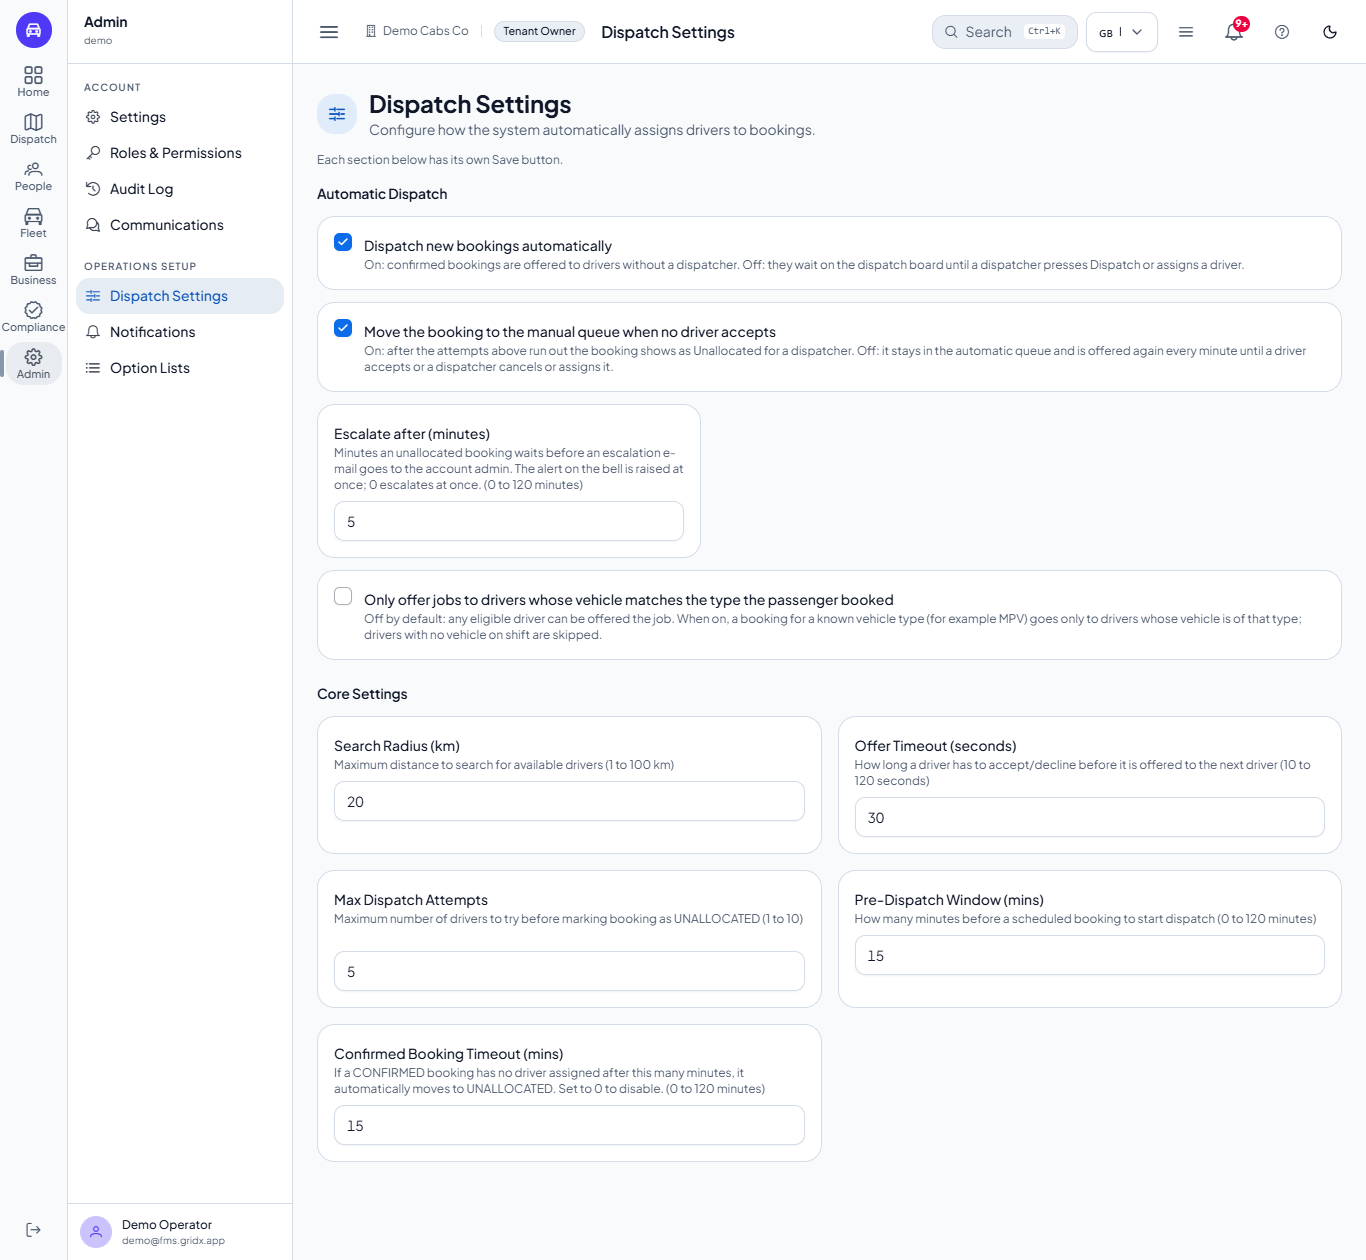
Dispatch new bookings automatically decides whether confirmed bookings are offered to drivers without a dispatcher; switch it off and they wait on the board until a dispatcher presses Dispatch. Move the booking to the manual queue when no driver accepts makes the booking UNALLOCATED when the attempts run out. Escalate after (minutes) is how long an unallocated booking waits before an e-mail goes to the account admin. Only offer jobs to drivers whose vehicle matches the type the passenger booked is off by default.
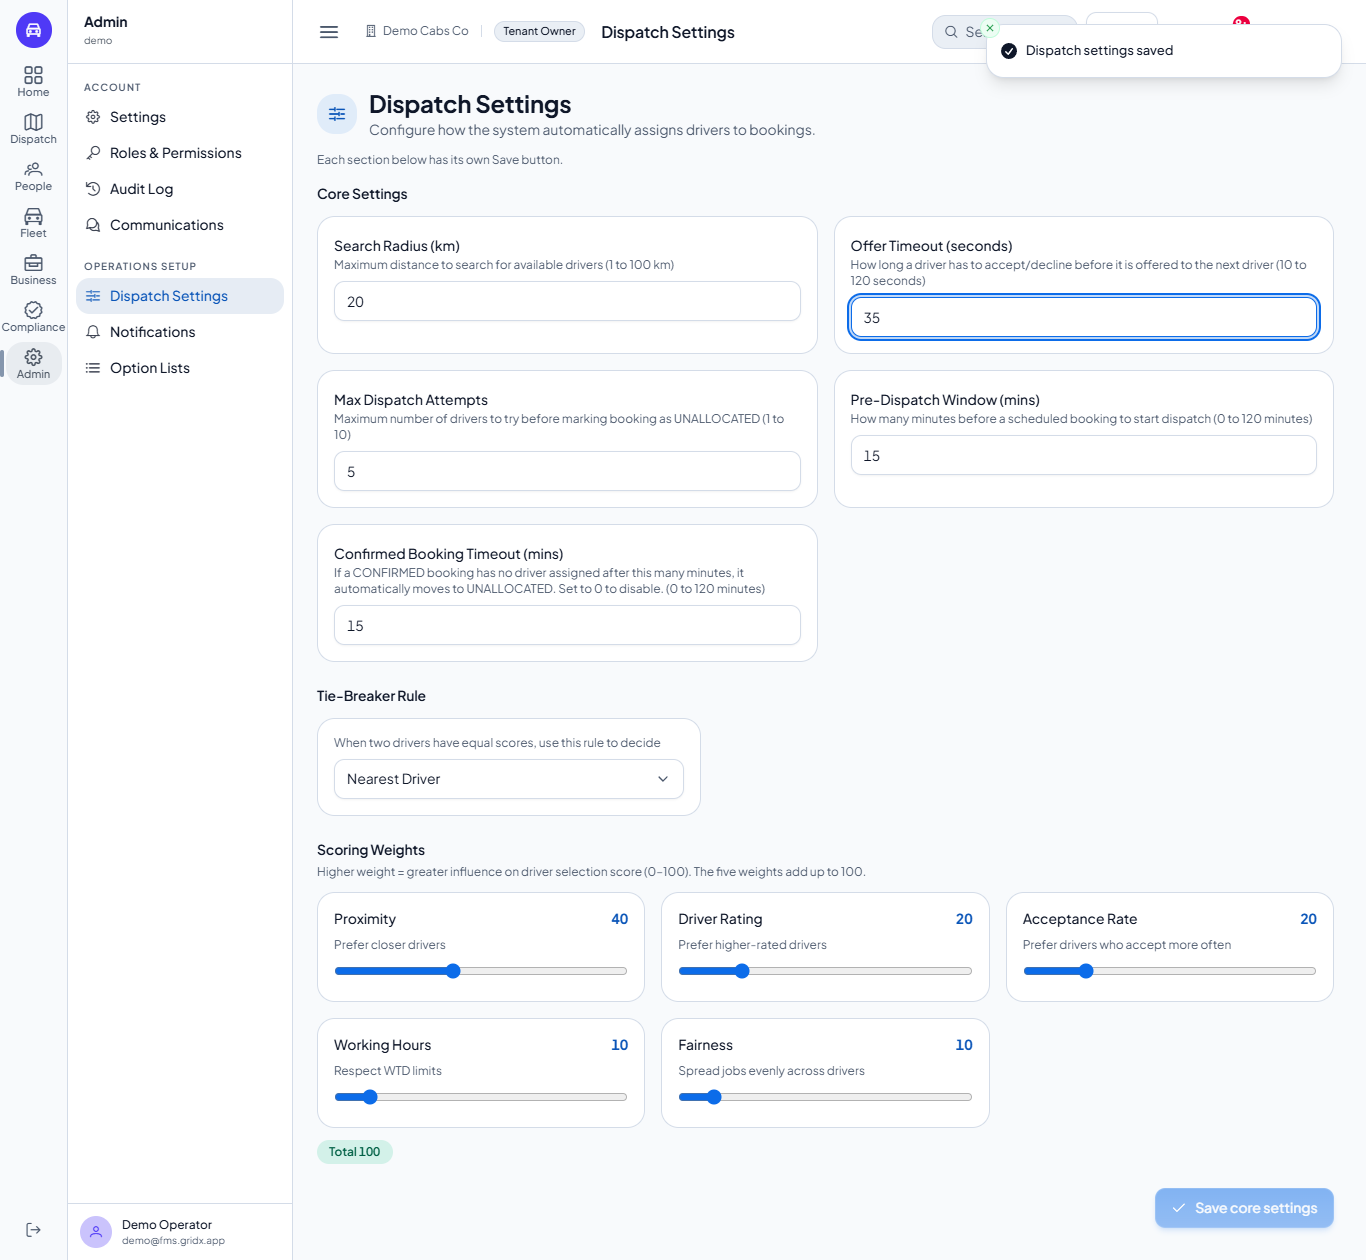
Below, Search Radius (km) is how far from the pickup the system looks for drivers. Offer Timeout (seconds) is how long a driver has to accept or decline. Max Dispatch Attempts is how many offers are made before the booking becomes UNALLOCATED. Pre-Dispatch Window (mins) starts a scheduled booking that many minutes early. Confirmed Booking Timeout (mins) moves a confirmed booking with no driver to UNALLOCATED; 0 switches it off. Each help line shows the allowed range.
The automatic dispatch switches and the five core settings with their help lines
3
Choose the tie-breaker
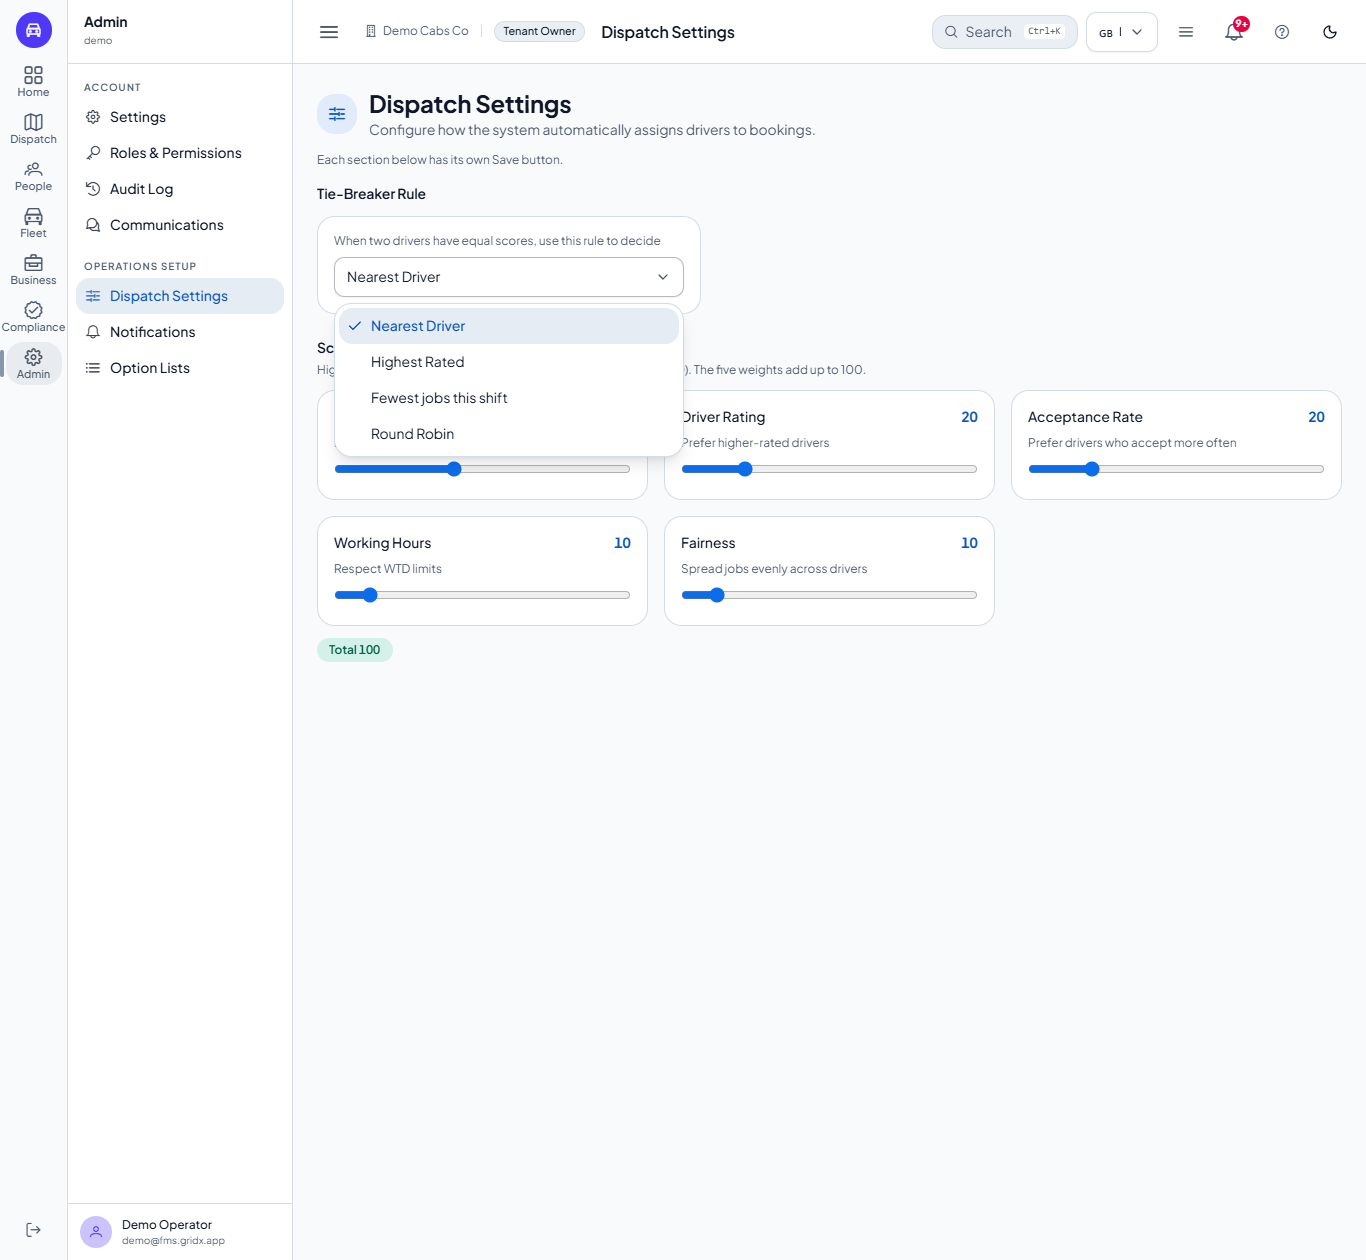
Open Tie-Breaker Rule and pick what decides between two drivers with the same score: Nearest Driver, Highest Rated, Fewest jobs this shift or Round Robin.
Tie-Breaker dropdown with Nearest Driver, Highest Rated, Fewest jobs this shift and Round Robin
4
Set the scoring weights
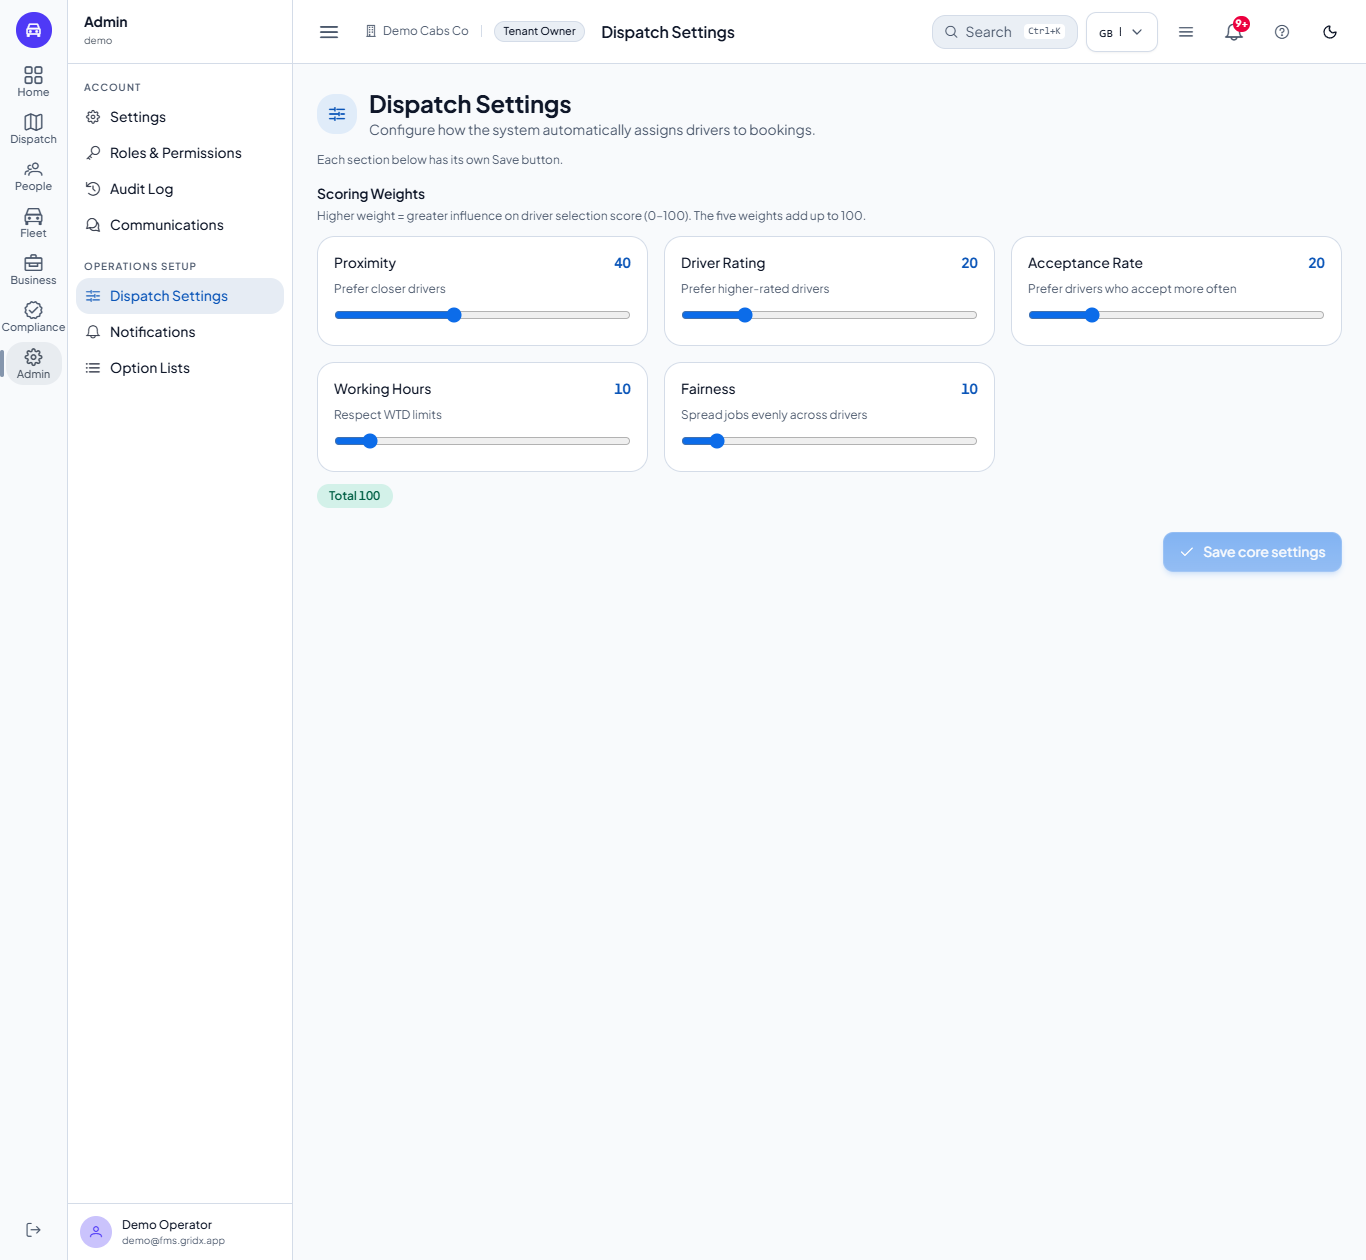
Each slider (0 to 100, steps of 5) says how much a factor counts when drivers are ranked: Proximity, Driver Rating, Acceptance Rate, Working Hours (respect driver working-time limits) and Fairness (spread jobs evenly). The badge under the sliders shows the total.
Five sliders for proximity, driver rating, acceptance rate, working hours and fairness with a total badge
5
Save the core settings
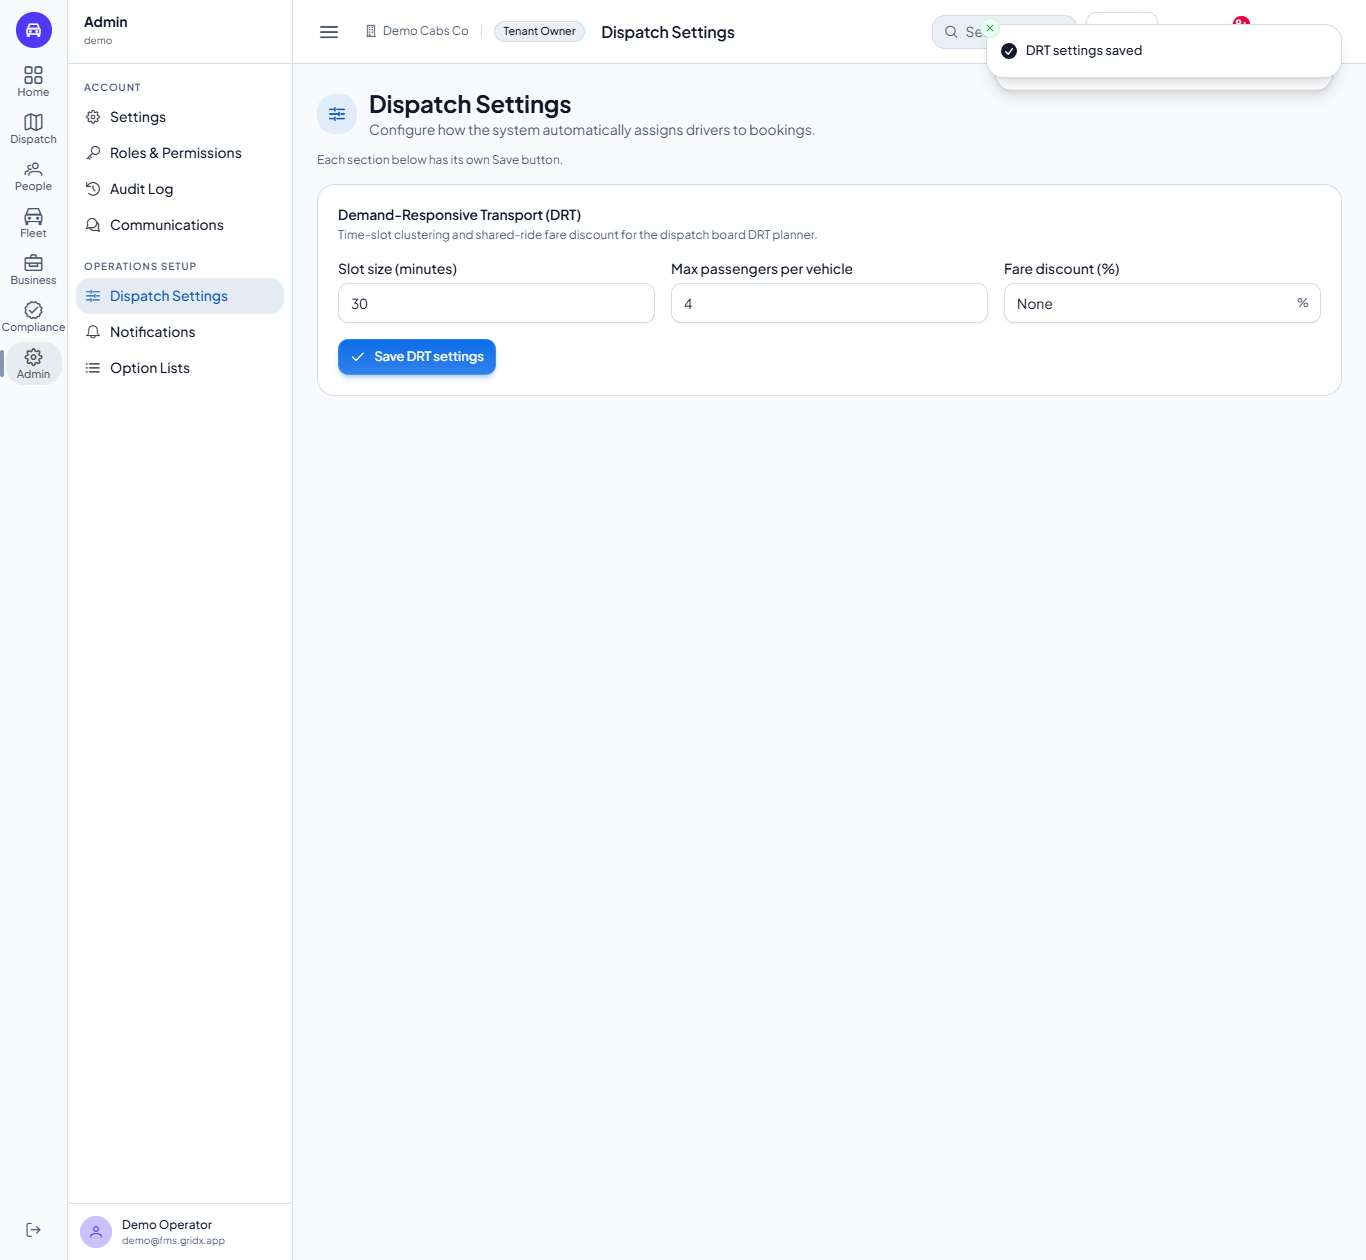
Change a value, for example the offer timeout, then press Save core settings. A toast says "Dispatch settings saved" and the button goes pale again until something else changes. Reload the page afterwards and check each box shows what you saved.
The Dispatch settings saved toast after pressing Save core settings
6
Review the surge tiers
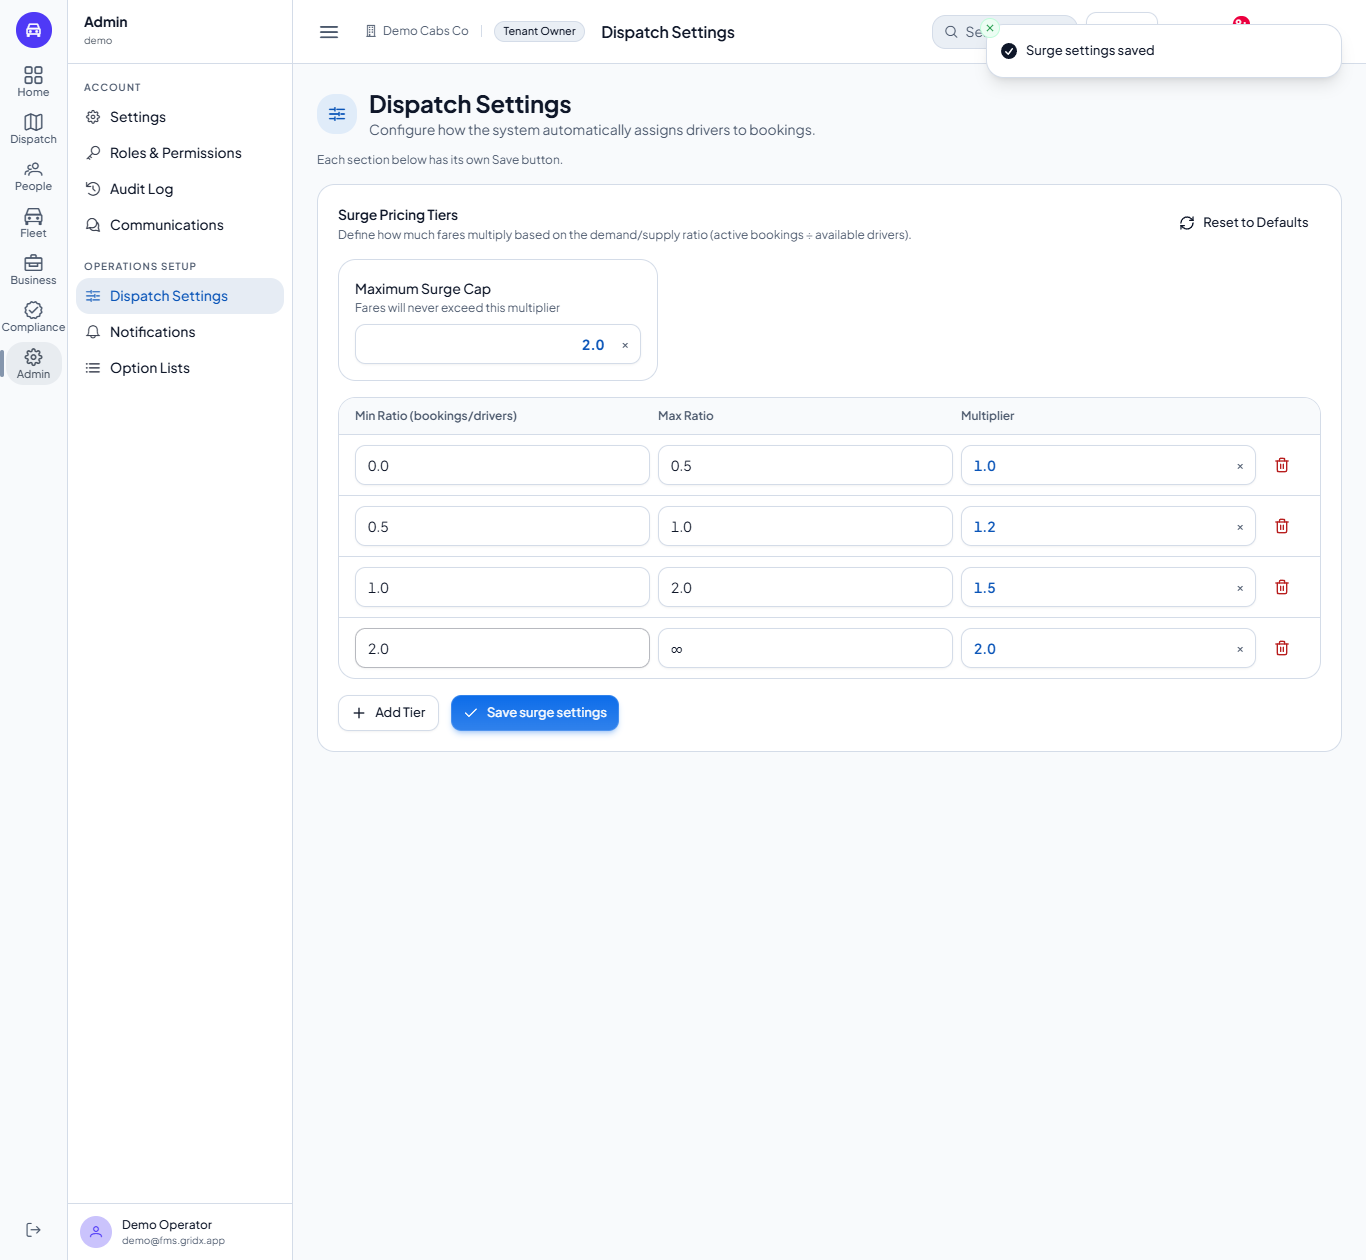
Surge Pricing Tiers multiply fares by the ratio of active bookings to available drivers. Each row has a Min Ratio, a Max Ratio and a Multiplier; Maximum Surge Cap is the highest multiplier a rider can ever pay. Reset to Defaults restores the standard bands, Add Tier adds a row and Save surge settings applies them (toast "Surge settings saved").
Surge Pricing Tiers with cap and four ratio bands
7
Set up shared rides
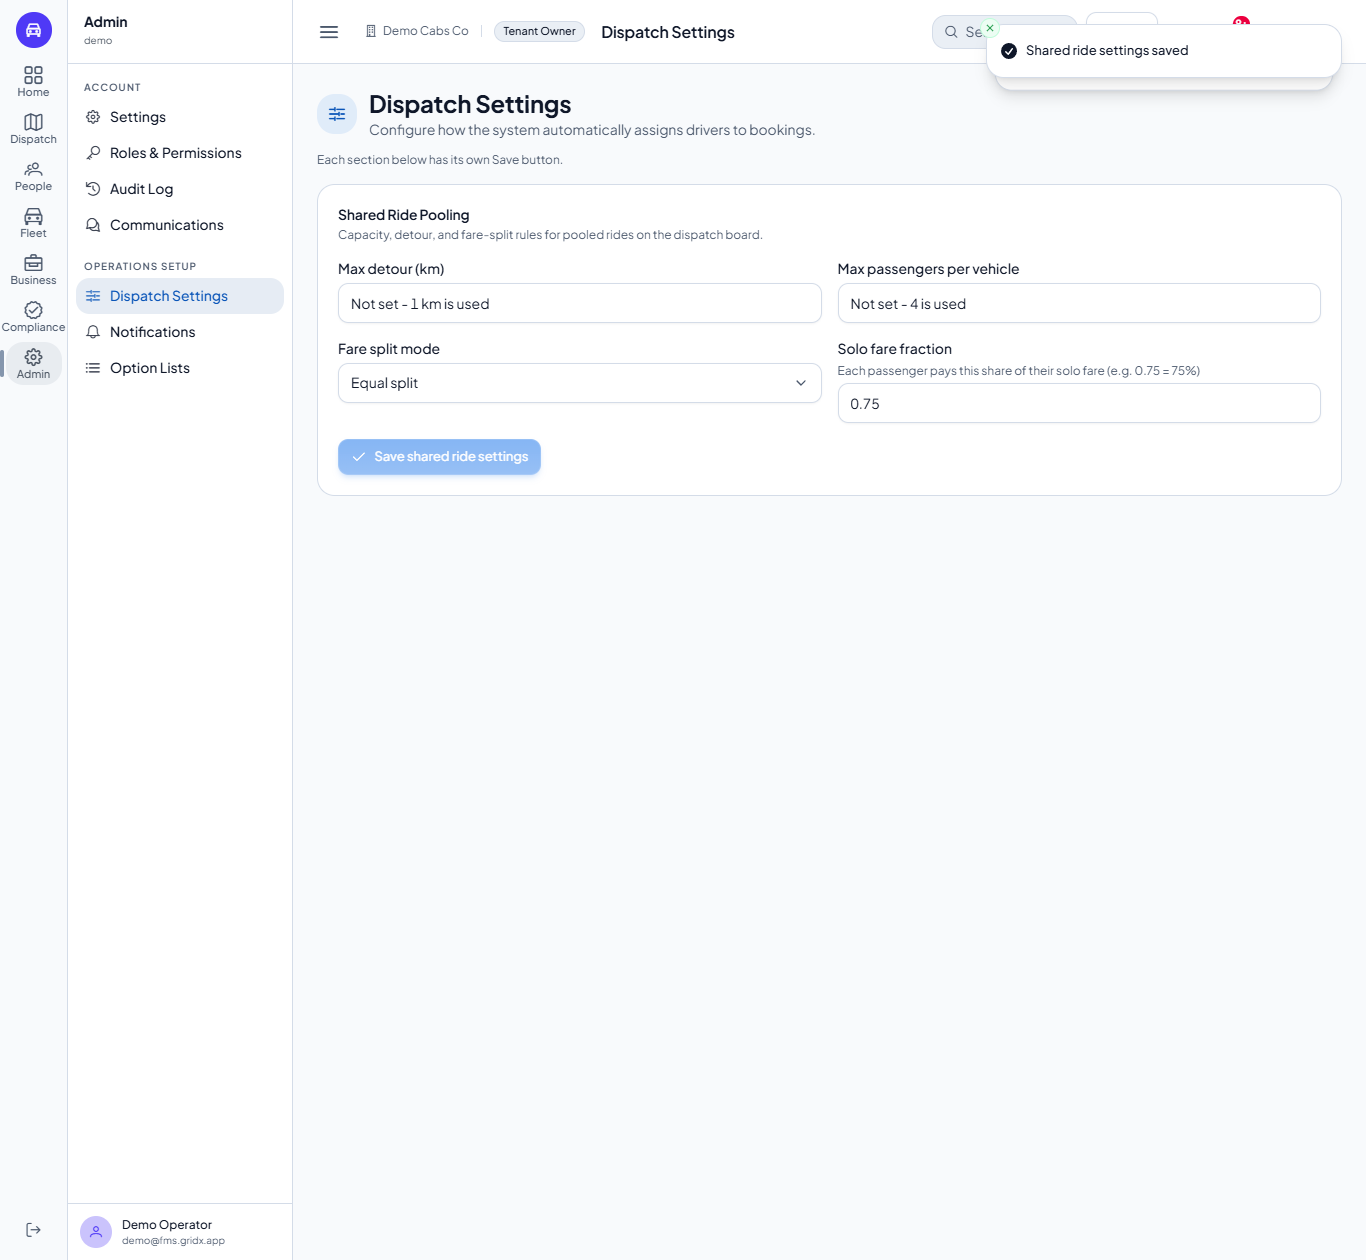
For pooled rides choose Max detour (km), Max passengers per vehicle, the Fare split mode (Equal split, Weighted by solo fare or Percent of solo fare) and the Solo fare fraction, for example 0.75 for 75 percent of the solo fare. Press Save shared ride settings. A value out of range is refused, for example "Max passengers per vehicle must be between 2 and 16".
Shared Ride Pooling fields and its save button
8
Fees and DRT
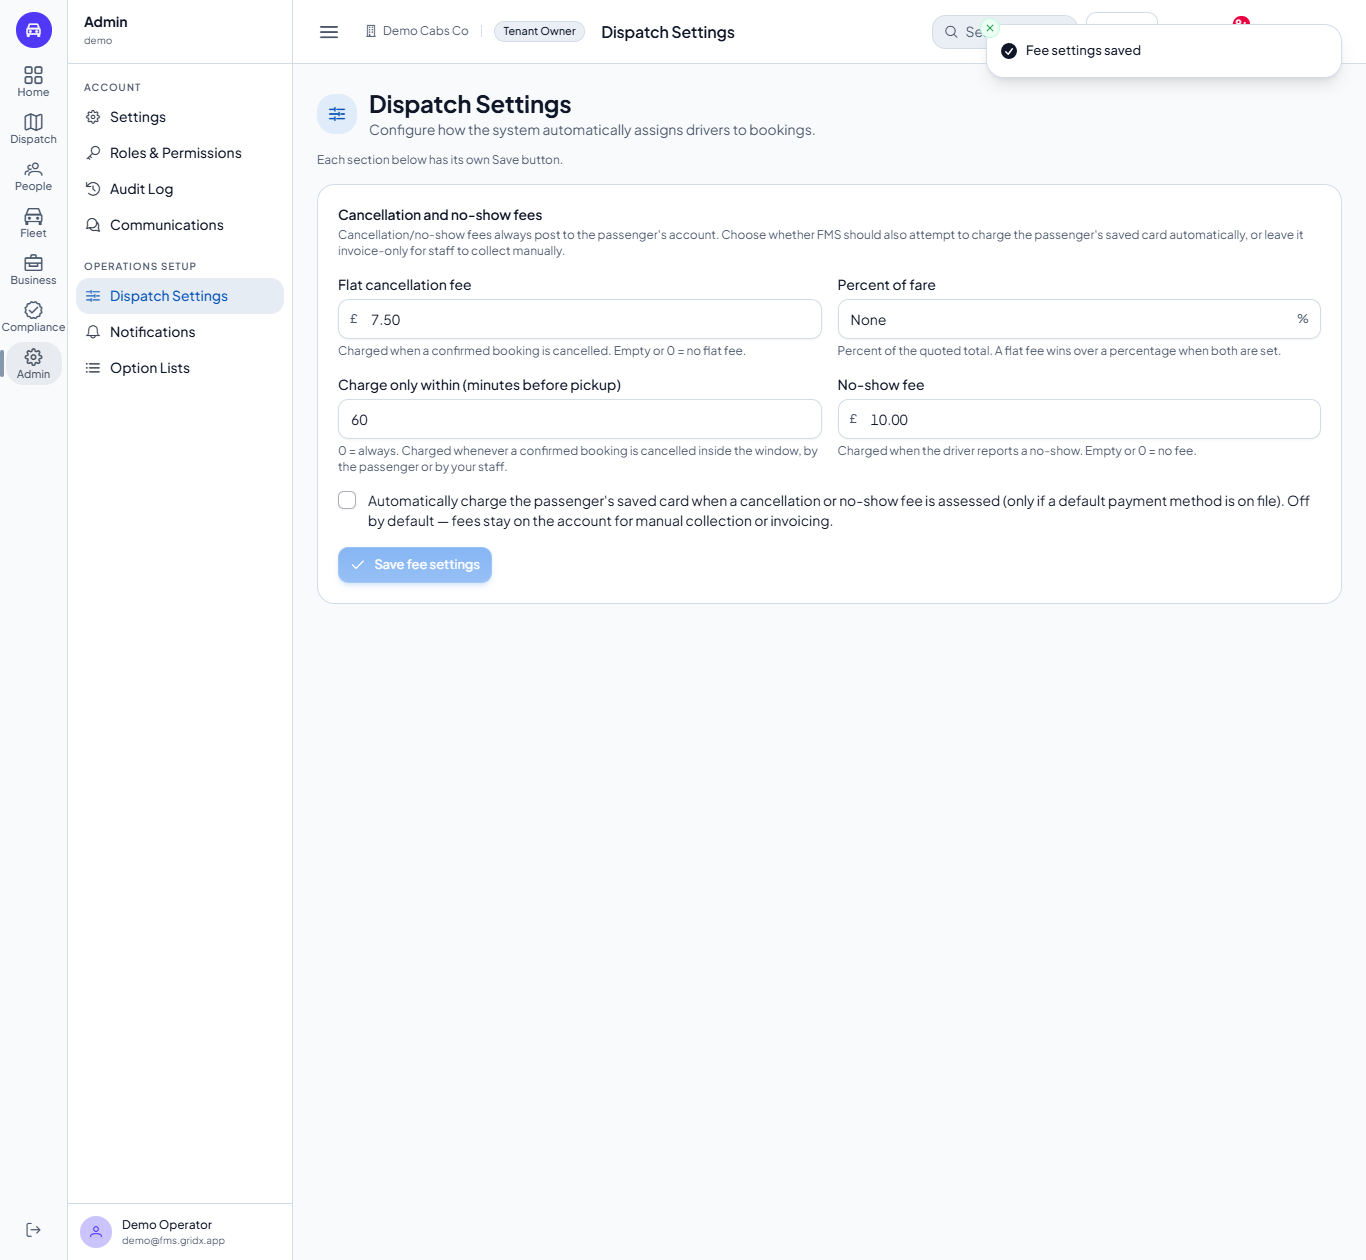
In Cancellation and no-show fees set a Flat cancellation fee or a Percent of fare (a flat fee wins when both are set), the window Charge only within (minutes before pickup) (0 = always) and the No-show fee. Tick Automatically charge the passenger's saved card when a cancellation or no-show fee is assessed if you want fees collected at once; otherwise they stay on the passenger's account for you to collect. Press Save fee settings.
The DRT card sets the Slot size (minutes), Max passengers per vehicle and Fare discount (%) for the demand-responsive planner. The discount must be between 0 and 100 percent; clear the box and save to remove it. Press Save DRT settings.
Cancellation and no-show fee fields and the saved-card checkbox
Demand-Responsive Transport slot size, vehicle capacity and fare discount
9
See the rules work on a live job
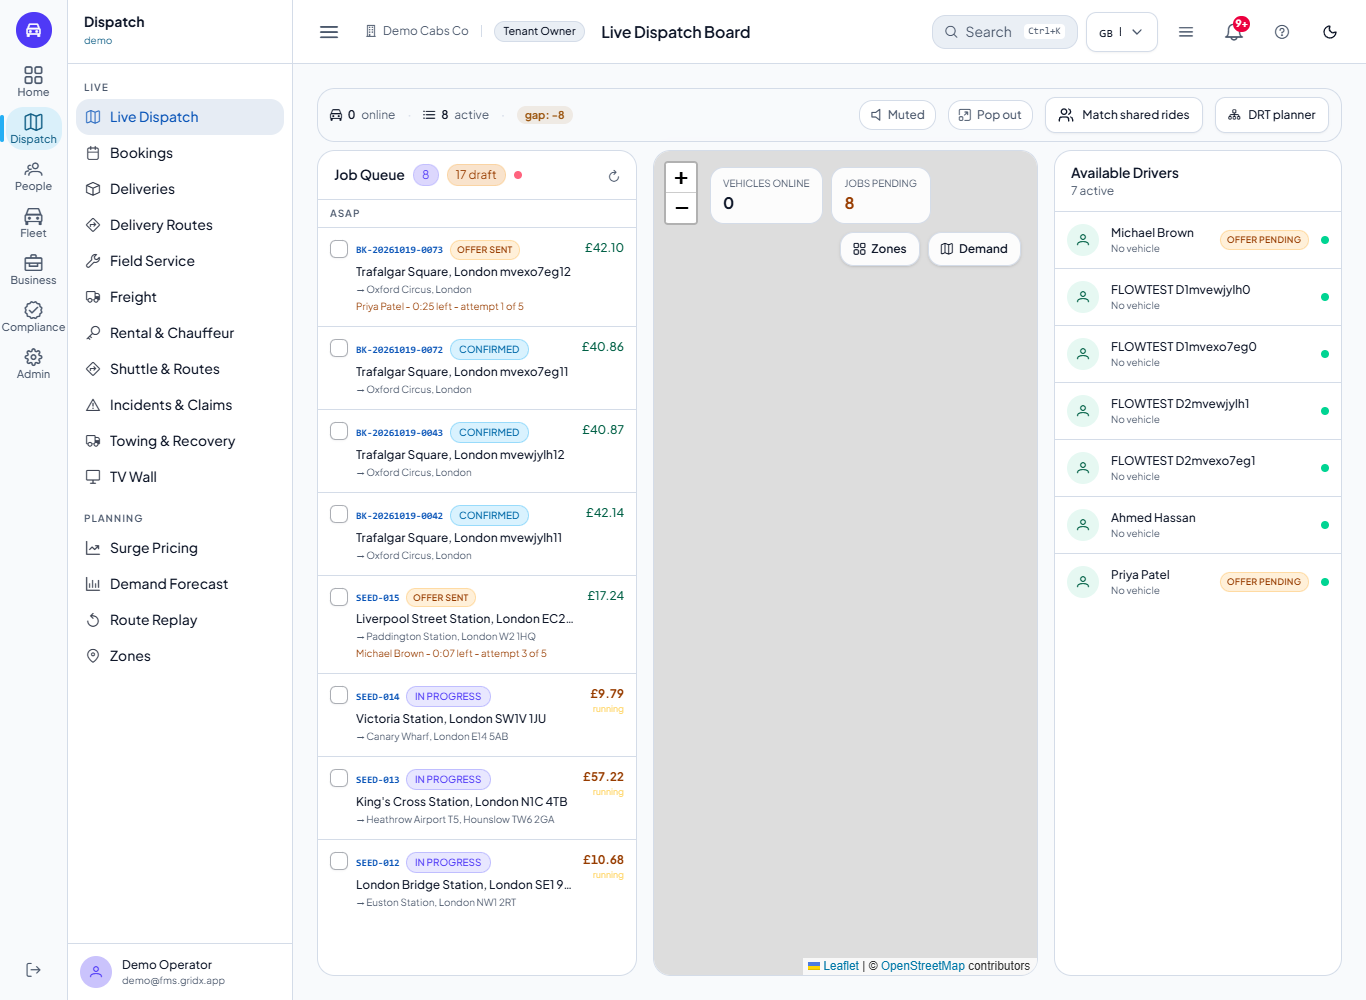
Open Dispatch > Live Dispatch and send a confirmed booking to dispatch. Drivers outside your search radius are skipped, the others are ranked by score, and the best one receives the offer for the number of seconds you set. The job shows OFFER SENT with the driver's name, the seconds left and the attempt number, and that driver shows OFFER PENDING in the list. If the offer expires, the job goes to the next driver until the attempts run out.
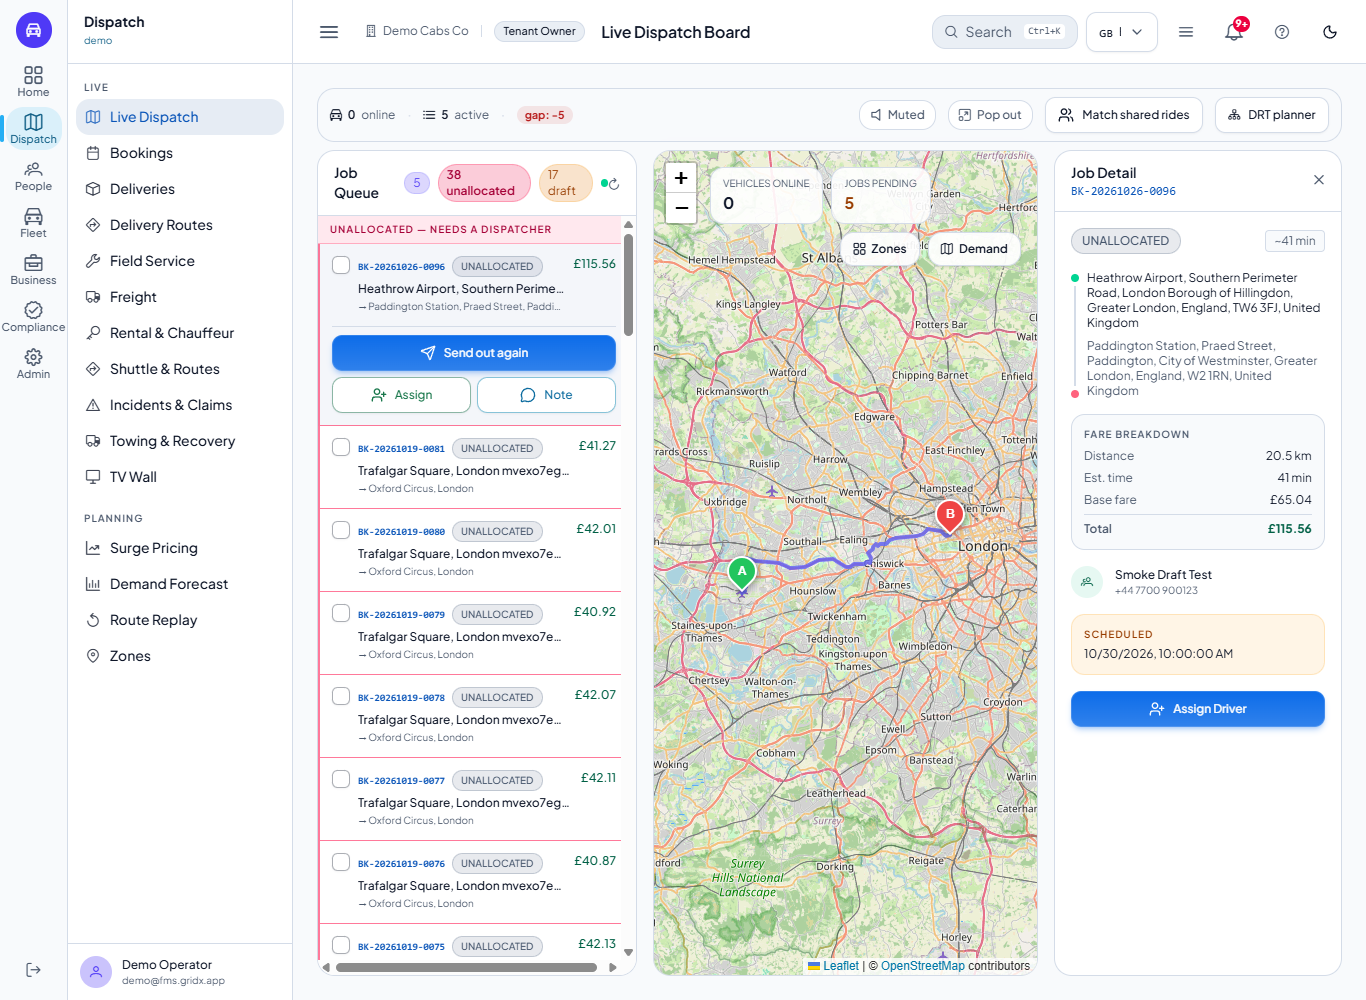
A job that nobody accepts is not lost: the queue has a first lane, Unallocated - needs a dispatcher, and the red badge in the queue header counts how many wait there. Select a job in that lane to see Send out again, Assign and Note, and Assign Driver in the Job Detail panel.
Live Dispatch Board with jobs marked OFFER SENT and a countdown line
Live Dispatch Board with the Unallocated lane, the red 38 unallocated badge and the Send out again, Assign and Note buttons
10
Find the change in the audit log
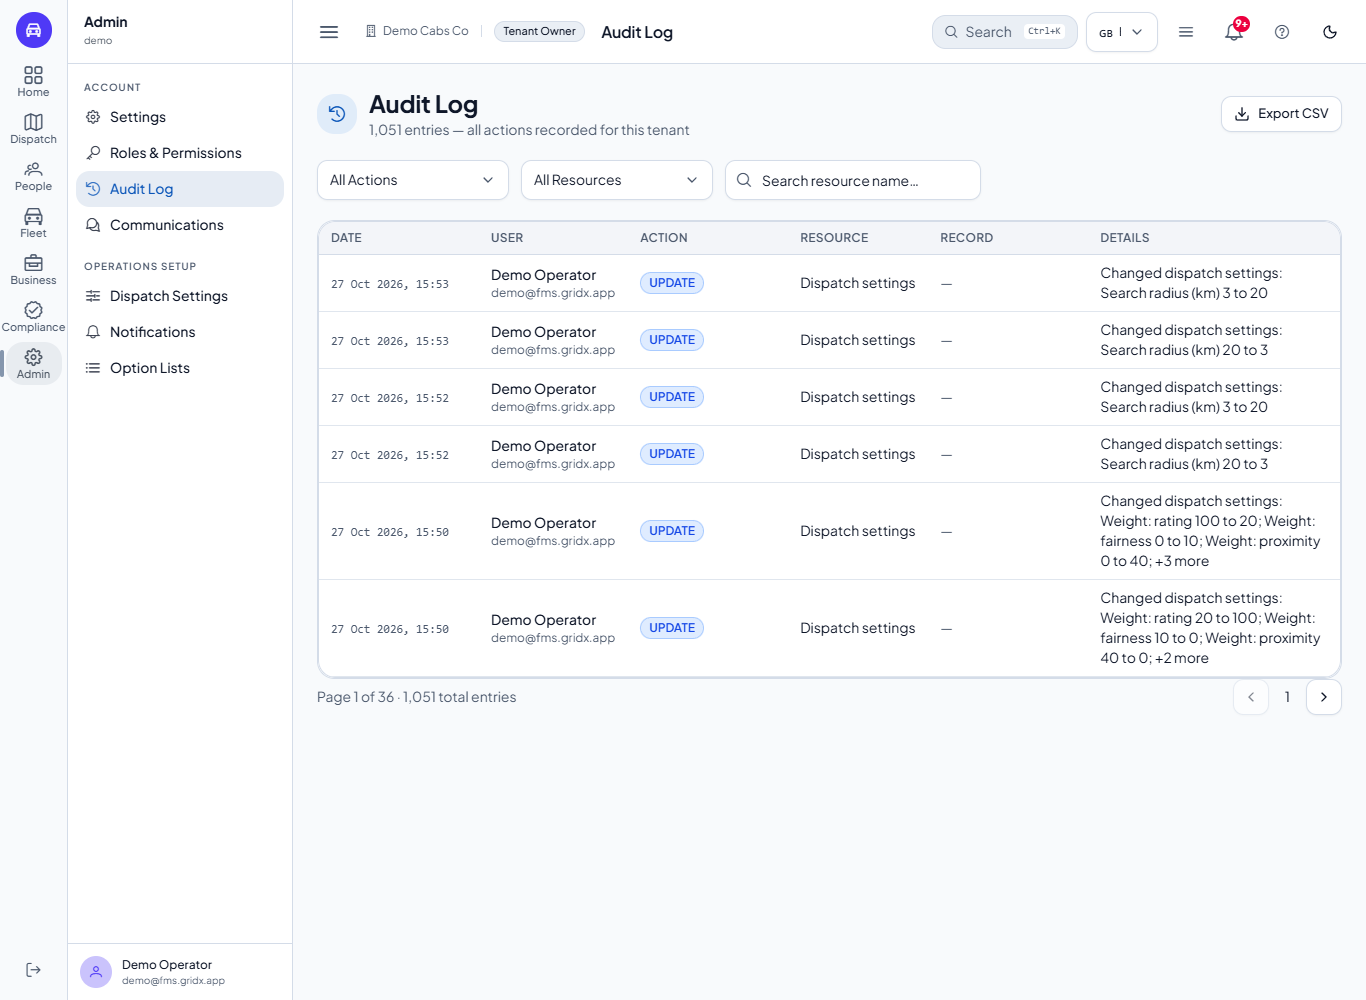
Open Admin > Audit Log. Each save appears as an UPDATE on Dispatch settings with your name and the time, and the Details column says what changed, for example "Search radius (km) 20 to 3".
Audit Log rows for dispatch settings updates
Check it worked
Reload Admin > Dispatch Settings and read each box.
Send a test booking to dispatch and look at the offer: it counts down from your offer timeout, and a driver beyond your search radius is not offered the job.
A booking nobody accepted appears in the Unallocated lane at the top of the Job Queue.
Common mistakes
Mistake
What you see
Fix
Offer timeout set very high
Passengers wait while a slow driver decides
Lower the timeout
Search radius too small
The booking becomes UNALLOCATED with "No eligible drivers found within radius"
Raise the radius
Weights that do not add up to 100
The badge shows "weights must add up to 100" and Save core settings is disabled
Adjust the sliders until the total is 100
Nobody on shift
No driver is offered the job
Start a shift for the driver first
Quick reference
Item
Meaning / rule
Search Radius
Distance from the pickup within which drivers are eligible (1 to 100 km)
Offer Timeout
Seconds a driver has to answer an offer (10 to 120)
Max Dispatch Attempts
Offers made before the booking becomes UNALLOCATED (1 to 10)
Confirmed Booking Timeout
Minutes before a confirmed booking with no driver becomes UNALLOCATED; 0 = off
Scoring weights
Five factors that add up to 100
Surge cap
Highest fare multiplier
Frequently asked questions
What does the offer timeout do? It is the number of seconds a driver has to accept or decline before the job goes to the next driver.
How do I stop far-away drivers receiving offers? Lower the search radius; drivers outside it are skipped with the reason "Outside radius".
Can I change surge pricing? Yes, edit the ratio bands and the maximum surge cap on the Dispatch Settings page and press Save surge settings.
Can I switch automatic dispatch off? Yes, untick Dispatch new bookings automatically; confirmed bookings then wait on the Live Dispatch board until a dispatcher sends or assigns them.