You will tell FMS where to send booking and fleet events, connect the provider accounts you already pay for, and see where API keys are issued. You need this when an accounts system, a website or a customer app has to react to what happens in dispatch.
Who it is forTaxi or fleet operator owner or the person who connects your other systemsTime10 minutesProductFMSLevelIntermediate
Before you start
Steps
1
Open Webhooks
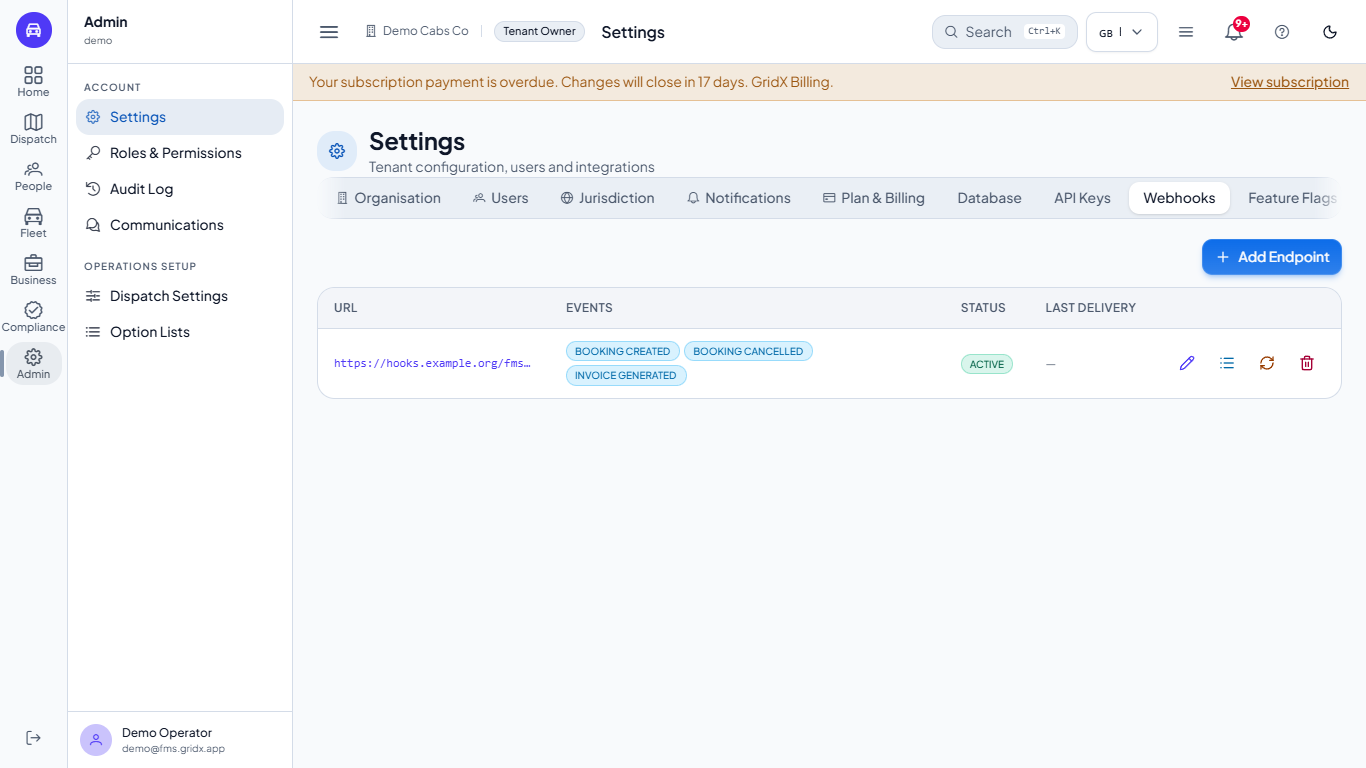
Go to Admin > Settings and open the Webhooks tab. Each row is one endpoint: its address, the events it receives, its status and the time of its last delivery. With no endpoint the tab says "No webhook endpoints". The four icons on a row are Edit webhook, View deliveries, Rotate signing secret and Delete webhook.
Webhooks tab with one endpoint, its events, Active status and the four row icons
2
Add an endpoint
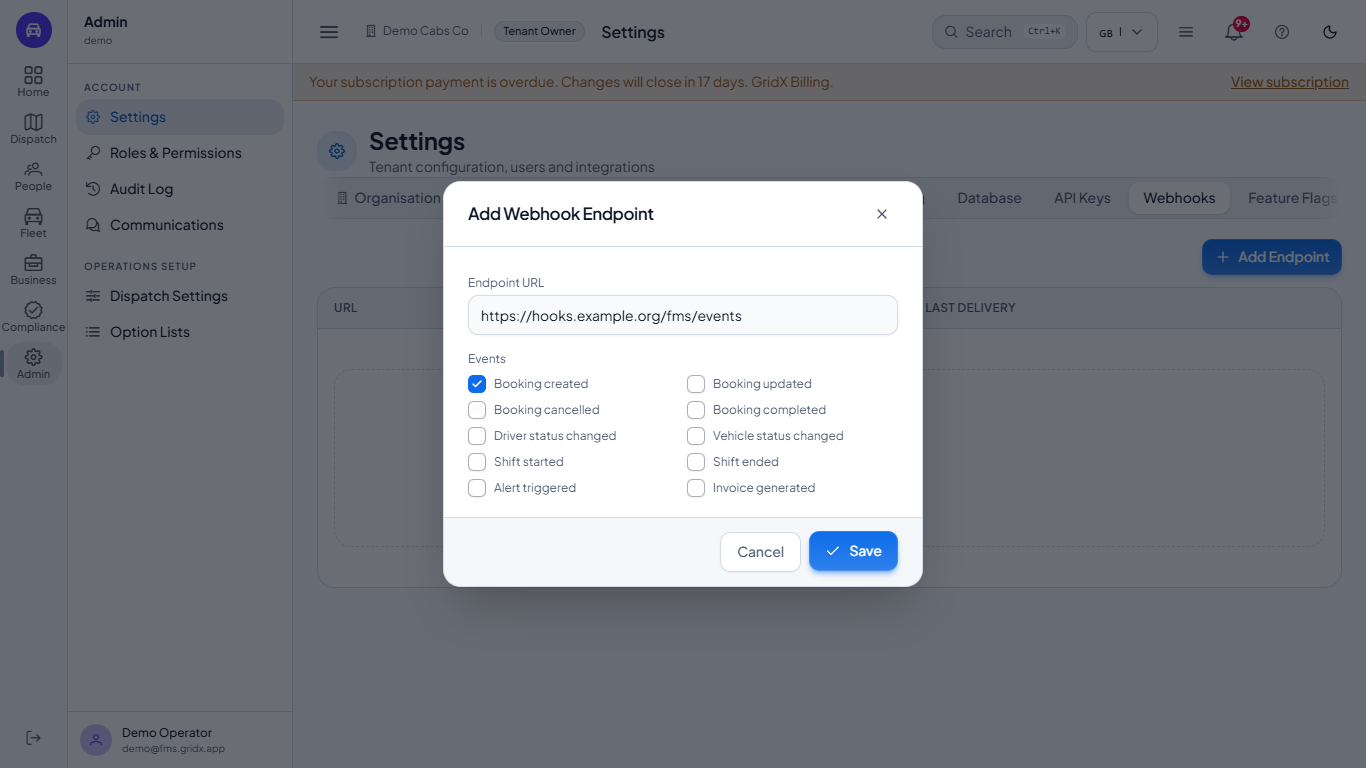
Press Add Endpoint. Type the public address of your server in Endpoint URL and tick the events you want: booking created, updated, cancelled or completed, driver or vehicle status changed, shift started or ended, alert triggered, invoice generated. Press Save.
Add Webhook Endpoint dialog with the address filled in and three events ticked
3
Copy the signing secret
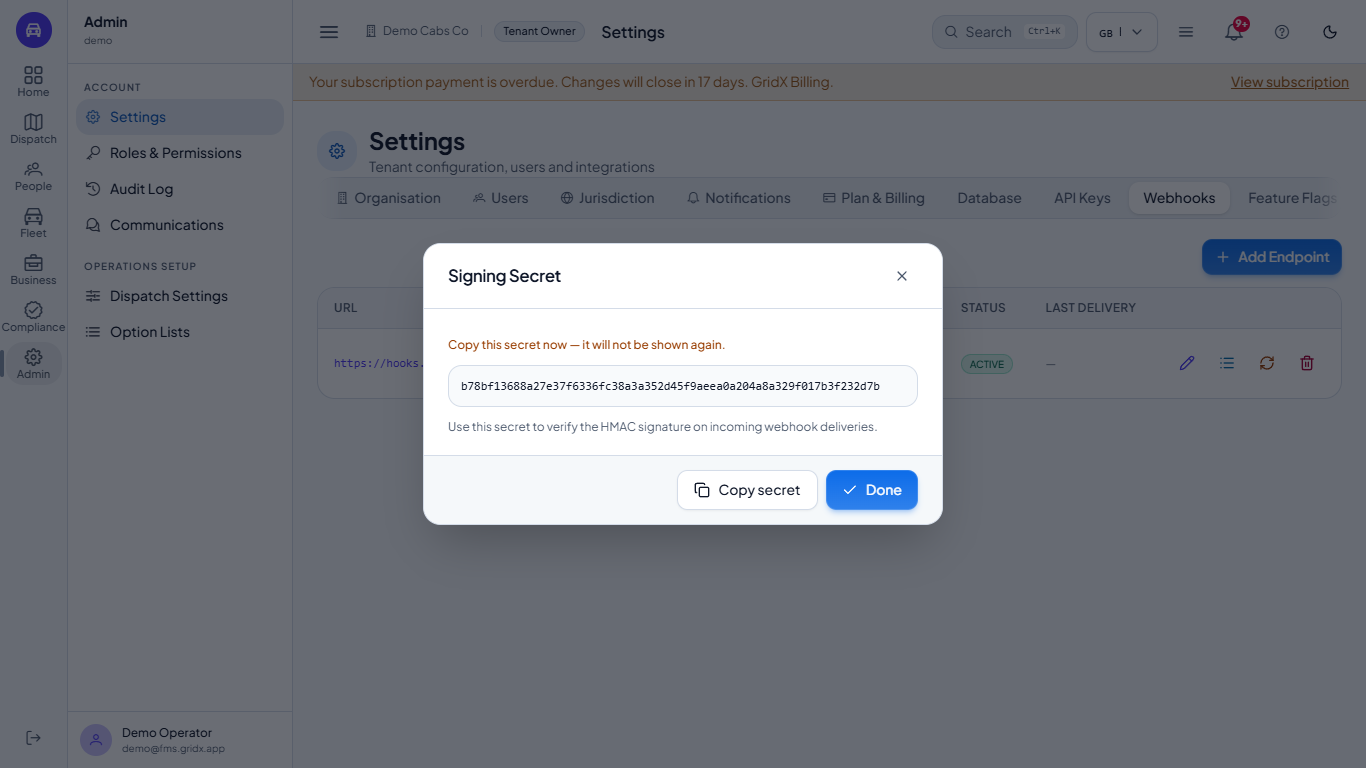
FMS shows the Signing Secret once: "Copy this secret now, it will not be shown again". Press Copy secret (it changes to Copied) and store it where your server can read it. Your server uses it to check the HMAC signature of each delivery, so it knows the call came from FMS. Press Done.
Signing Secret dialog showing the secret once with the Done button
4
See what happened
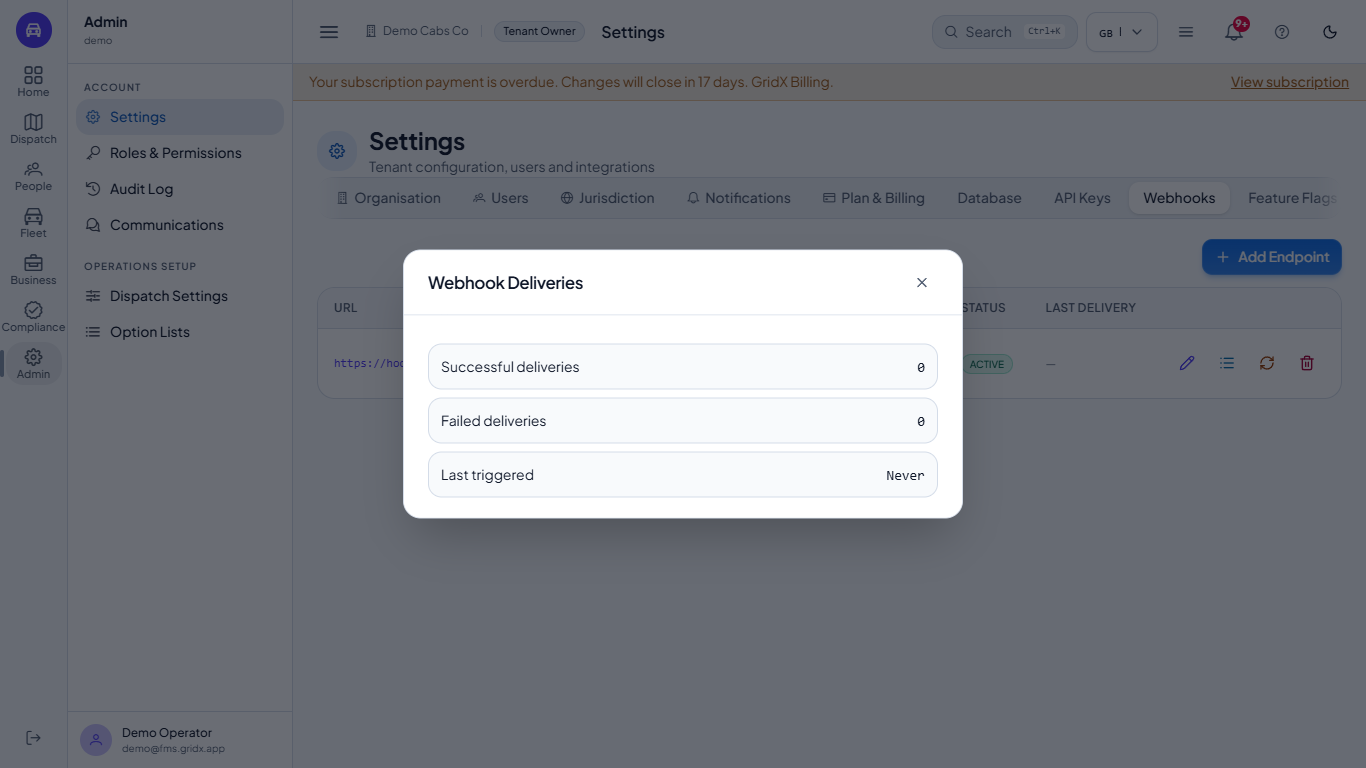
View deliveries shows how many deliveries succeeded, how many failed and when the endpoint was last triggered. A new endpoint reads 0, 0 and Never.
Webhook Deliveries dialog with zero successful, zero failed and last triggered never
5
Rotate, edit or delete
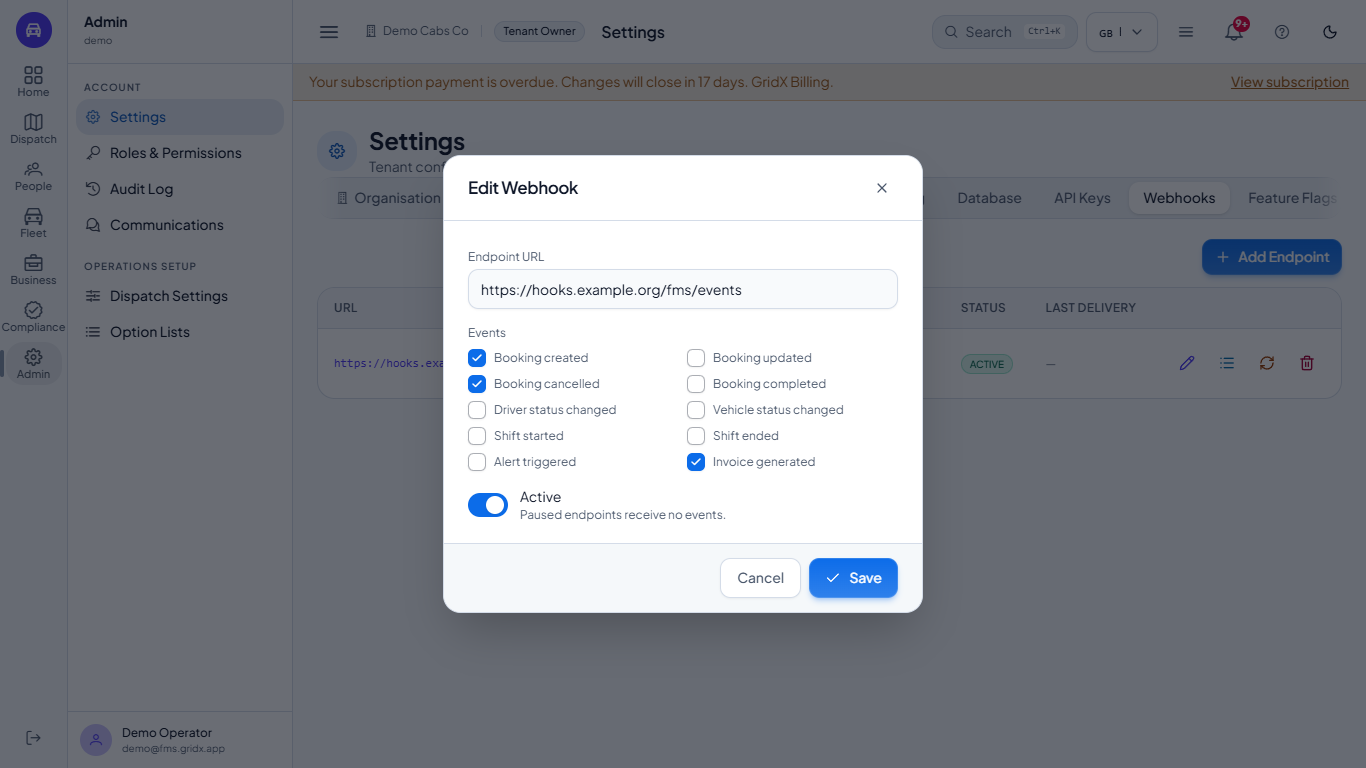
Edit webhook changes the address or the events, and the Active switch pauses the endpoint (paused endpoints receive no events). Delete webhook asks you to confirm, then the toast says Webhook deleted. Rotate signing secret asks first, because the old secret stops working at once; after you press Rotate secret the new secret appears, ready to copy.
Edit Webhook dialog with the address, ten events and the Active switch
6
Open Integrations
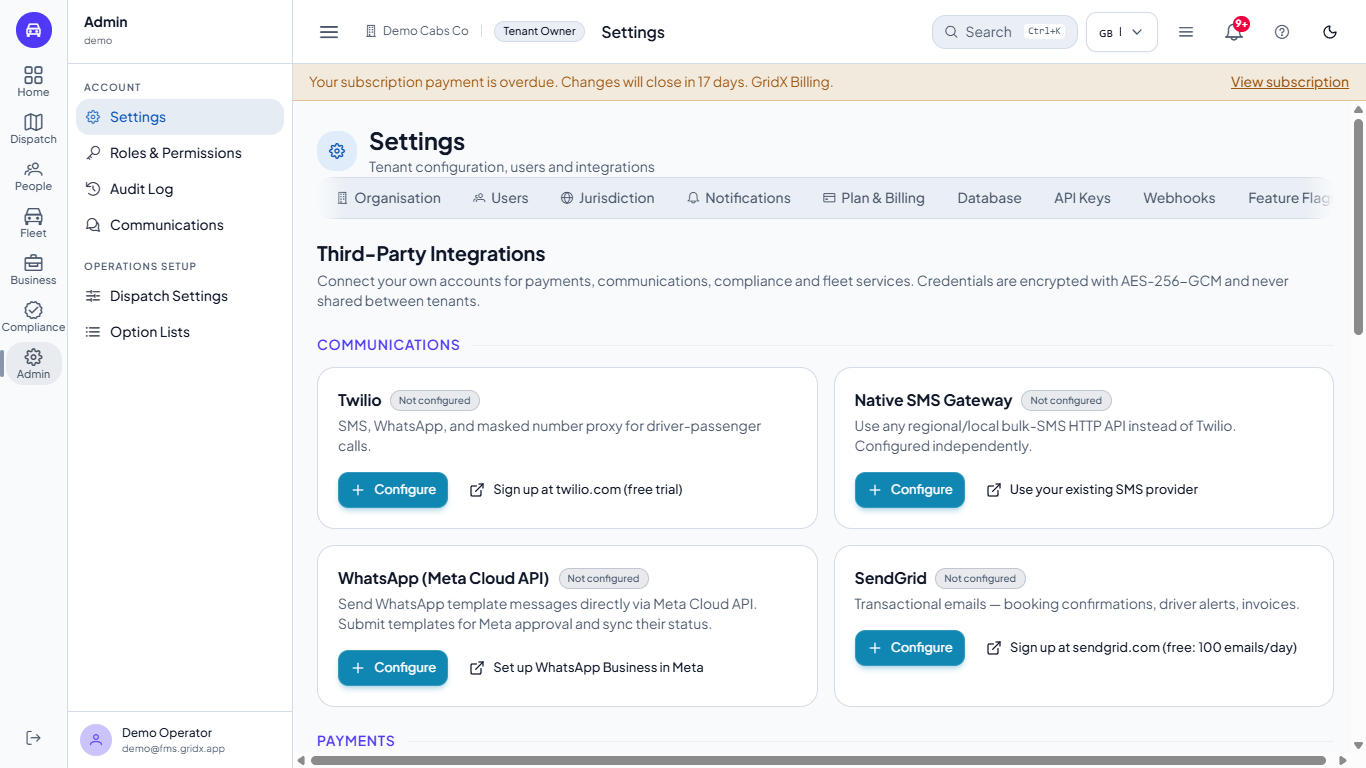
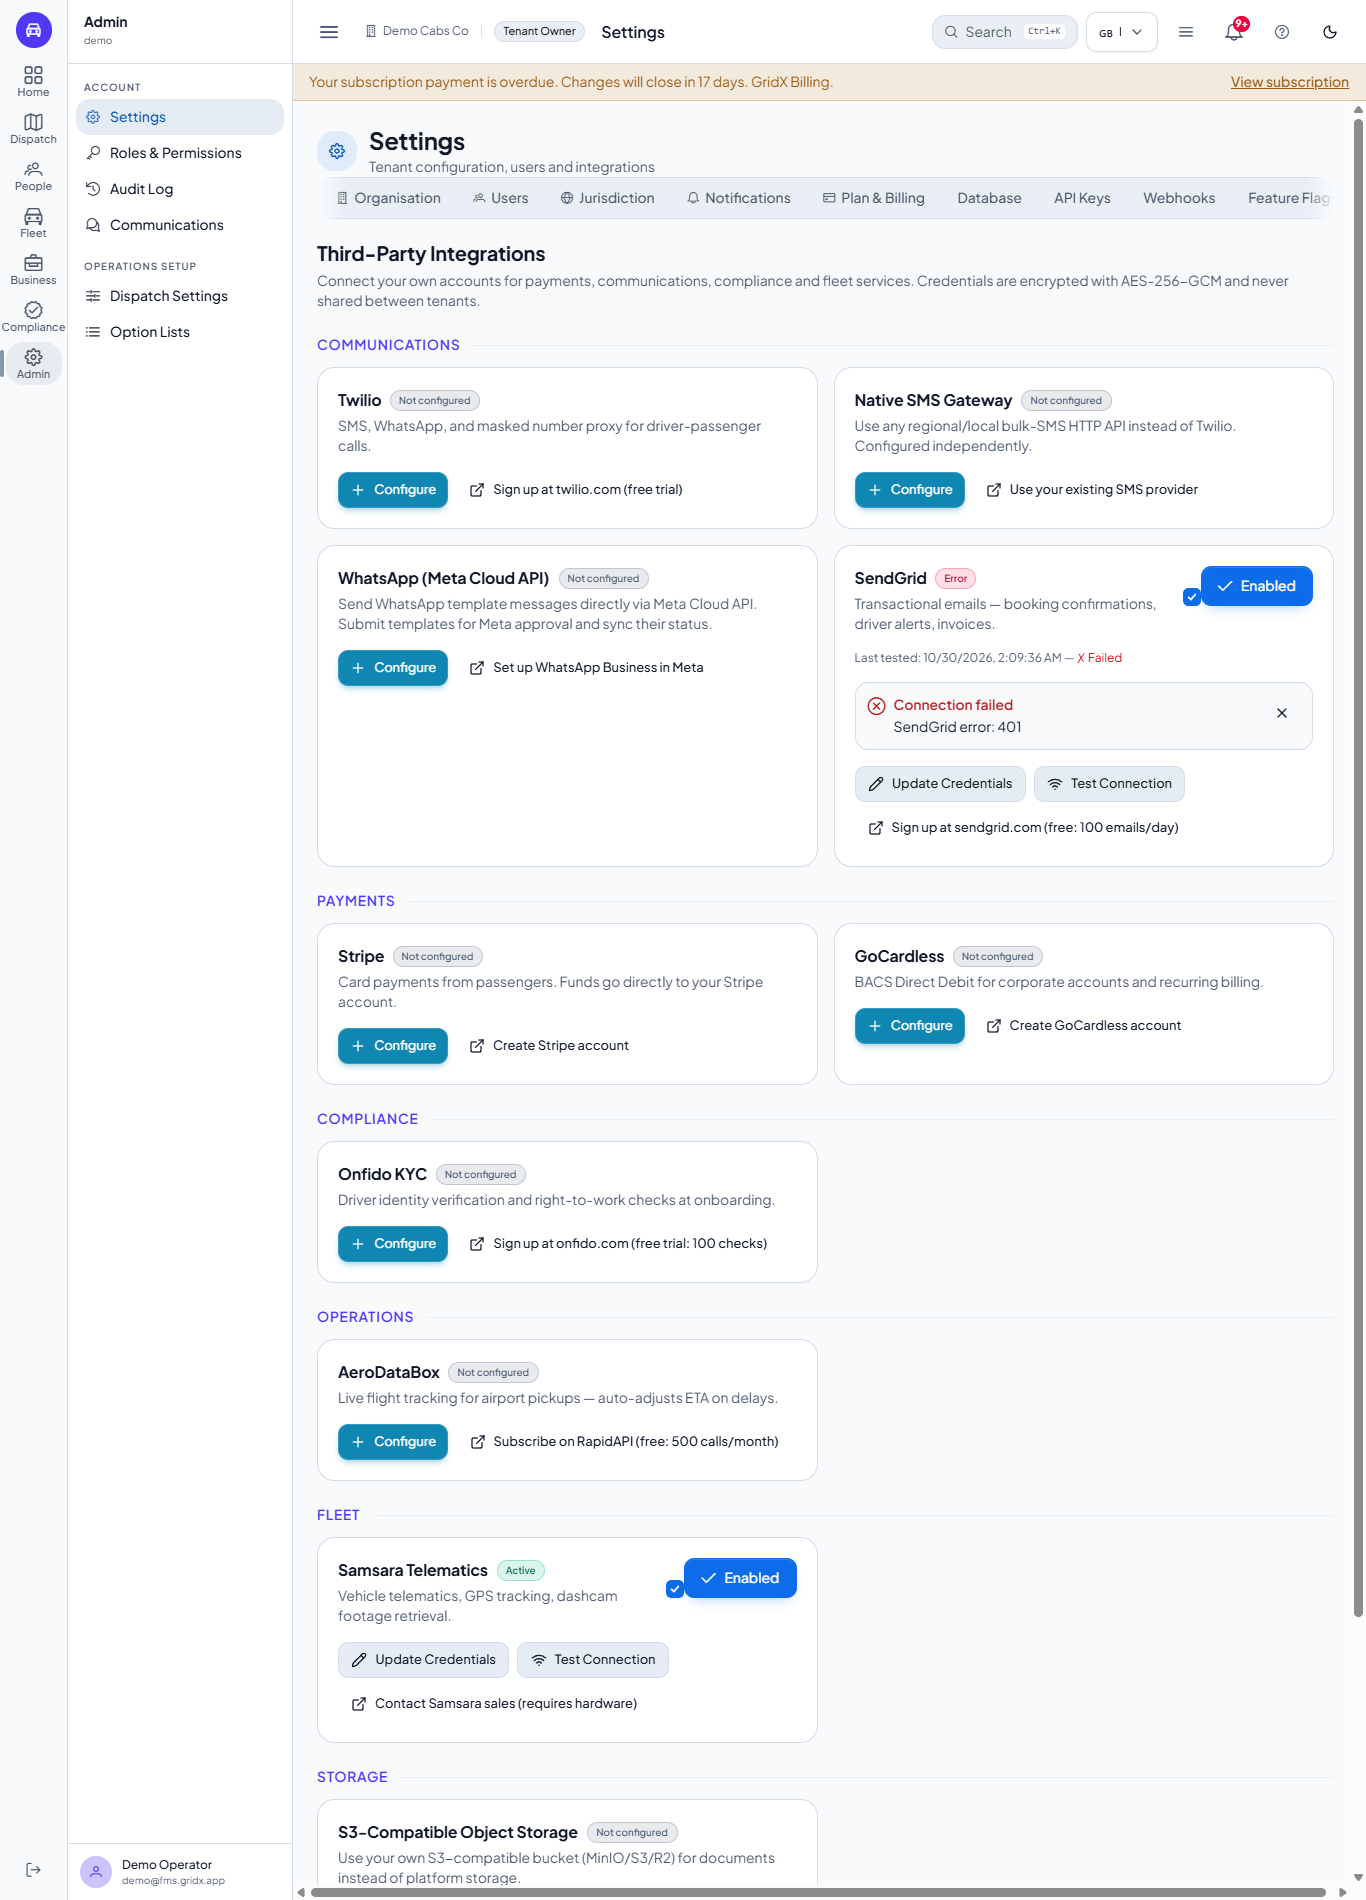
Open the Integrations tab. The cards are grouped as Communications, Payments, Compliance, Operations, Fleet, Storage and Finance. Each shows a status badge, a short description and a link to sign up with that provider. Your credentials are encrypted and kept for your tenant only.
Third-Party Integrations tab with cards for communications, payments, compliance and more
7
Connect a provider
Press Configure on a card, for example Twilio. The dialog tells you where to find the credentials and asks for the fields of that provider, such as Account SID, Auth Token and From Phone Number. Press Save Credentials. Secret fields are never shown again.
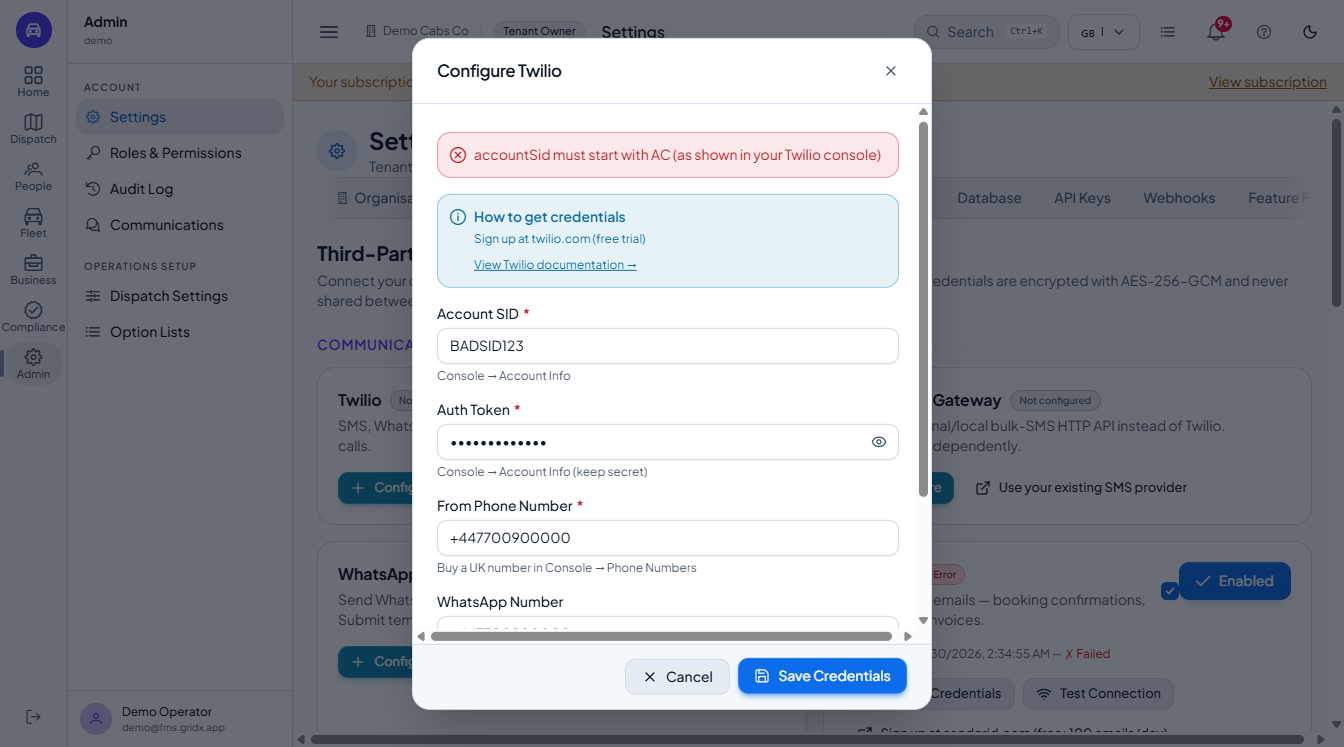
If a value has the wrong shape, for example a Twilio Account SID that does not start with AC, the dialog stays open and a red box at the top gives the reason, with the same sentence in a toast. Correct the value and press Save Credentials again; nothing is saved until the server accepts it.
Configure Twilio dialog with Account SID, Auth Token, phone numbers and Proxy Service SID
Configure Twilio dialog with a red message that the Account SID must start with AC
8
Test the connection
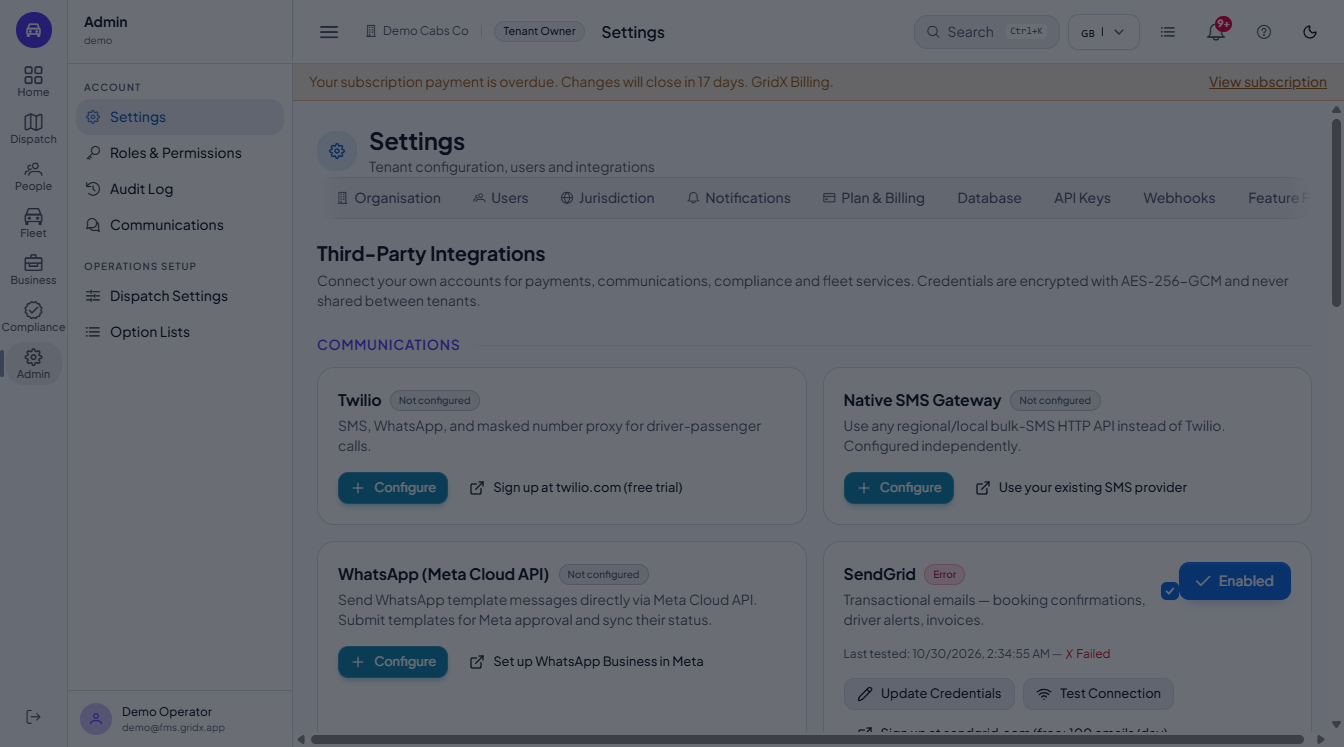
On a configured card press Test Connection. The result shows inside that card (use Dismiss result to clear it), and the card gets a Last tested line with the time and the result. A provider with no live test says it cannot be checked from here instead of pretending. Use it after every change of credentials.
Integrations tab with the result of Test Connection shown inside the SendGrid card
9
Issue an API key
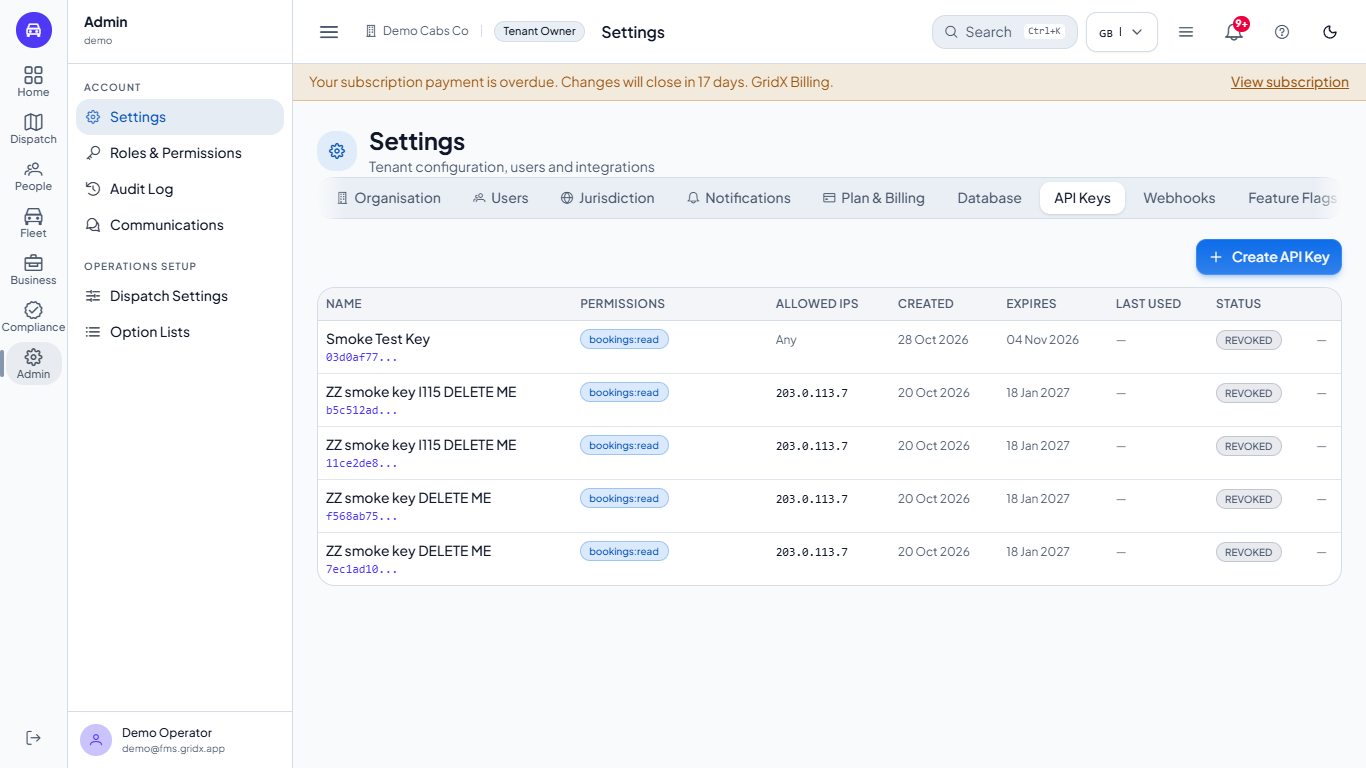
Open API Keys to issue a key for your own integrators: a name, the permissions, an expiry and an optional list of allowed addresses. The key is shown once when you create it. The full steps are in the two-factor and API keys tutorial.
API Keys tab with the key table and the Create API Key button
Check it worked
Your endpoint is in the Webhooks list with the events you chose.
The integration card shows its status and, after you press Test Connection, a Last tested time.
Common mistakes
Mistake
What you see
Fix
Using a local or private address for the endpoint
"Failed to save webhook" and a message that the address must be public
Use the public https address of your server
Saving with no event ticked
The server answers that at least one event is needed
Tick at least one event
Closing the signing secret without copying it
The secret is never shown again
Rotate the secret and copy the new one
Pressing Rotate secret before your server is ready
Deliveries fail the signature check
Update your server with the new secret straight away
Quick reference
Item
Meaning / rule
Endpoint URL
A public http or https address that receives the events
Events
Ten to choose from, from booking created to invoice generated
Signing secret
Shown once; your server uses it to verify each delivery
View deliveries
Successful, failed and last triggered
Integration card
One provider, with status, Configure and Test Connection
API key
A key for your own integrators, shown once
Frequently asked questions
Can I see each delivery one by one? Not yet: View deliveries shows only the counts and the last time the endpoint was triggered.
Where do my provider credentials go? Into the Configure dialog of the card. They are encrypted for your tenant only and secret fields are never shown again.
Do I need an integration to send email and SMS? Messages are sent through the accounts you connect; see the notification templates tutorial for the wording and the delivery log.